|
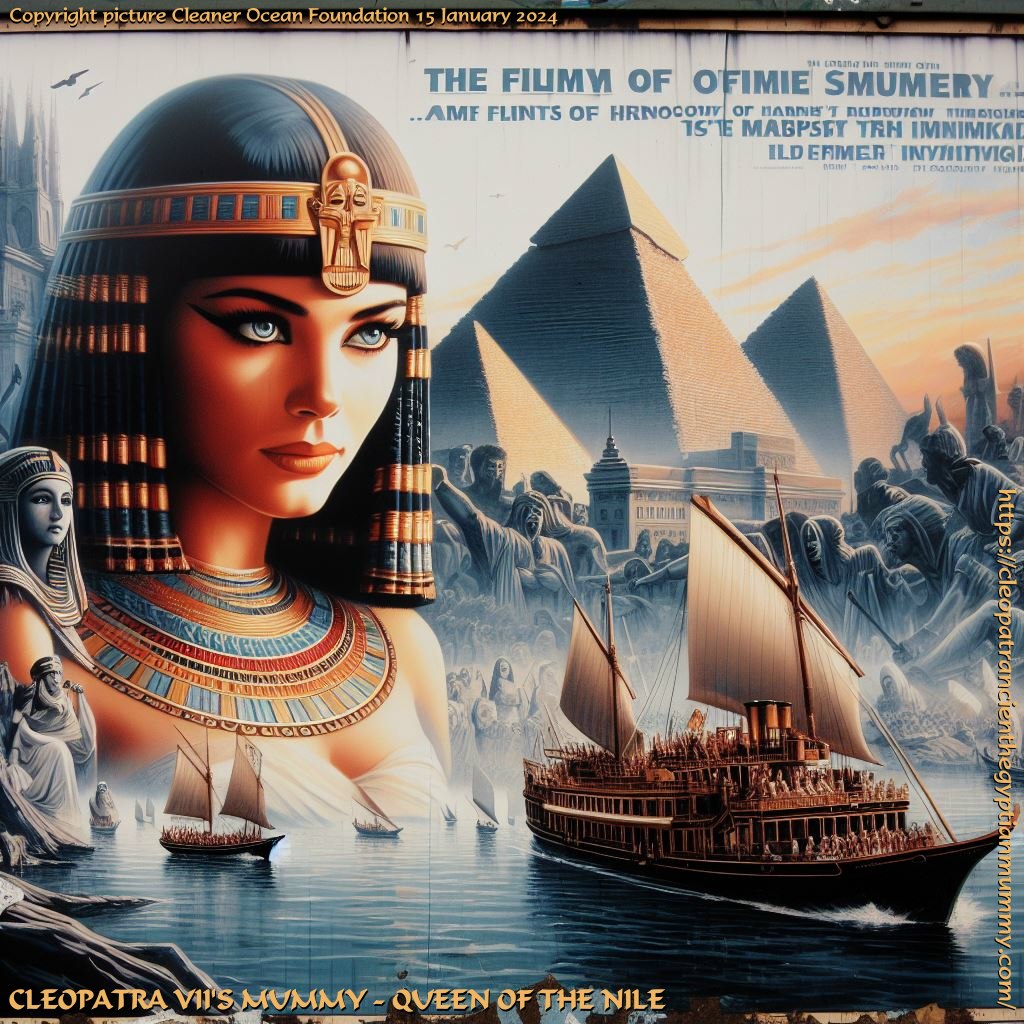
QUEEN OF THE NILE
Dig for treasure with our A - Z or set a course for HOME shipmates
The 'Queen of the Nile' is a figurehead designed to be mounted on the Elizabeth Swann, hydrogen and solar powered trimaran. This page shows the development of the mythical Queen of the Nile, from study in 1:20 scale to the full size making of the sculpture, in wood, aluminium and composites. The completed work to be adorned in 22ct gold leaf.
Typically, works of community works of art of this size are cast in bronze from a mould made from a clay master. That is all very well for fixing on a giant stone plinth. But such material would be far too heavy for the figurehead of a ship in a dynamic situation. Working in clay though, would have been a lot simpler in terms of technology - and artistic alterations would have been easier to effect changes. Then again clay has its own problems.
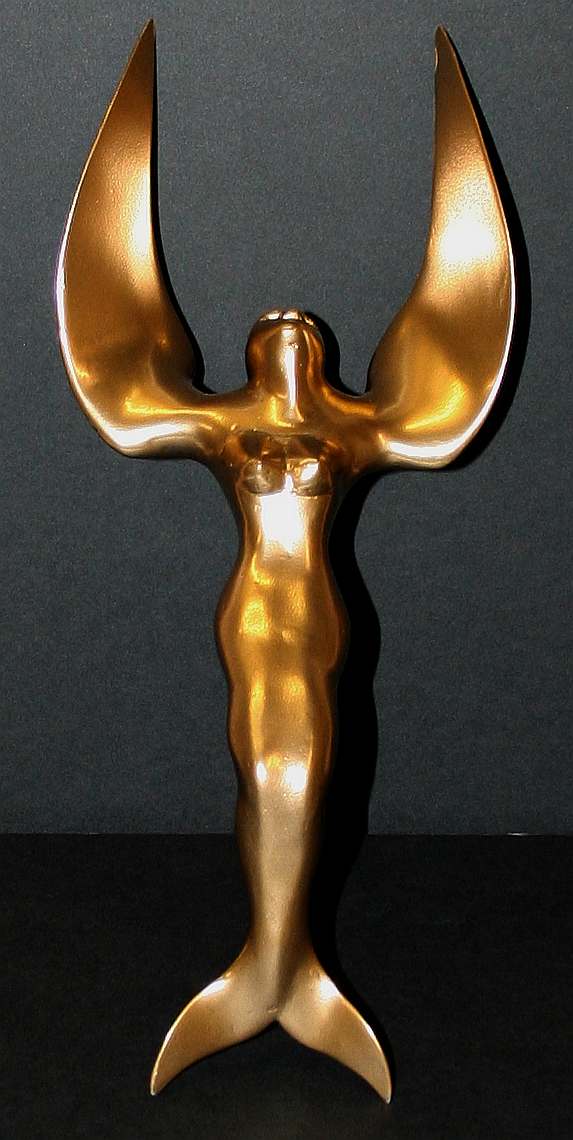
1:20 STUDY - This is the original sculpture that we are basing our Queen of the Nile concept on. The figurehead based on Cleopatra was hand carved in metal and composites, where the very first attempt was made of paper and wheat flour dough reinforced with PVA adhesive, but was all but eaten by a hungry mouse over a very cold winter period, including the acrylic paint and PVA that we would have thought indigestible. This sculpture is about 300mm high.
Please note that this design is Copyright © 2010 Bluebird Marine Systems, with all rights reserved. This art-piece may not be reproduced as a model, statue or other artwork in any scale without the prior written permission of the company. If you wish to feature the photographs for media reviews, they must be marked as Copyright, with an attribution and a link back to this page. If these requirements are not observed, the use of any of these pictures will be seen as a breach of copyright here asserted, as defined by the Copyright, Designs and Patents Act 1988. The only exception is for educational use by teachers in schools, colleges and universities, when no permission is necessary, but a link back would be appreciated.
Cleopatra as Isis reborn is symbolic of life and regeneration, the relationship between air, earth and water and the cradle of life, being an angel that nurtures our hopes for the future, giving life to our next generations and looking over us, so perpetuating the youth of the human race in a continuous cycle.
In harmony with the life force that has seen us populate our glorious Blue Planet, is the desire to maintain a balance in life that mankind is prone to disregard as we use our ingenuity to harness nature in disproportion to species distribution, that prior to the Industrial Revolution and population growth, coupled with the ease of food production and transportation that we presently enjoy, has upset yesteryear's precious equilibrium.
The Cleopatra figurehead is a fascinating piece of contemporary art that draws inspiration from multiple sources.
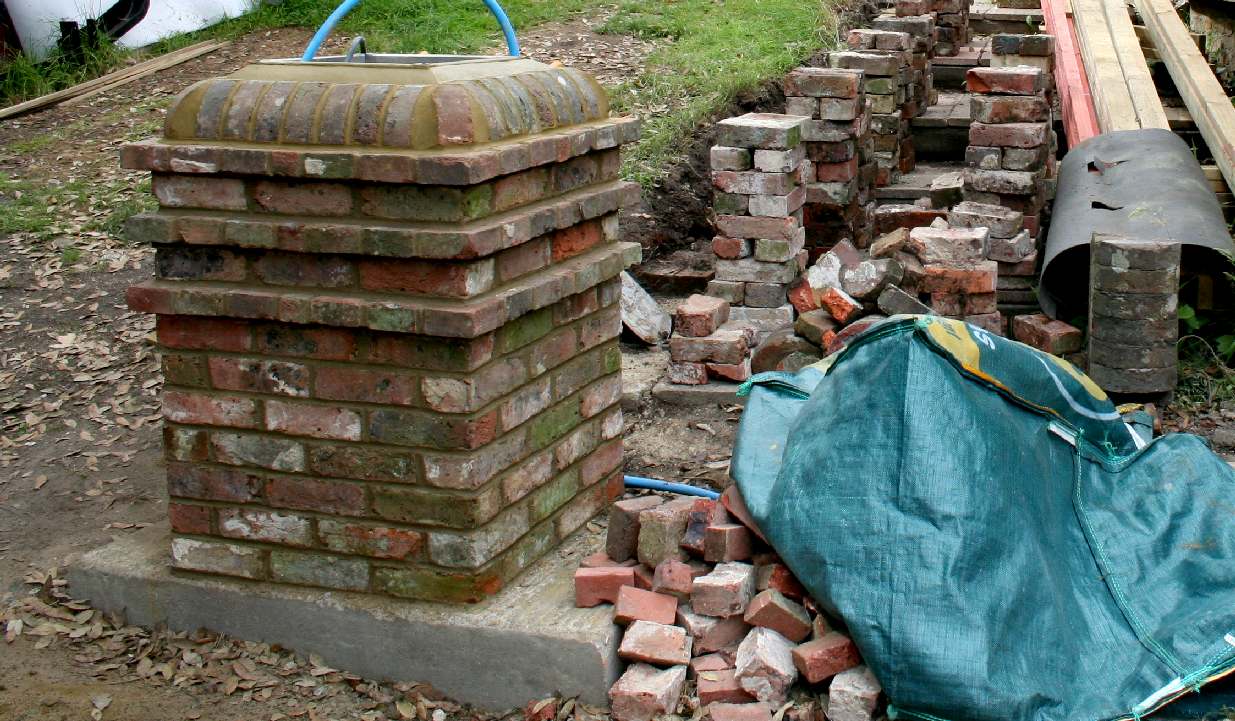
The essence of a fountain is a solid base that connects deep within mother earth, on which to mount the Queen of the Nile. Winds in this part of the world have been measured at over 60 miles per hour. With a large surface area, the wings of Isis will generate significant lateral forces. Much the same as a sail propels a sailing ship.
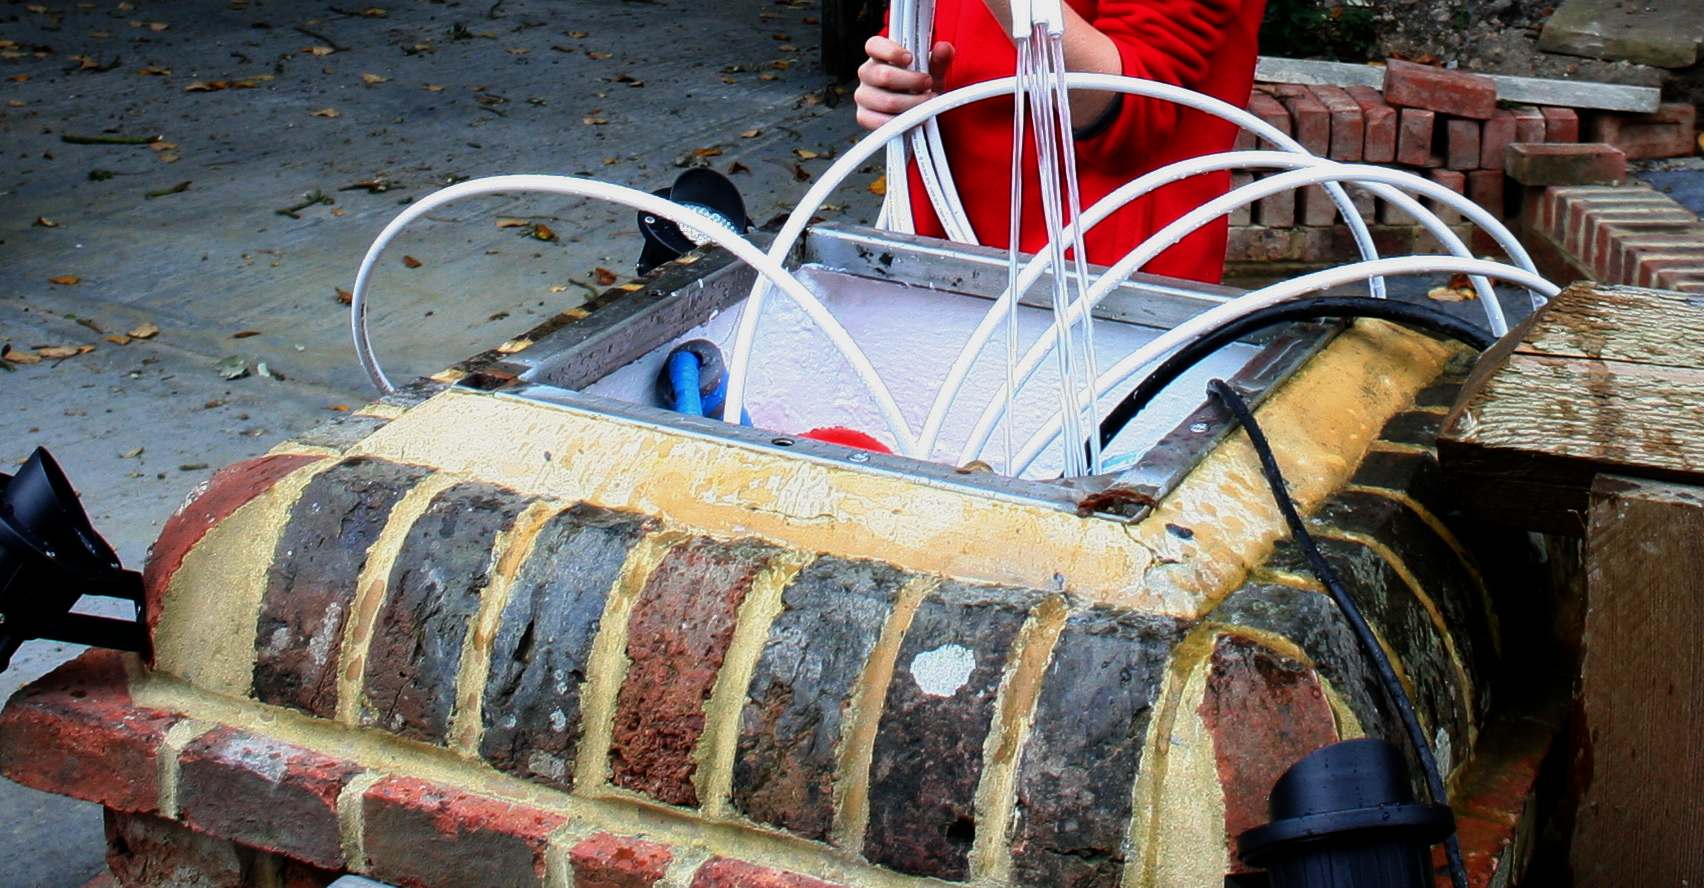
THE ALLURE OF WATER - The other main ingredient of a fountain is water. Water features rely on a good pump to provide powerful jets of water. In this case to reach a height of 3 meters, that is jetted over Cleopatra via thin pipes that run through the stainless steel tubes that support the oyster shaped bowl. So, completing the return of water that has passed over the statue, to the water tank below.
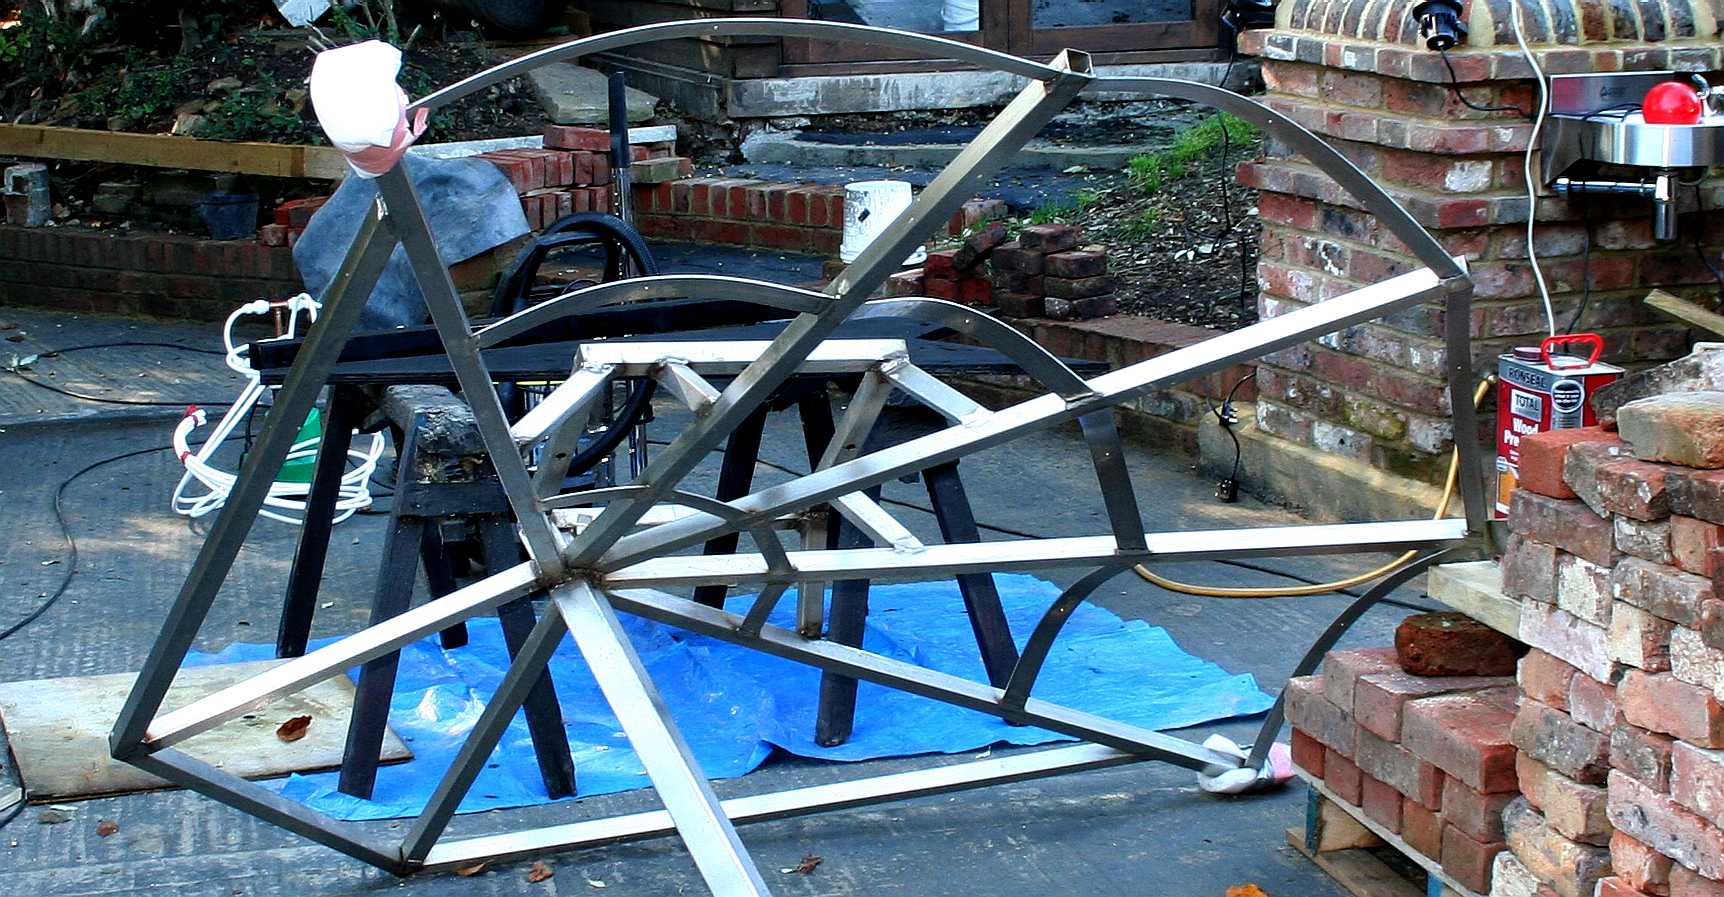
The stainless steel frame forms an Oyster shell in transparent architectural polycarbonate. Such that the return of crystal clear spring water in a continuous cycle may be both observed and enjoyed.
Water, in its liquid form, has captivated human imagination for millennia. Its fluidity, its capacity to transform, and its essential role in life have made it a potent symbol across cultures and time. The marriage of water with the human form, as exemplified by fountains and sculptures, represents a particularly intriguing intersection of art, engineering, and human psychology.
In many cultures, water nymphs, mermaids, and other water deities are depicted as beautiful human-like figures. These representations reinforce the connection between water and the human form, carrying mythological and religious significance.
The
human form in a fountain can symbolize the cycle of life, with water representing birth, renewal, and purification.
The contrast between the smooth curves of the human body and the fluid nature of
water creates a visually striking
composition that is aesthetically appealing.
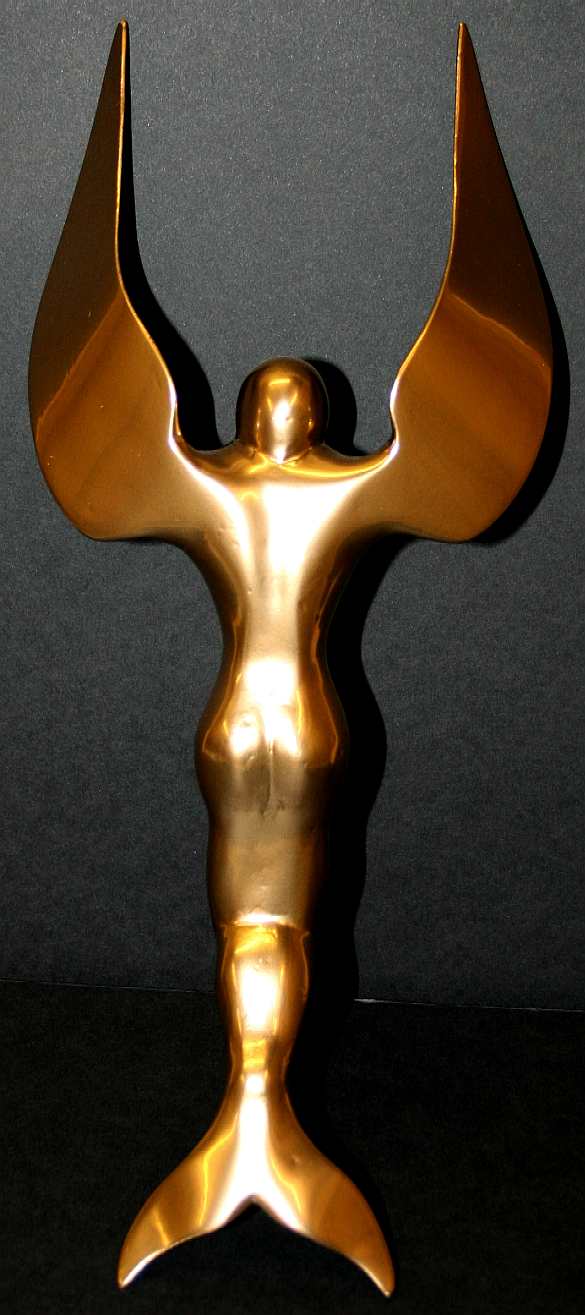
DURABLE - Learning from that mistake, the artist created a second carving working from the same drawings as before, but using aluminium as the former and composites that no animal would find tasty enough to want to eat. Copyright photographs © June 2013 Ltd., all rights reserved. You will need the permission of Cleaner Ocean Foundation to reproduce these pictures except for educational use or media review when the appropriate credits and back links should be applied.
The figurehead study began life in 1/10th scale (one tenth of the actual figurehead or 288 millimeters, against 2.8 meters) from sketches of birds and marine animals that were amalgamated with the human form. You can see how the concept progressed by comparing the aluminium frame above to the finished one tenth scale artwork that established copyright protection for the artist. This copyright has been donated to us for use on the Elizabeth Swann project.
Converting the beautiful lines of the original sculpture study, that was hand carved from composites using knives and chisels, must incorporate load bearing mountings that were not necessary for the original art that weighed less than a kilogram. In full size the sculpture will weight quite a bit more, more like 60 kilograms, and the wing surfaces will generate significant forces in high winds, that the structure will transfer to the ship mounting points when she is at sea. This is possibly one reason why most figureheads do not have wings.
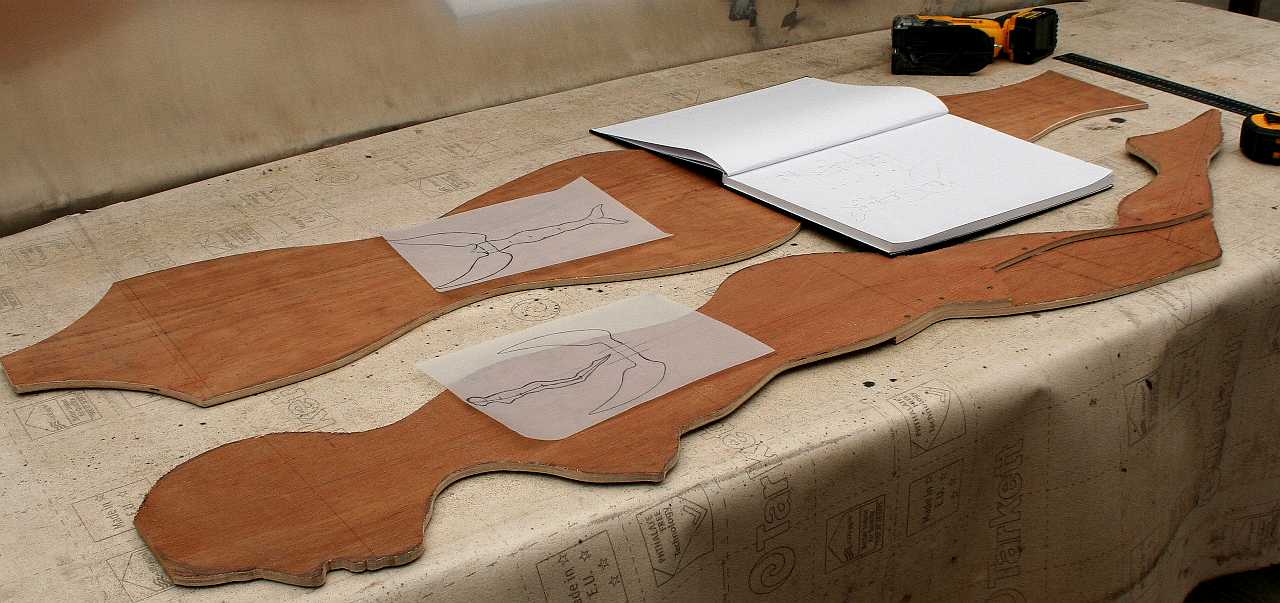
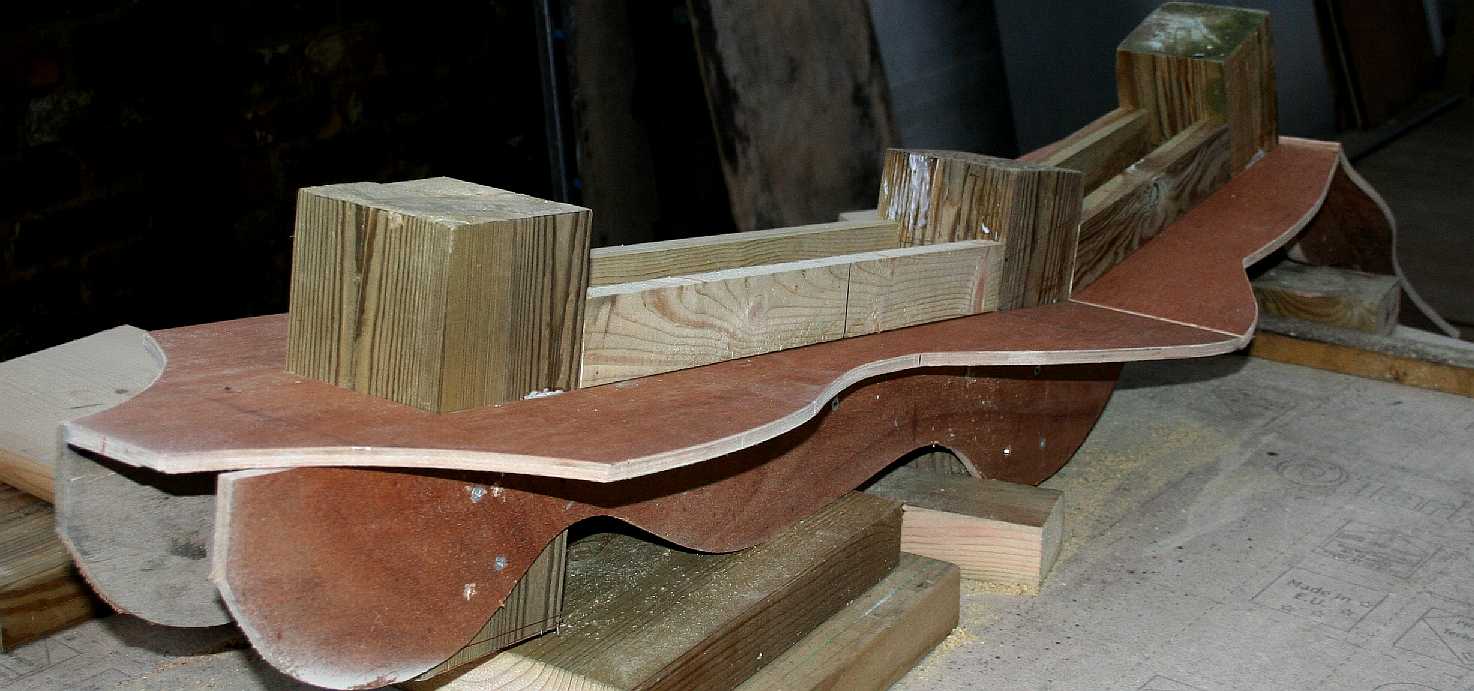
FORMERS - To make a 3D sculpture you can begin with a solid block of wood or stone and carve your way to happiness, or you can make a buck from plan and side views of your sketches. This is the quickest way and more importantly; the lightest method. You will still have to sculpt the artwork from wood or whatever medium you prefer working in. We'll be using wood and polyurethane foam to get the job done in less time (hopefully). You can see one of the sketch books with the original drawings in it. This is traced to copy to another drawing that will be carefully dimensioned to loft on plywood and aluminium sheets. Copyright © photograph. All rights reserved.
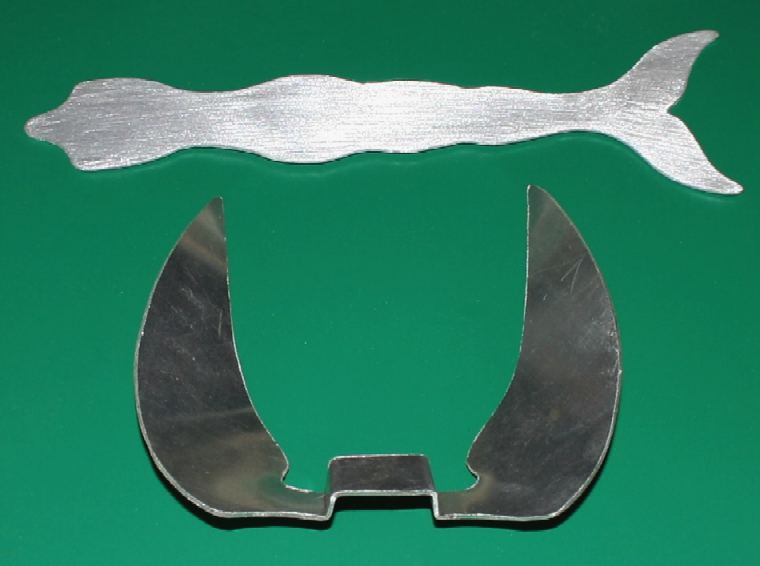
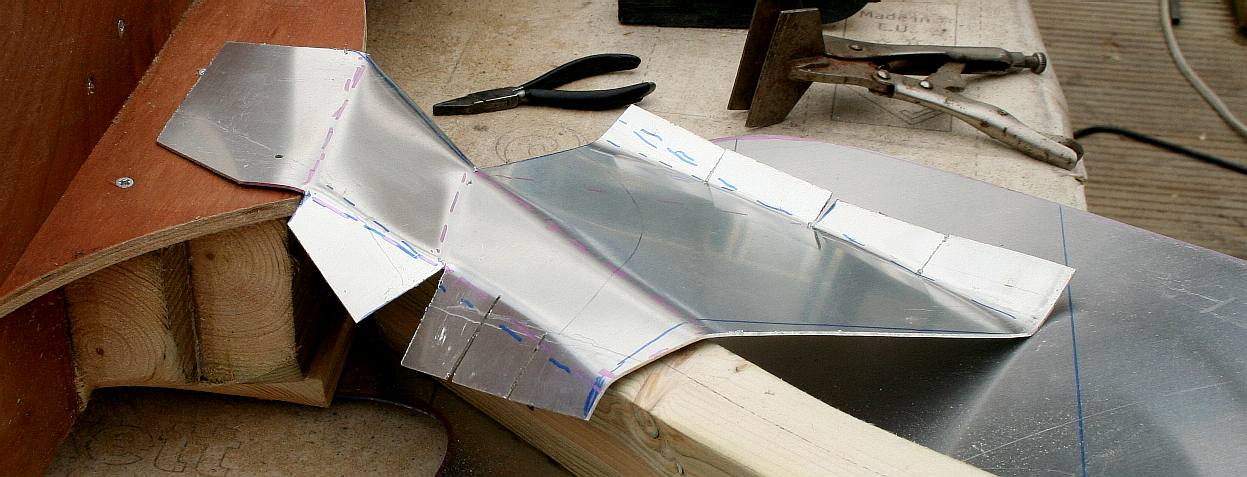
FORMERS - The aluminium wings and tail are cut from sheet metal to complete the set. Now begins the job of joining them all together. Plywood is made by bonding thin layers of wood together with the grain alternating in direction with each layer. By this means a flat board can be made that is very strong. Copyright © photograph.
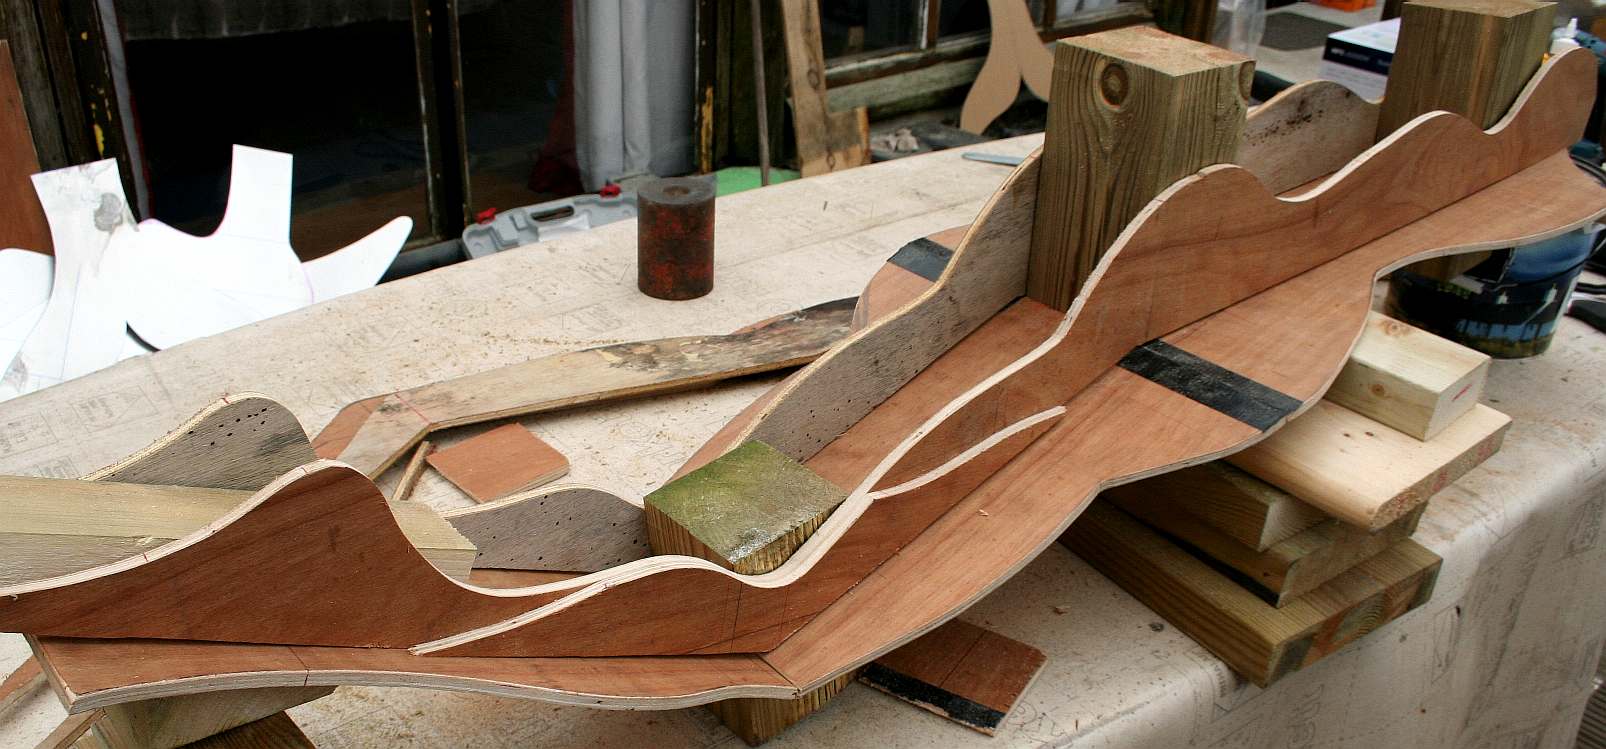
DETAIL CUTS - The side elevation slots onto the body plan with changes of angle that means cutting the plywood in half, being careful to mark where the structural mounting points are to be fitted.
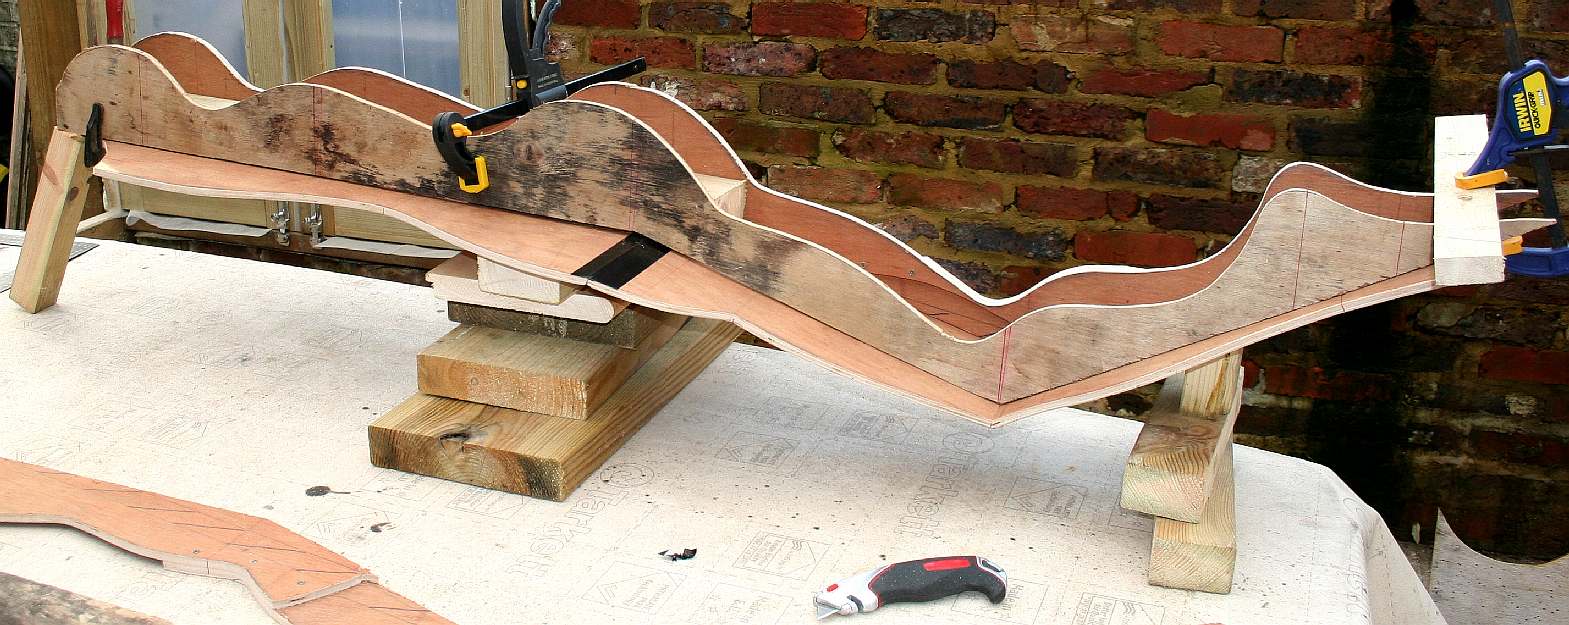
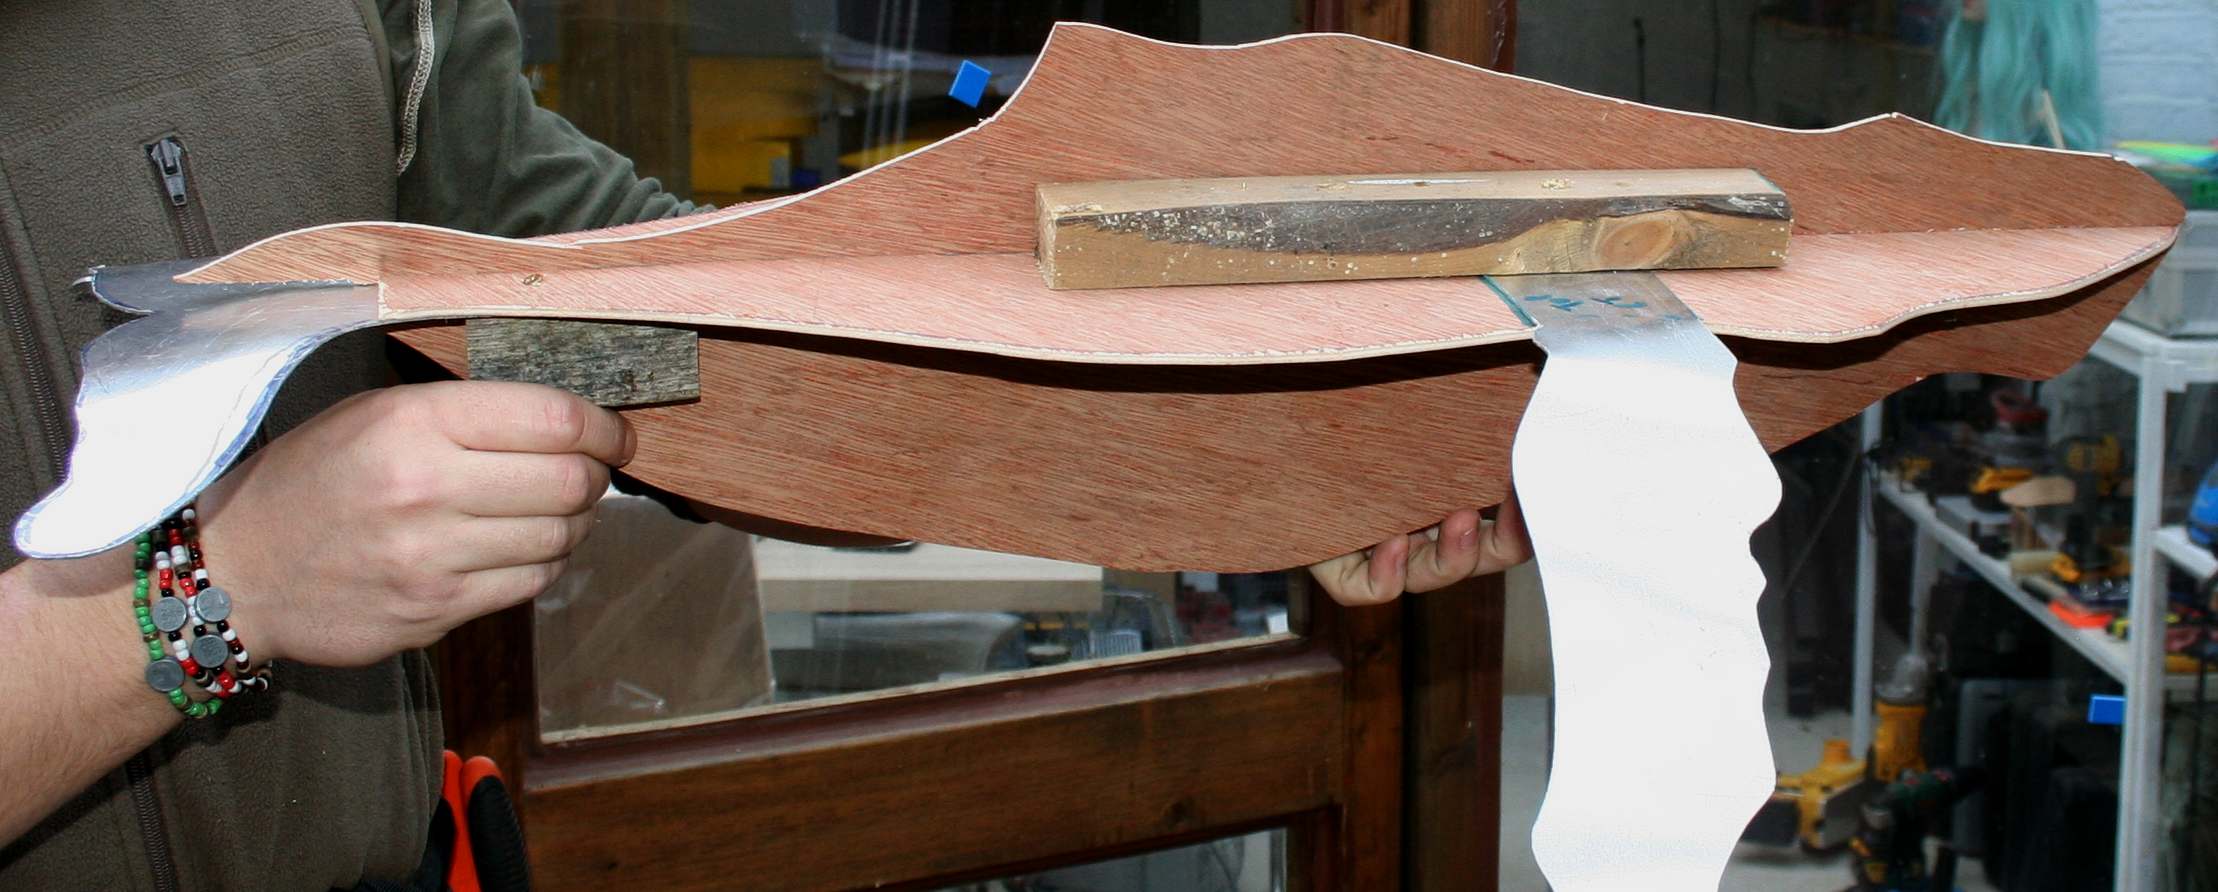
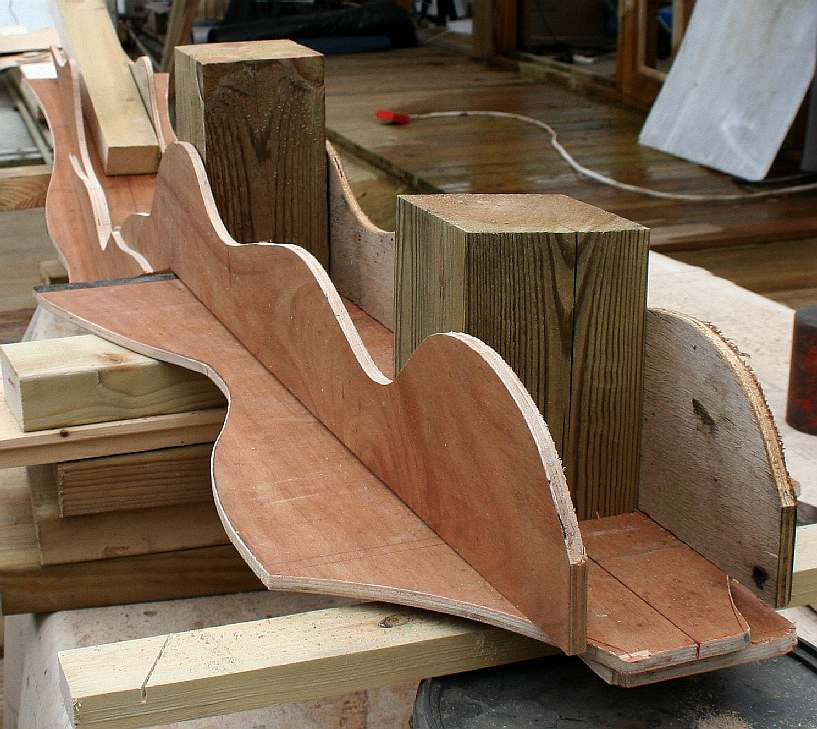
TEST FIT - Here you see a jig test-fit dry run before some minor adjustments are made ready for bonding. But, before that we need to insert some hefty wooden blocks as the mountings to carry the weight of the finished art.
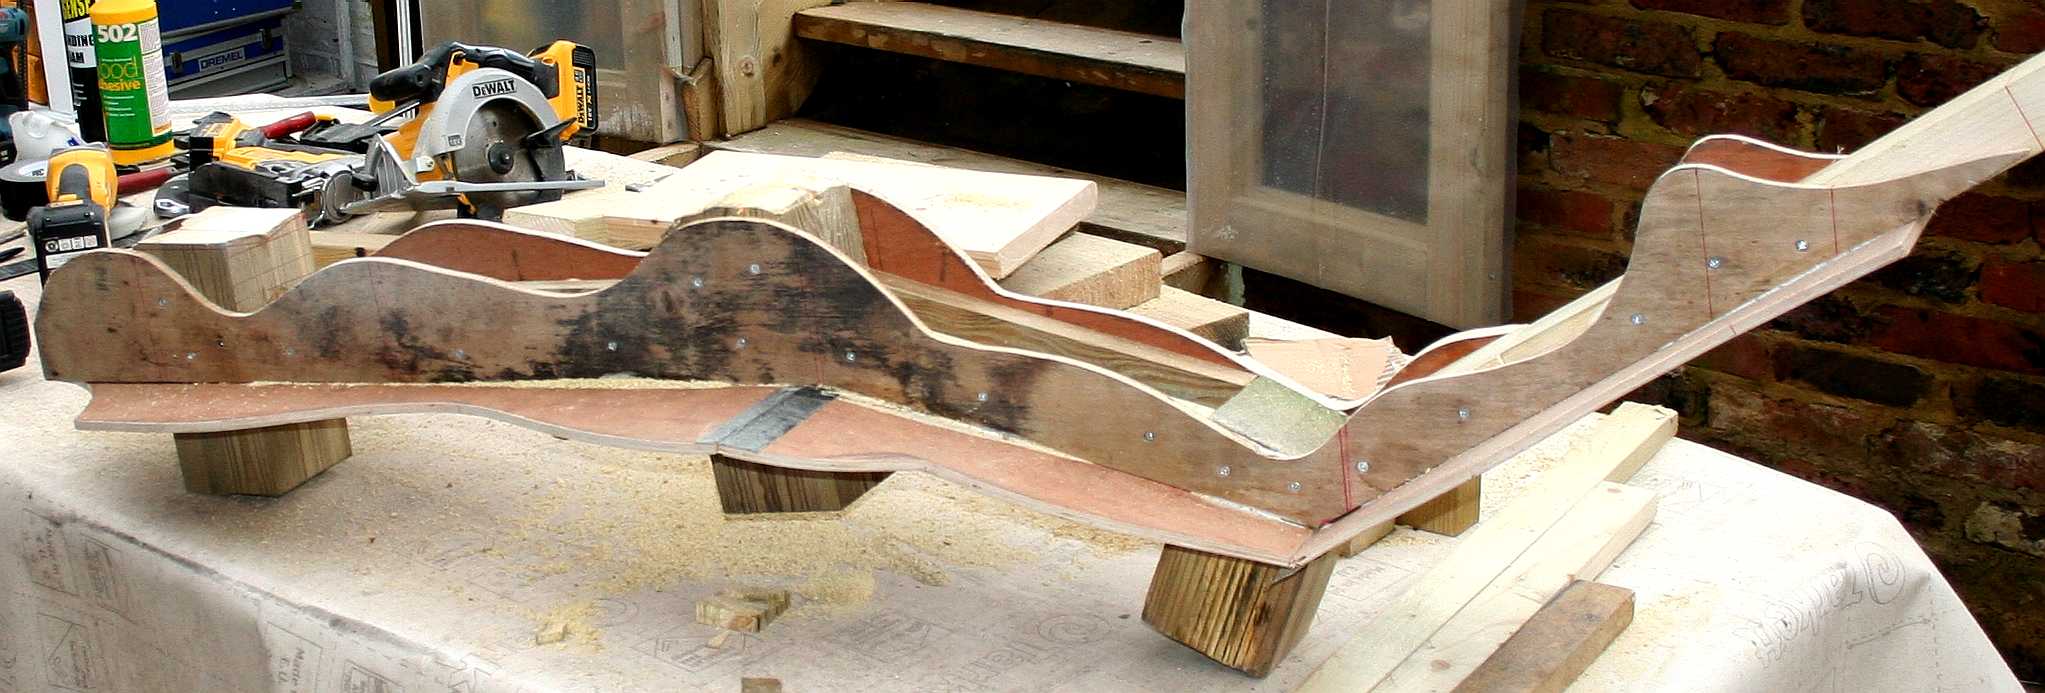
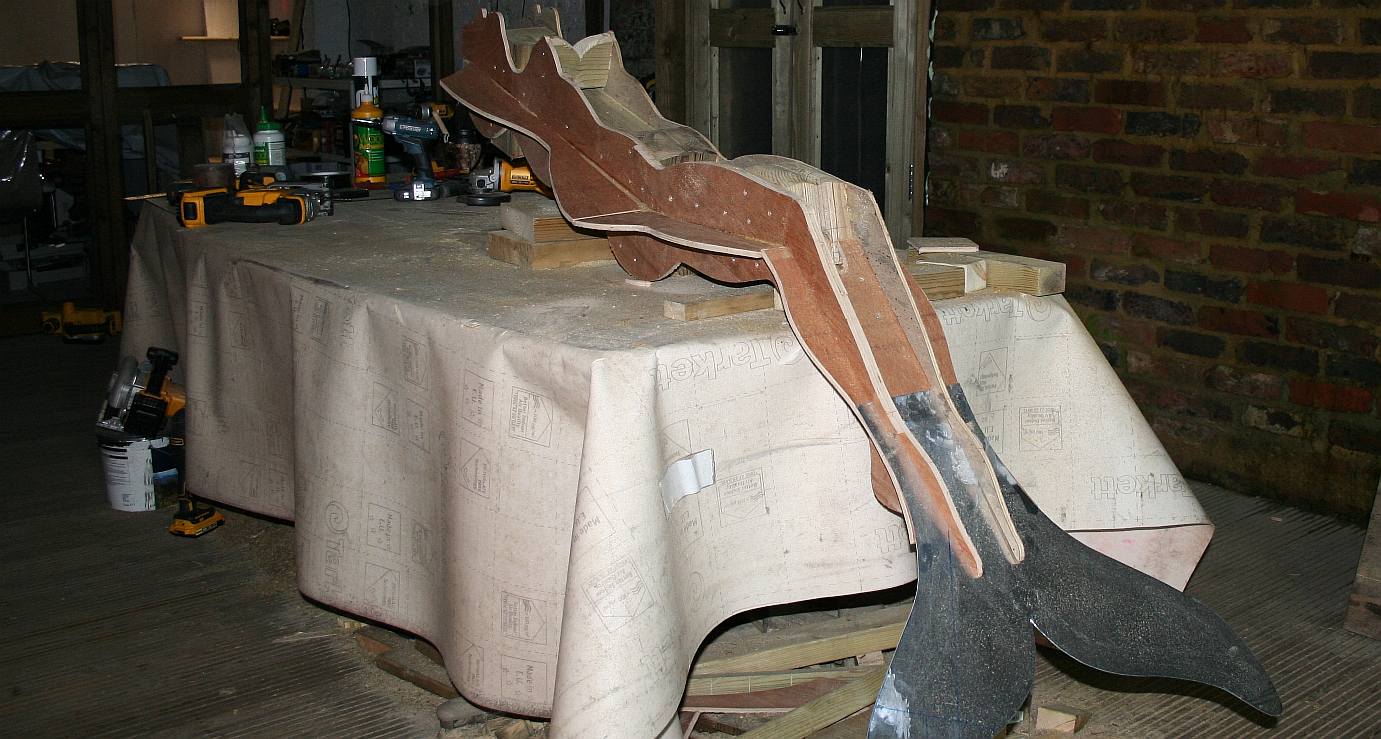
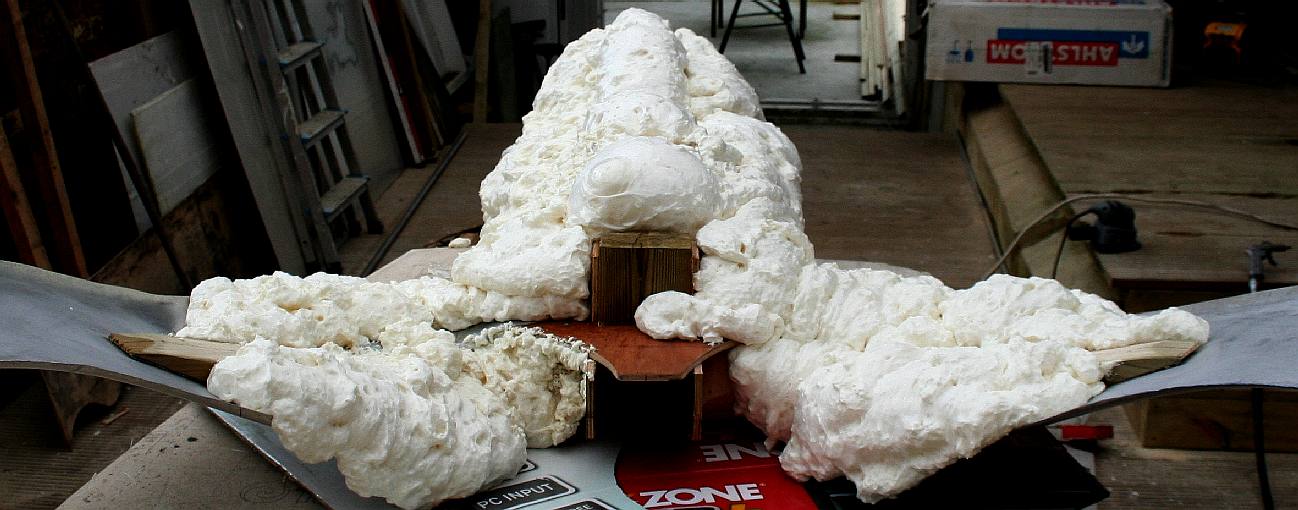
A HUMPBACK WHALE 1:20 SCALE - The assembly is screwed together with timber to lock the templates at ninety degrees to one another . It would be a simple matter to motorize and radio control this static model. We won't have the time for that. Copyright photograph © Jameson Hunter November 30 2018.
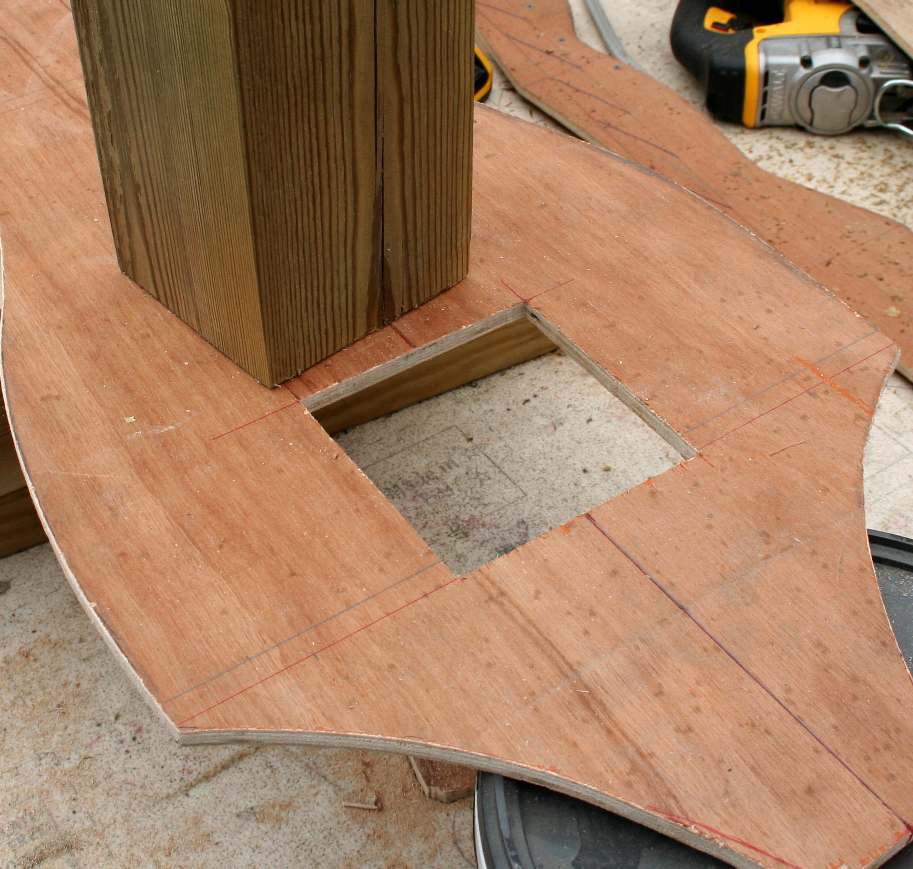
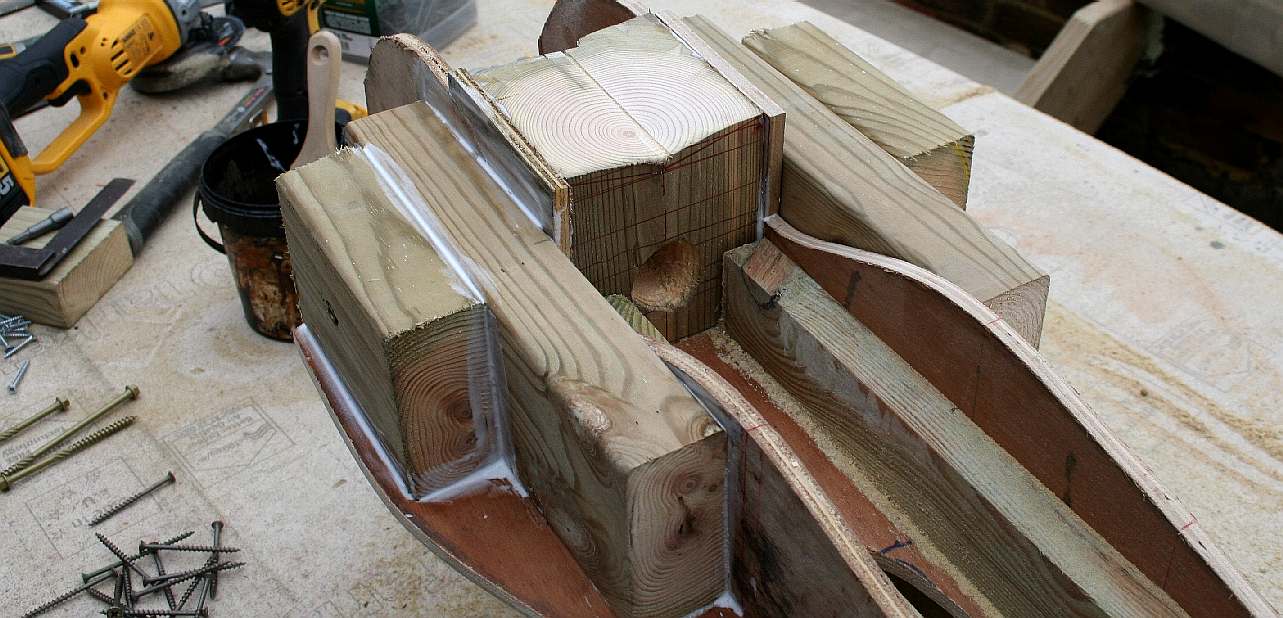
BLOCKS - We need to insert some timbers that are man enough to support the completed work of art. Wooden posts were planed to size before marking and cutting out the slots with a jigsaw. We liked the DeWalt lithium battery unit for ease of swapping blades.
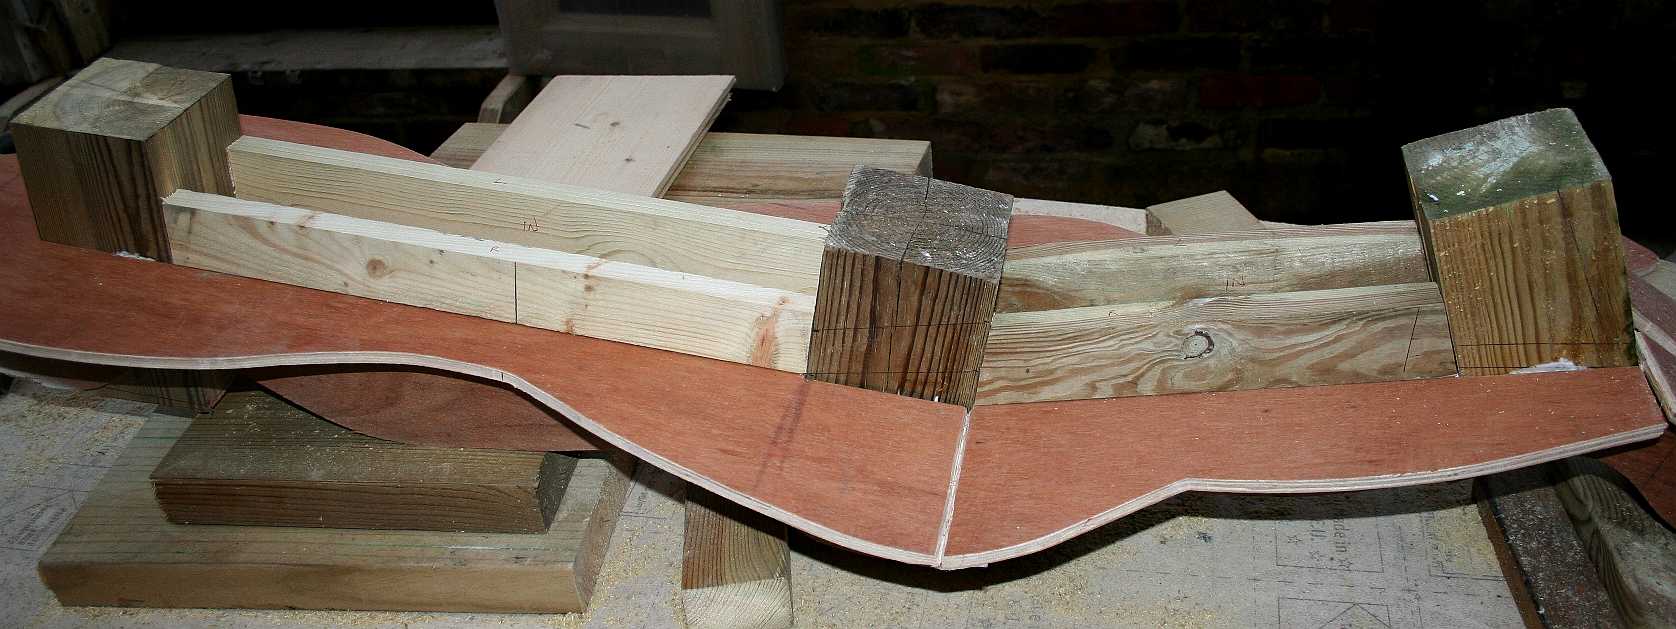
ALIGNMENT - It's worth spending a few minutes slotting the component parts together before getting out the screws and resin. Nails would also work, but screws give you more control, especially today with battery drivers.
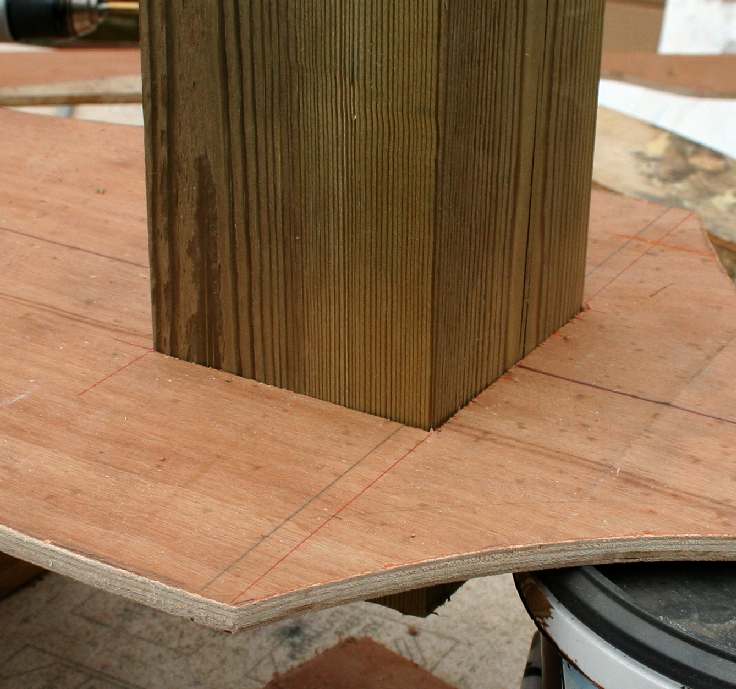
IT FITS - Once you are sure it all slots together as planned, mark the positions as a guide so that when bonding you don't have to line it all up again with sticky fingers.
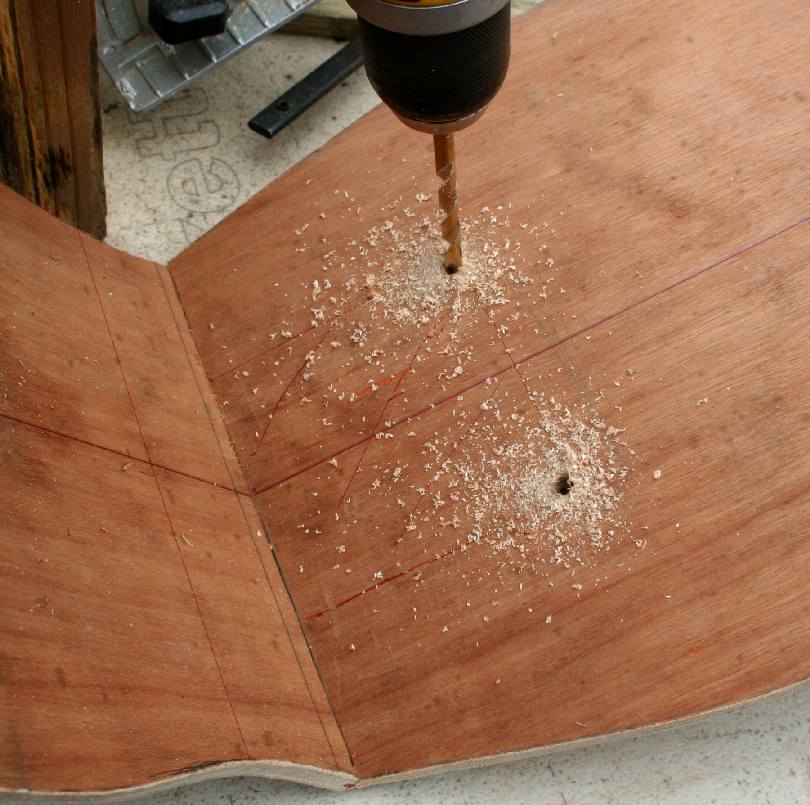
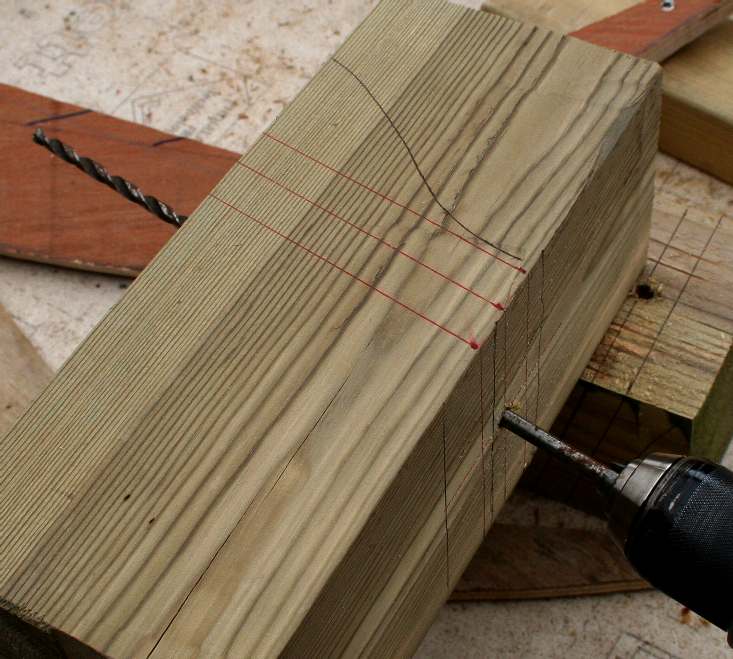
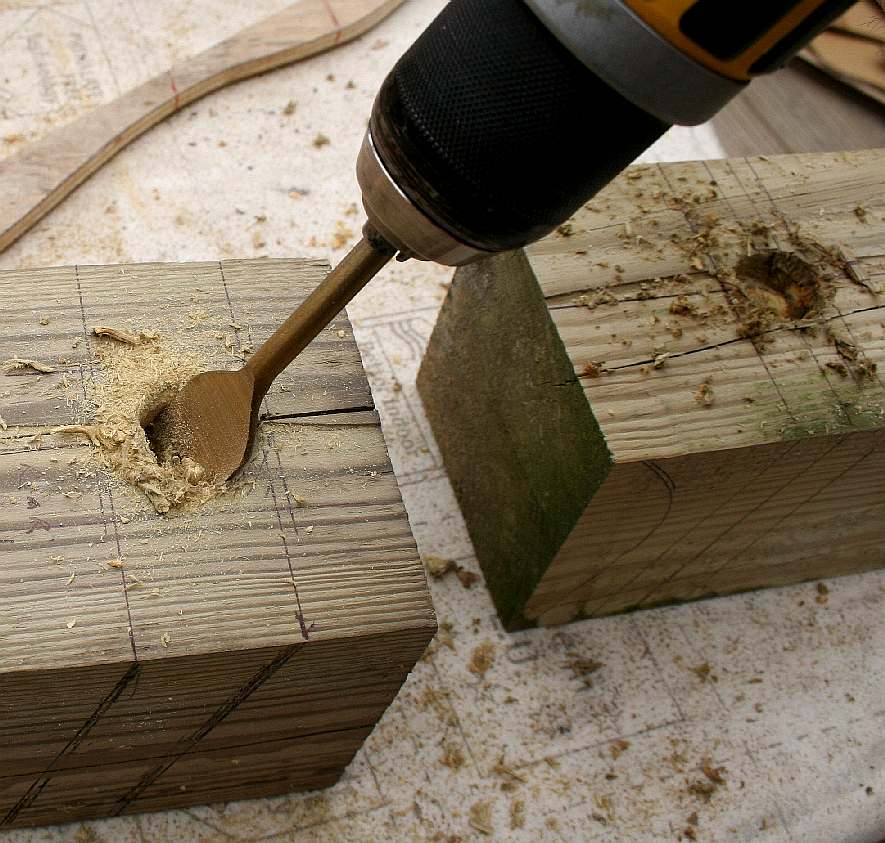
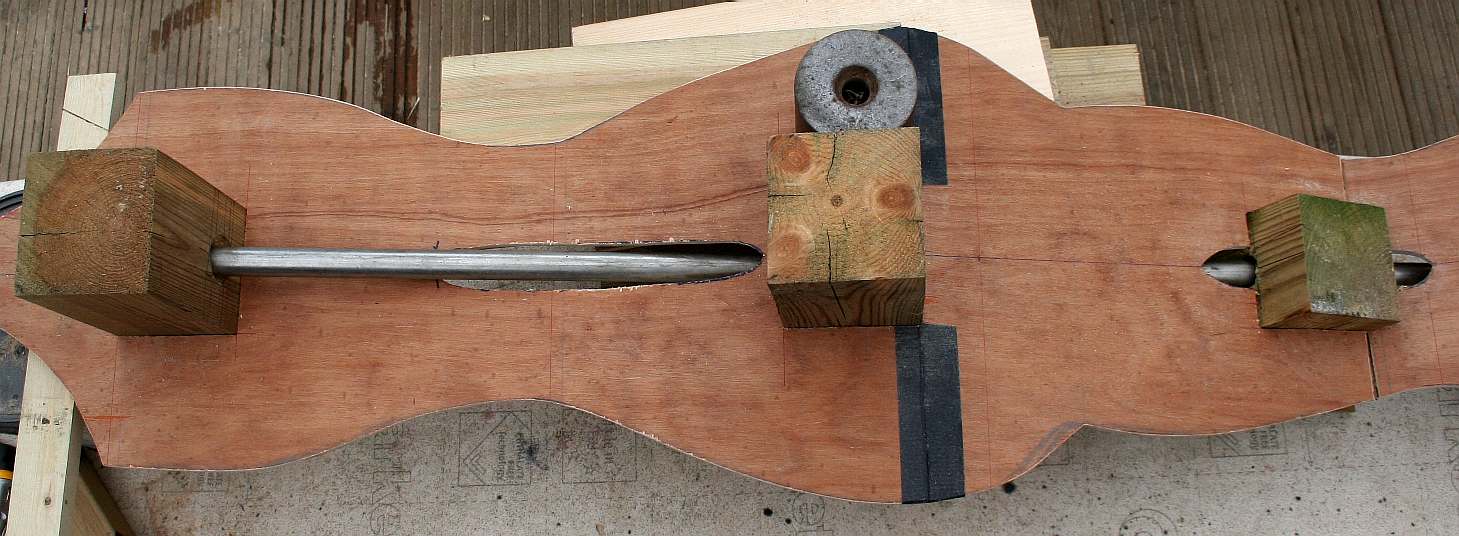
BORING - Having marked the blocks as accurately as you can by eye, use a pilot drill to give you the angle to follow with spade cutters. The sculptor used 22mm and 32mm cutters, coming from each side and meeting in the middle.
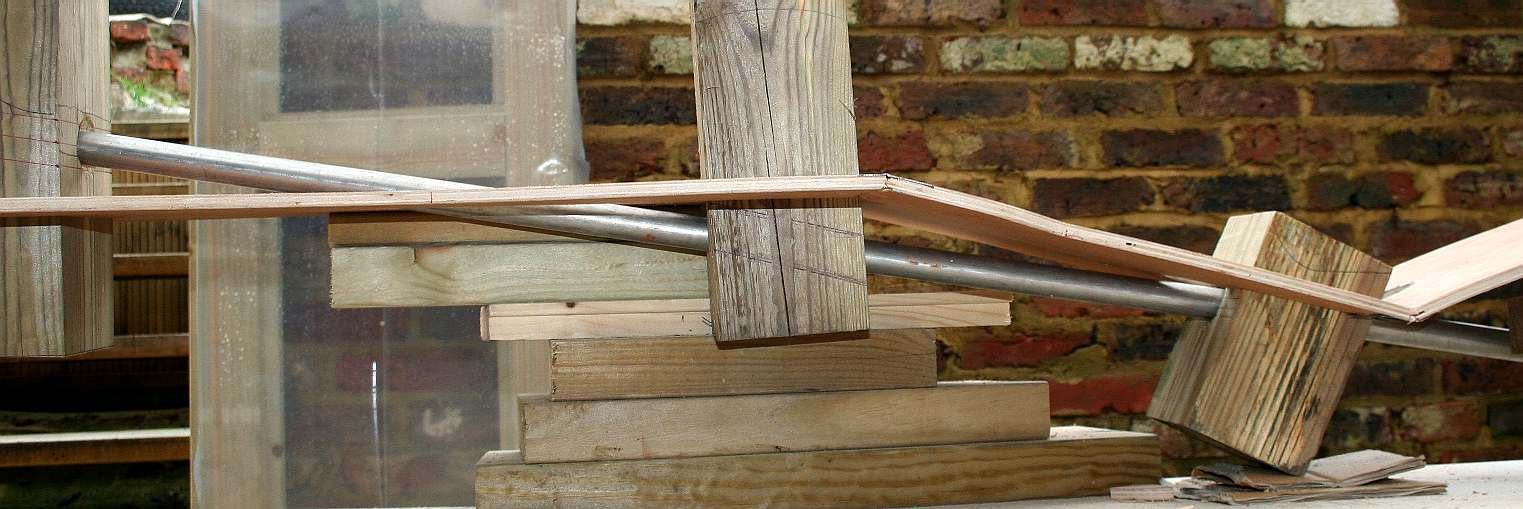
ROD - If you've got it right, you can insert a mounting pole through all three blocks, in this case a stainless steel rod. As you can see, other slots in the plywood former needed to be cut to allow the steel rod to pass from one block to another.
ANGLES - The body attitude of the Cleopatra sculpture meant that the wooden mounting blocks would be at different angles to each other. A little fettling may be need to get a really nice fit.
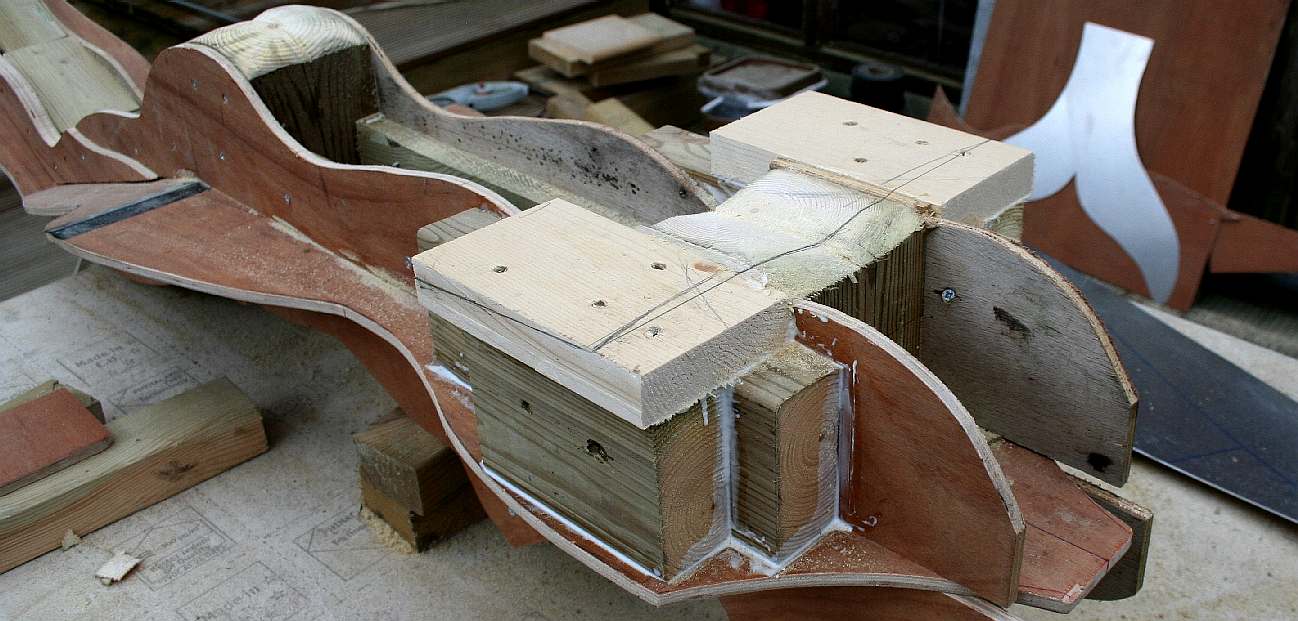
BONDING - Once the angles are marked and the artist was happy with the fit, he bonded the side formers for the back, buttocks and calves - to the blocks with a waterproof resin that is stronger than the wood. Screws are used to hold the wooden parts together while the adhesive dries. Timbers are inserted on the inside of the plywood and bonded in place to increase the strength of the frame.
REPEAT - The whole procedure is repeated for the front, chest, abdomen and knees body former. First though, timbers are cut and inserted to reinforce the plywood, again bonded to the wooden panels to increase the strength. The alternative to this method is to bond a series of solid wooden blocks together and carve the figure with sharp chisels. As this is a scale up of an existing artwork, the former method more accurately reproduces the outline. The artist still has to carve the finished piece by eye, but has datum points as a reliable reference.
FRAME - Another view of the timber frame. It is important to cut inserts accurately to make a wooden beam from one mounting point to another.
TAIL - The Mermaid tail is slotted into place for a dry test fit. The wings are much larger. They will need reinforcing with timber and steel because they are thinner. Once the body is carved, the whole assembly will be sheathed in carbon fibre before being final shaping. After that gold leaf will be applied.
CHEST - Wooden blocks are cut and fitted to strengthen where the wings of this southern angel will be attached.
SHOULDER PADS - Pads are bonded in place to mount Cleopatra's wings These pads have to be curved to match the profile of the wings as they arch into the spine to create a distinctive back.
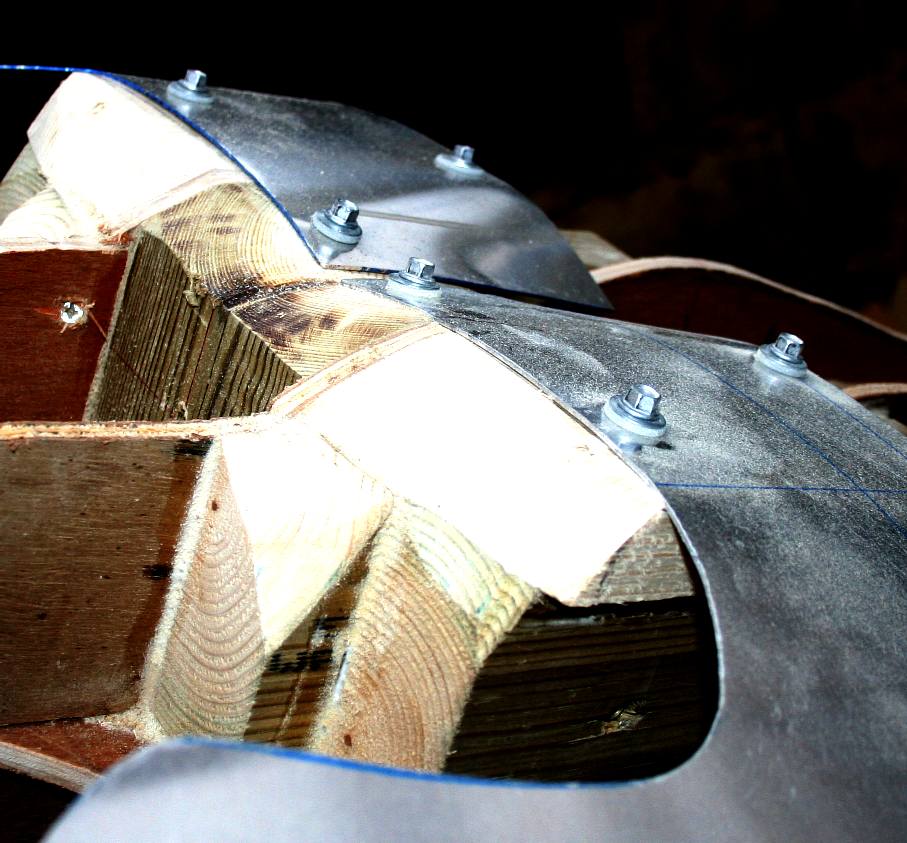
BOLTS - The wings are bolted in place temporarily so that shaping of the shoulders and neck can begin. These bolts will be removed and replaced with countersunk screws once the wing panels are more securely attached. We've had a lot of experience with wood, including building the bodywork of a full size car.
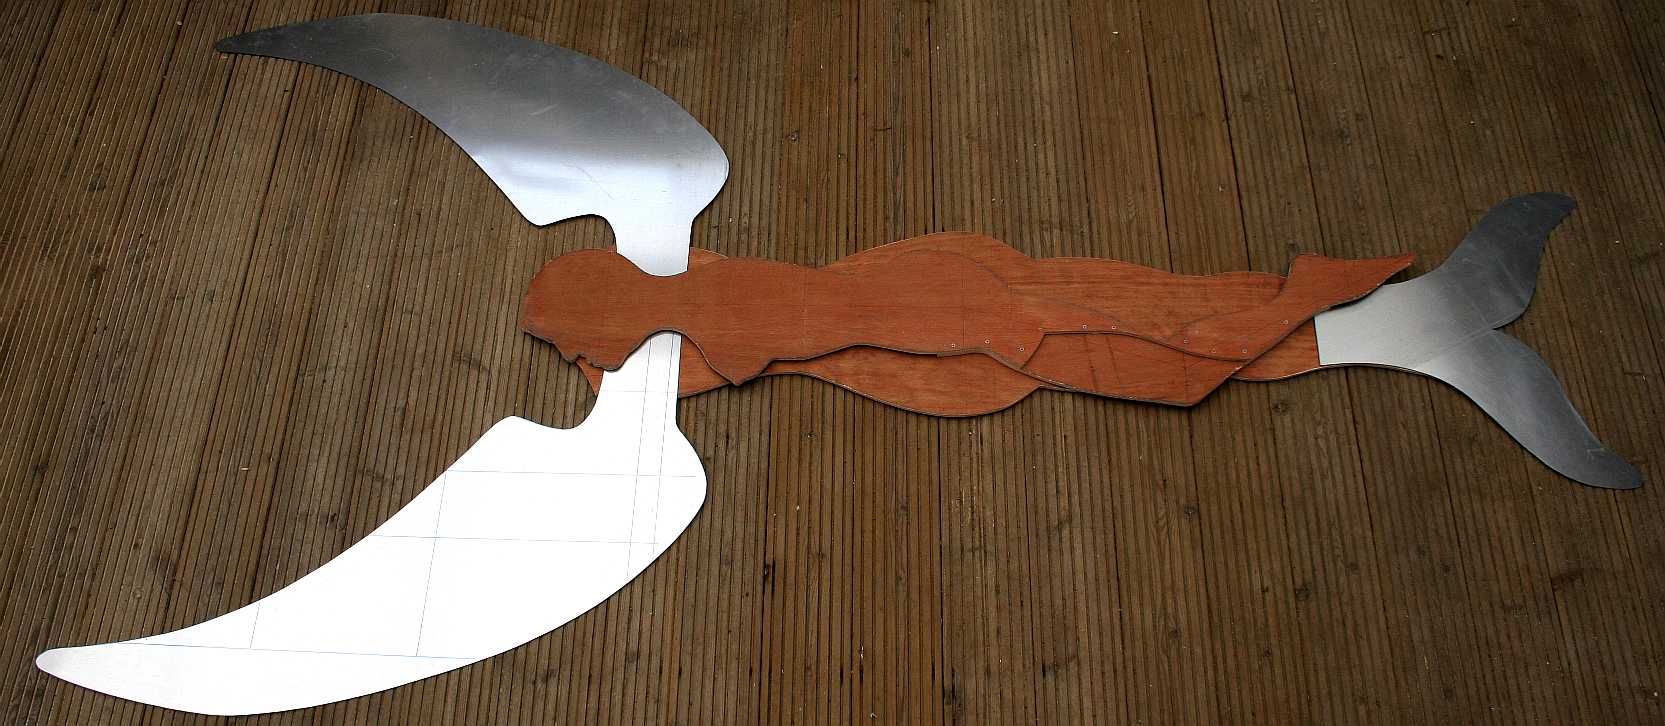
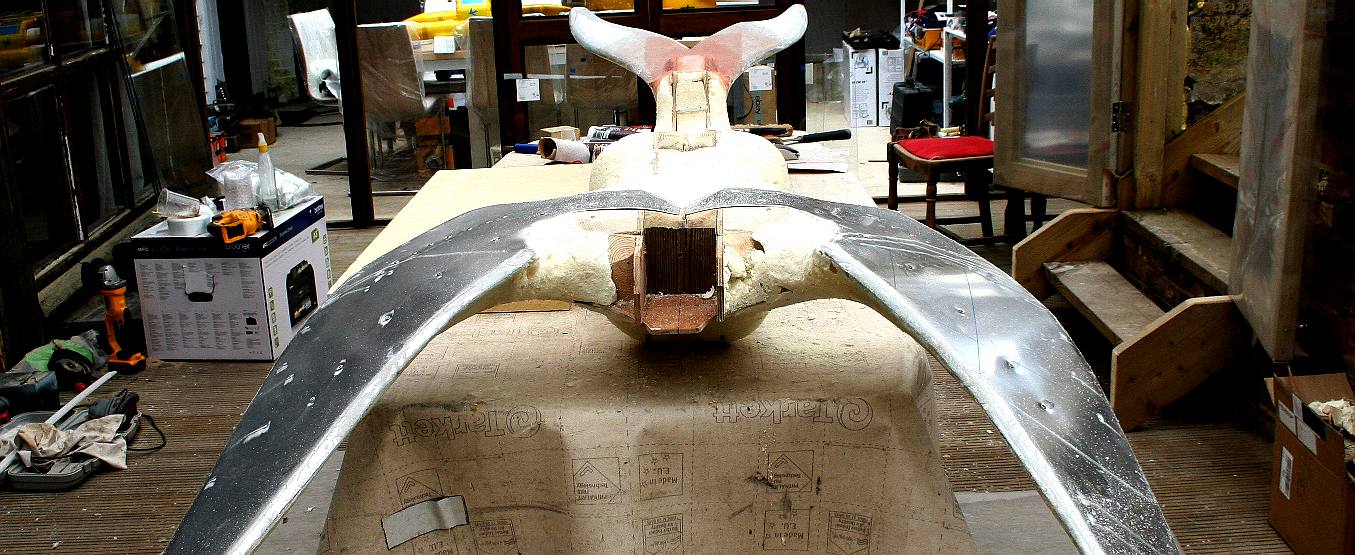
LITTLE & LARGE - The original art piece is compared to the statue during the making. The large aluminium wings will need reinforcing with shaped timbers and then a second skin on the inside of the curve, where the wing will attach to the underside of the shoulder blade.
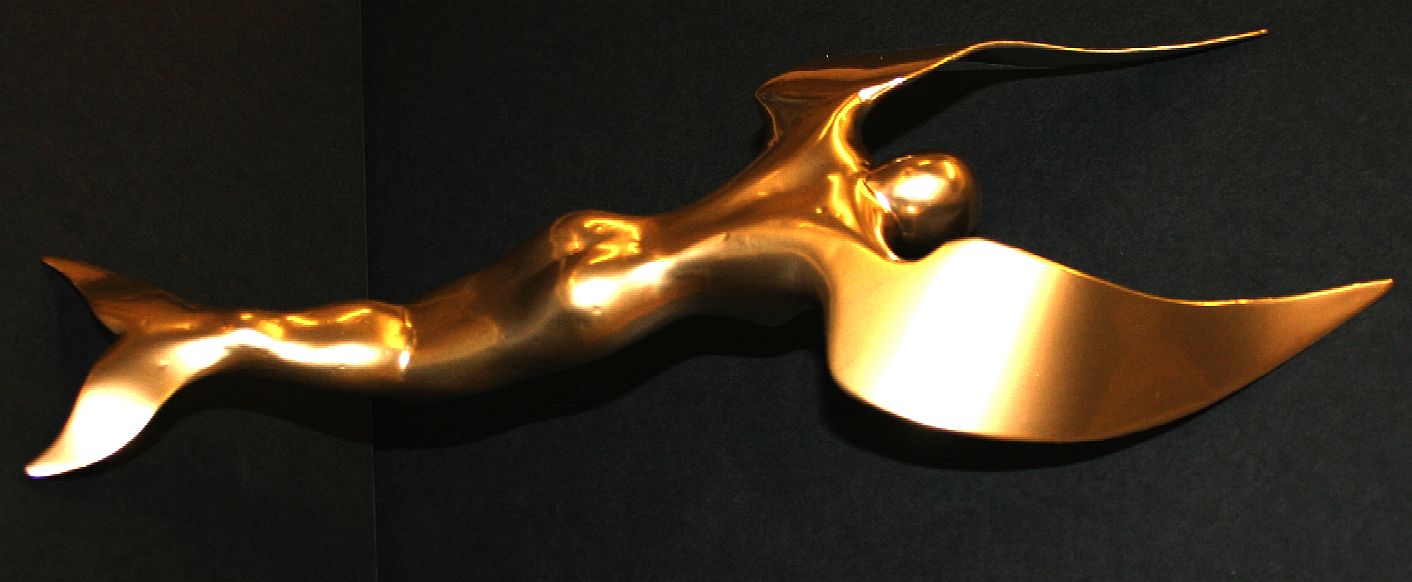
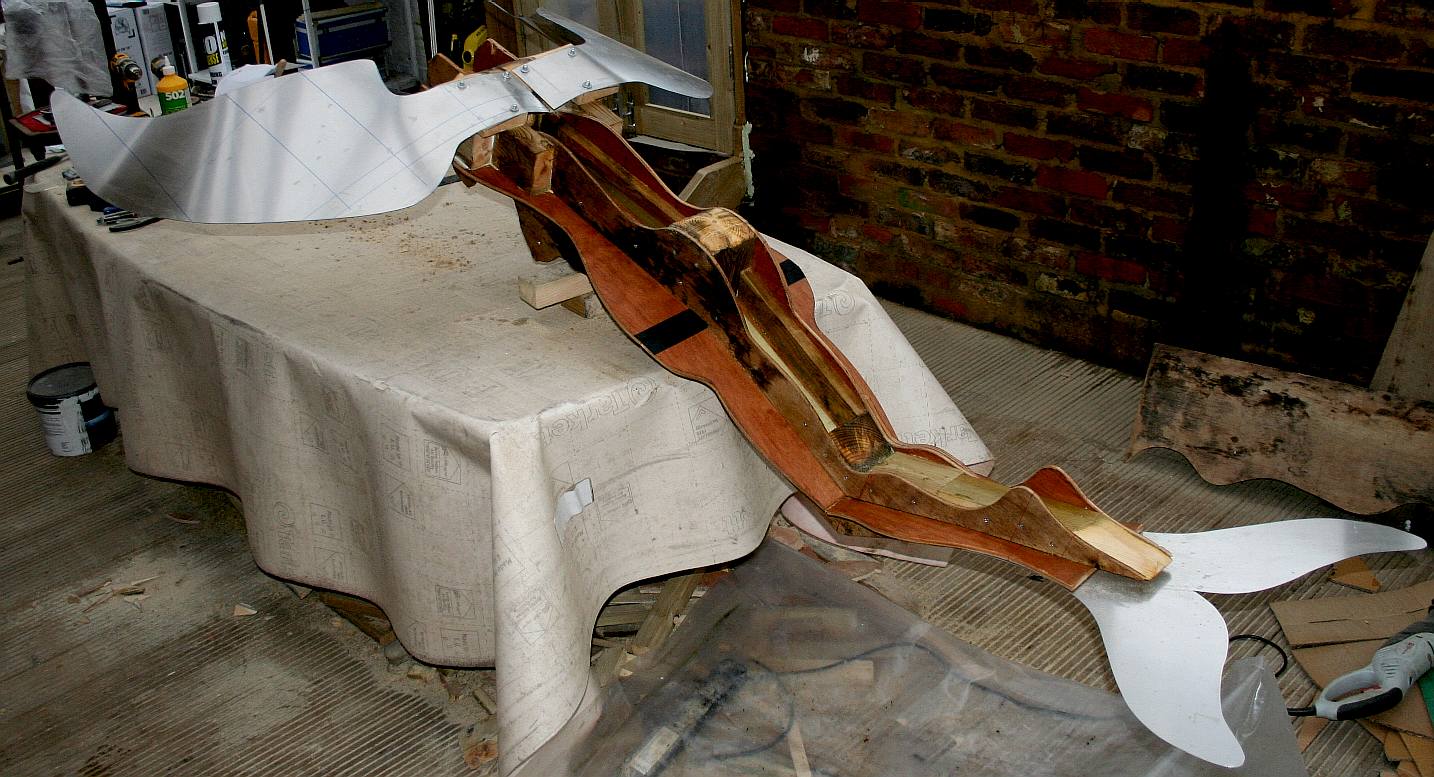
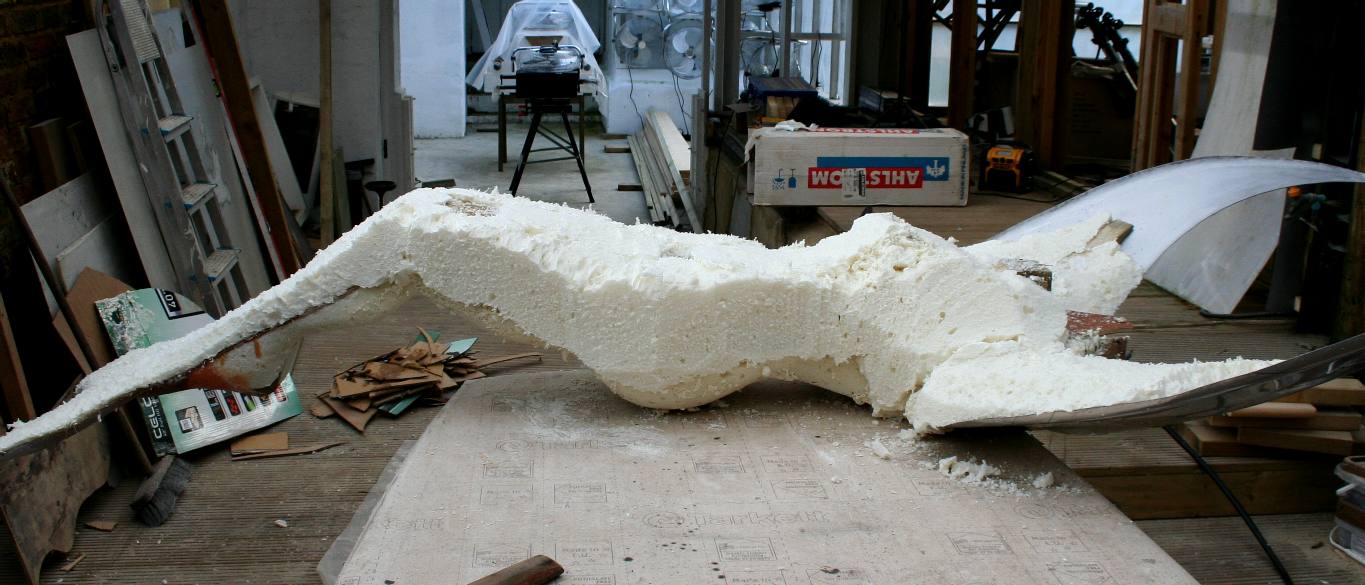
TAKING SHAPE - The Queen of the Nile statue is beginning to look like the original angelic sculpture at the head of this page. There is still a lot of infill needed and the actual head frame to attach, where that seen so far is only there as a guide. The sculpture manages to capture both the swimming action of a mermaid and the flight of an angel in one mythical creature.
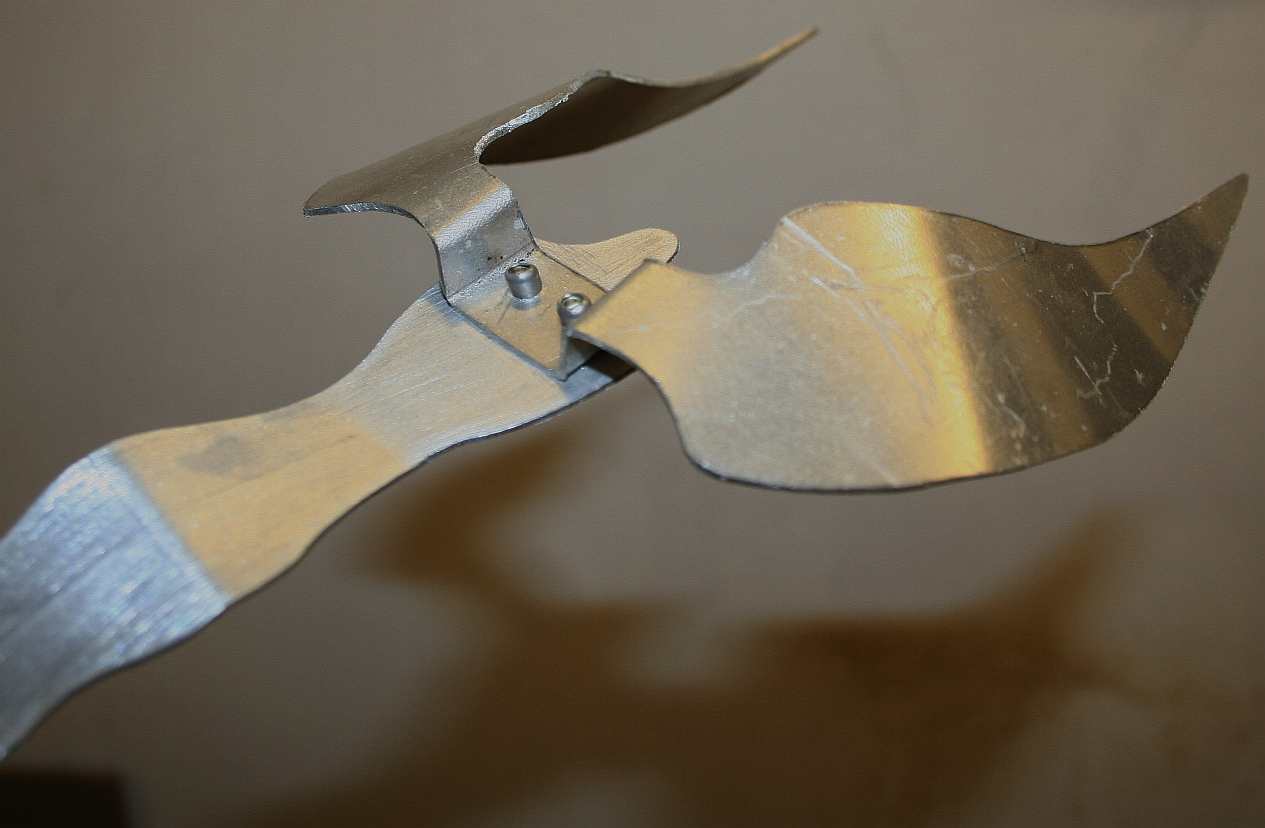
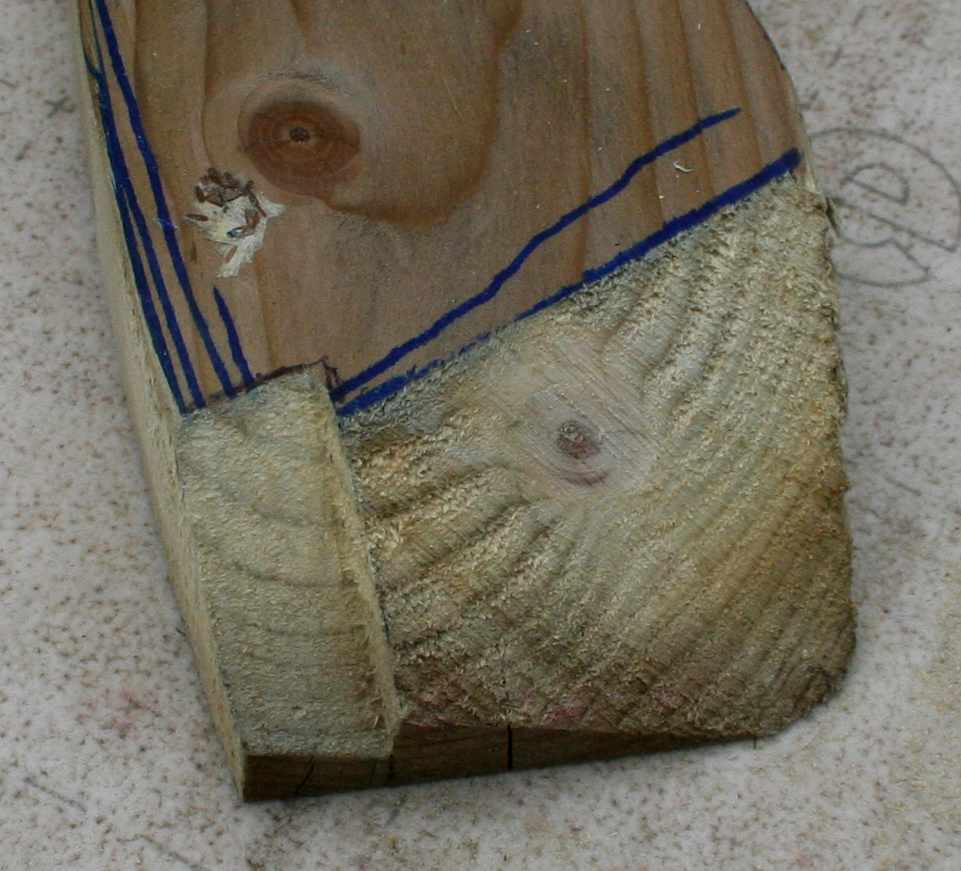
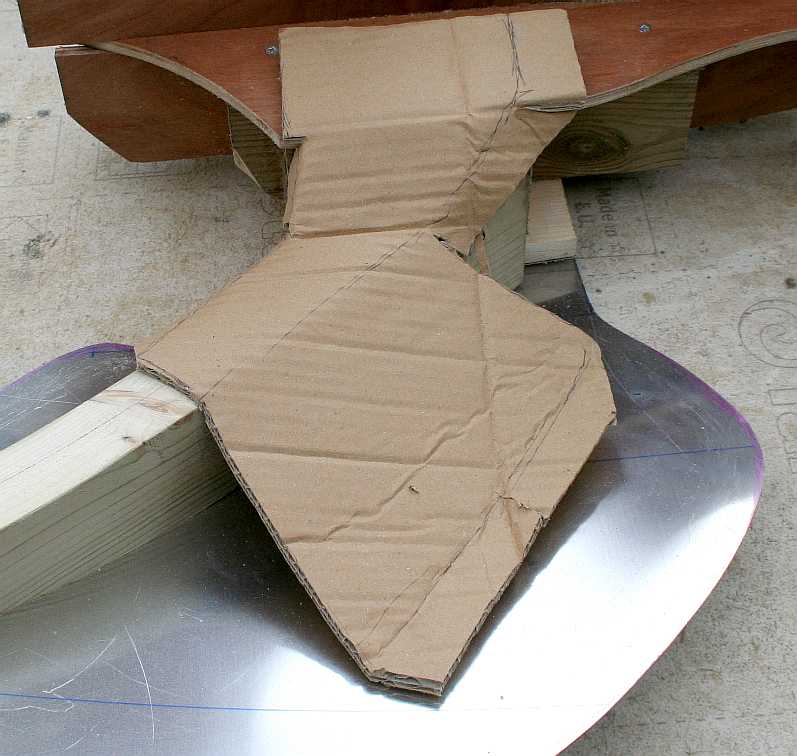
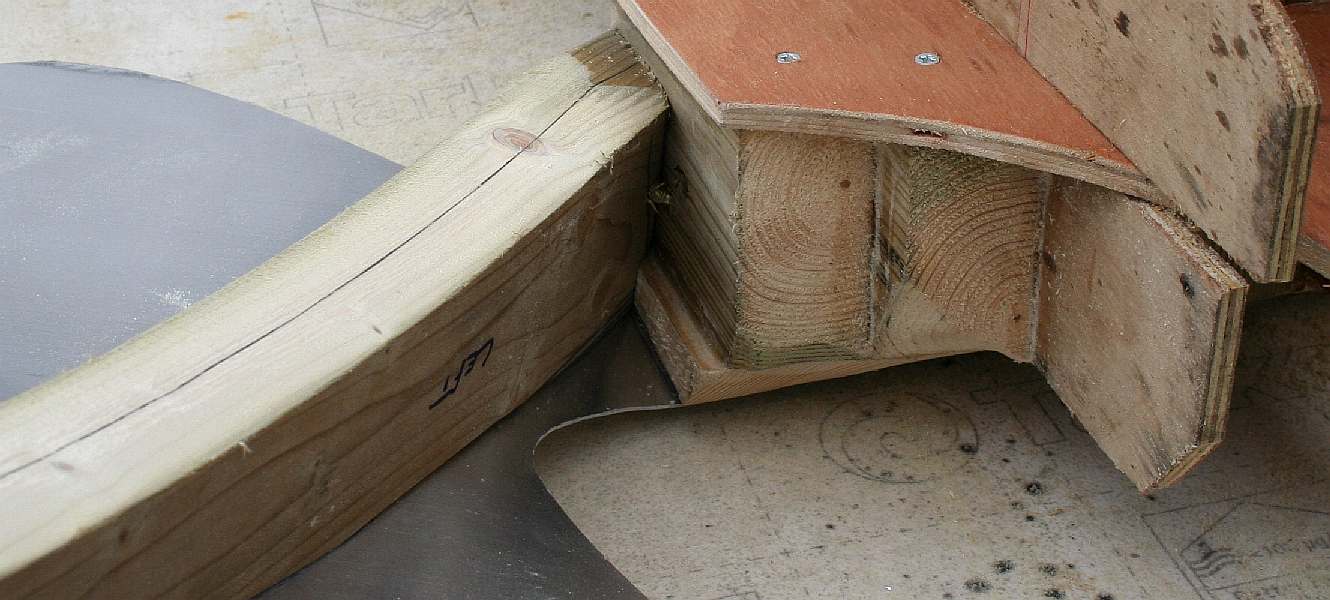
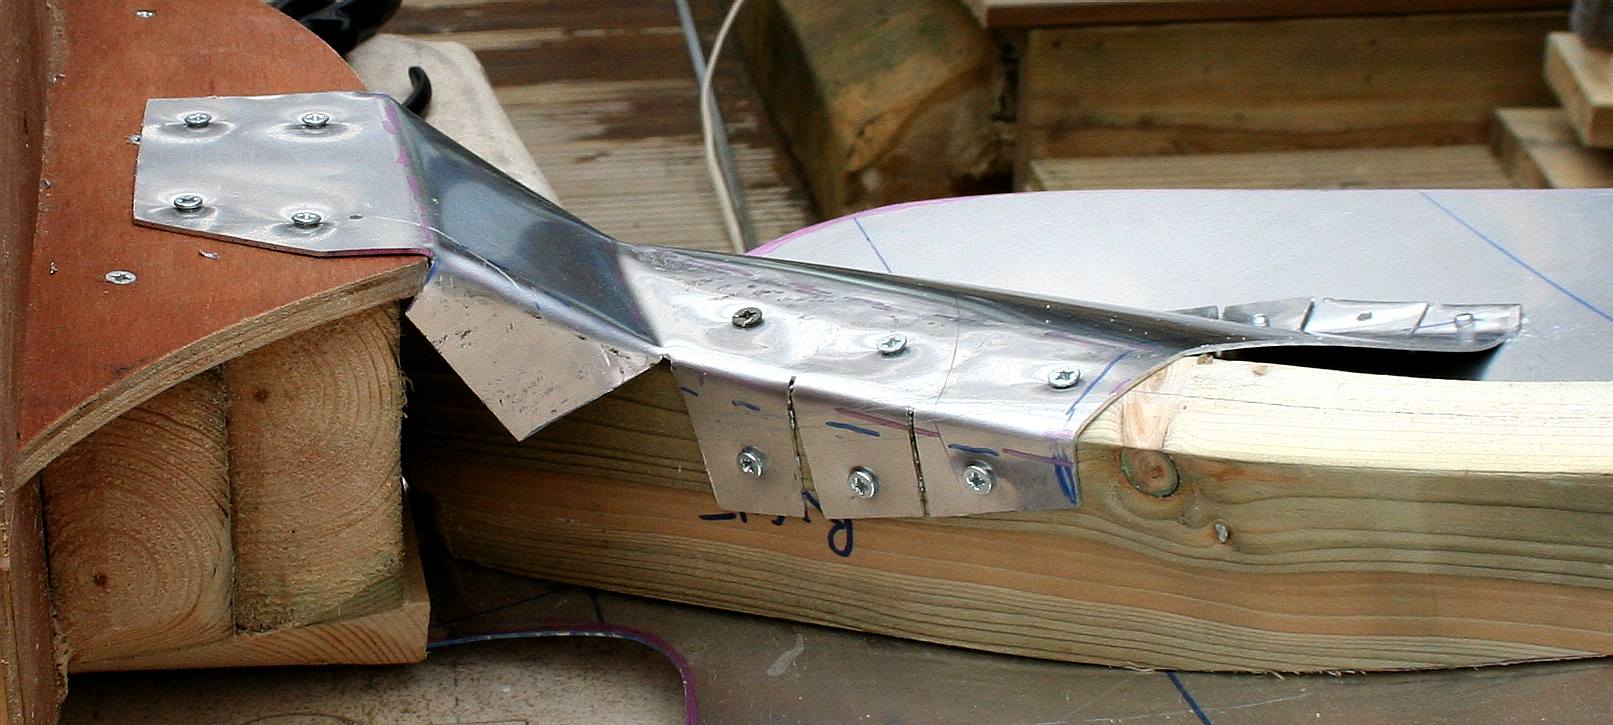
DETAILS - [LEFT] The shoulder joint is seen here with the angles cut so that the aluminium wing blade sits correctly. The process of getting this joint right is largely trial and error. It's better to take off too little than make a mistake and cut off too much. [RIGHT] Cardboard (or paper) can be used to work out the flat sheet development of a reinforcing bracket that will also be made in folded then beaten aluminium. The metal article will not be as compliant as cardboard.
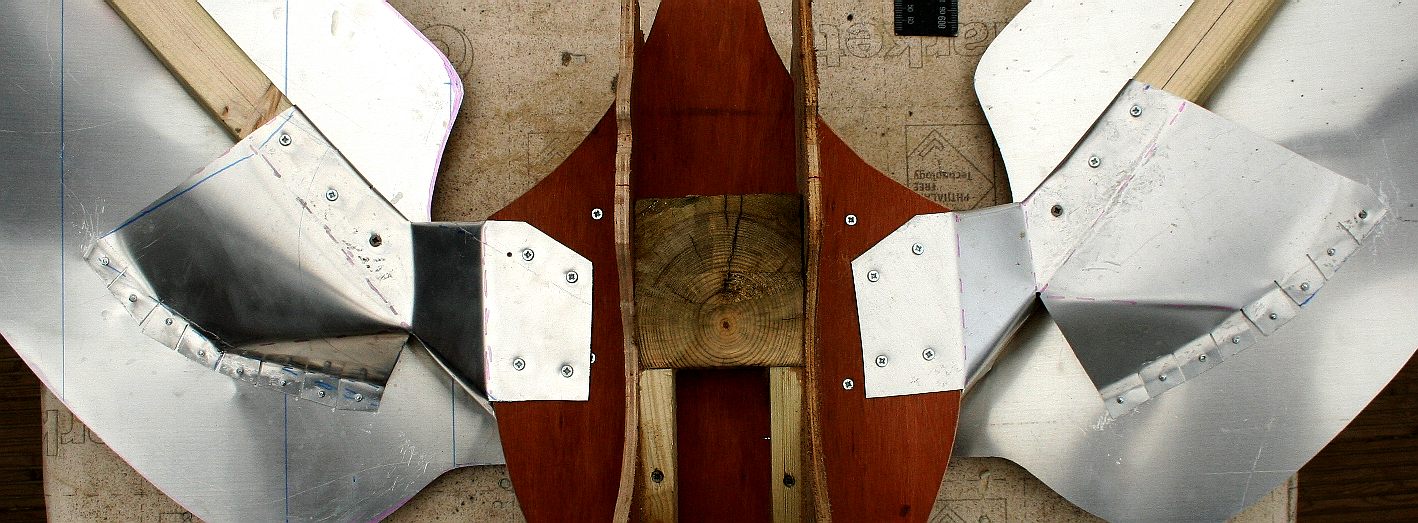
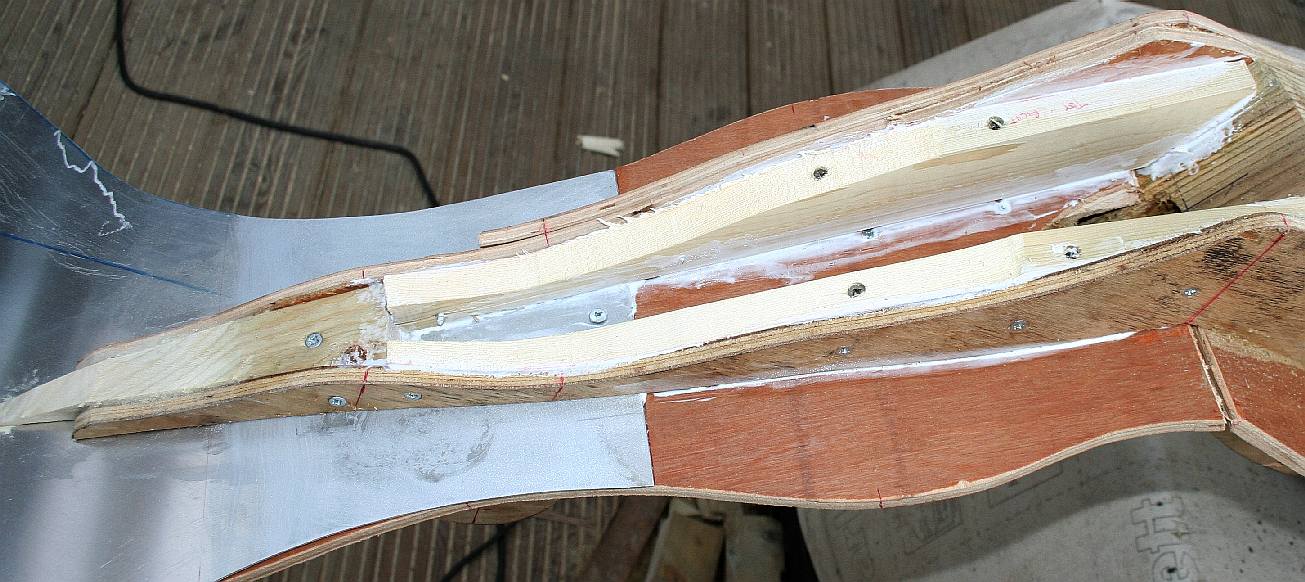
MIRROR IMAGE - The two arms that reinforce the wings are seen here marked with centre lines so that when the wings are drilled to screw to the timbers there are reliable guides. The bones of birds are hollow to keep them light and dense only at load input areas such as where the muscles attach and at joints. Weight is a consideration for us where the statue is used as a figurehead on SeaVax. This first sculpture will be used as a statue on the Fountain of Youth.
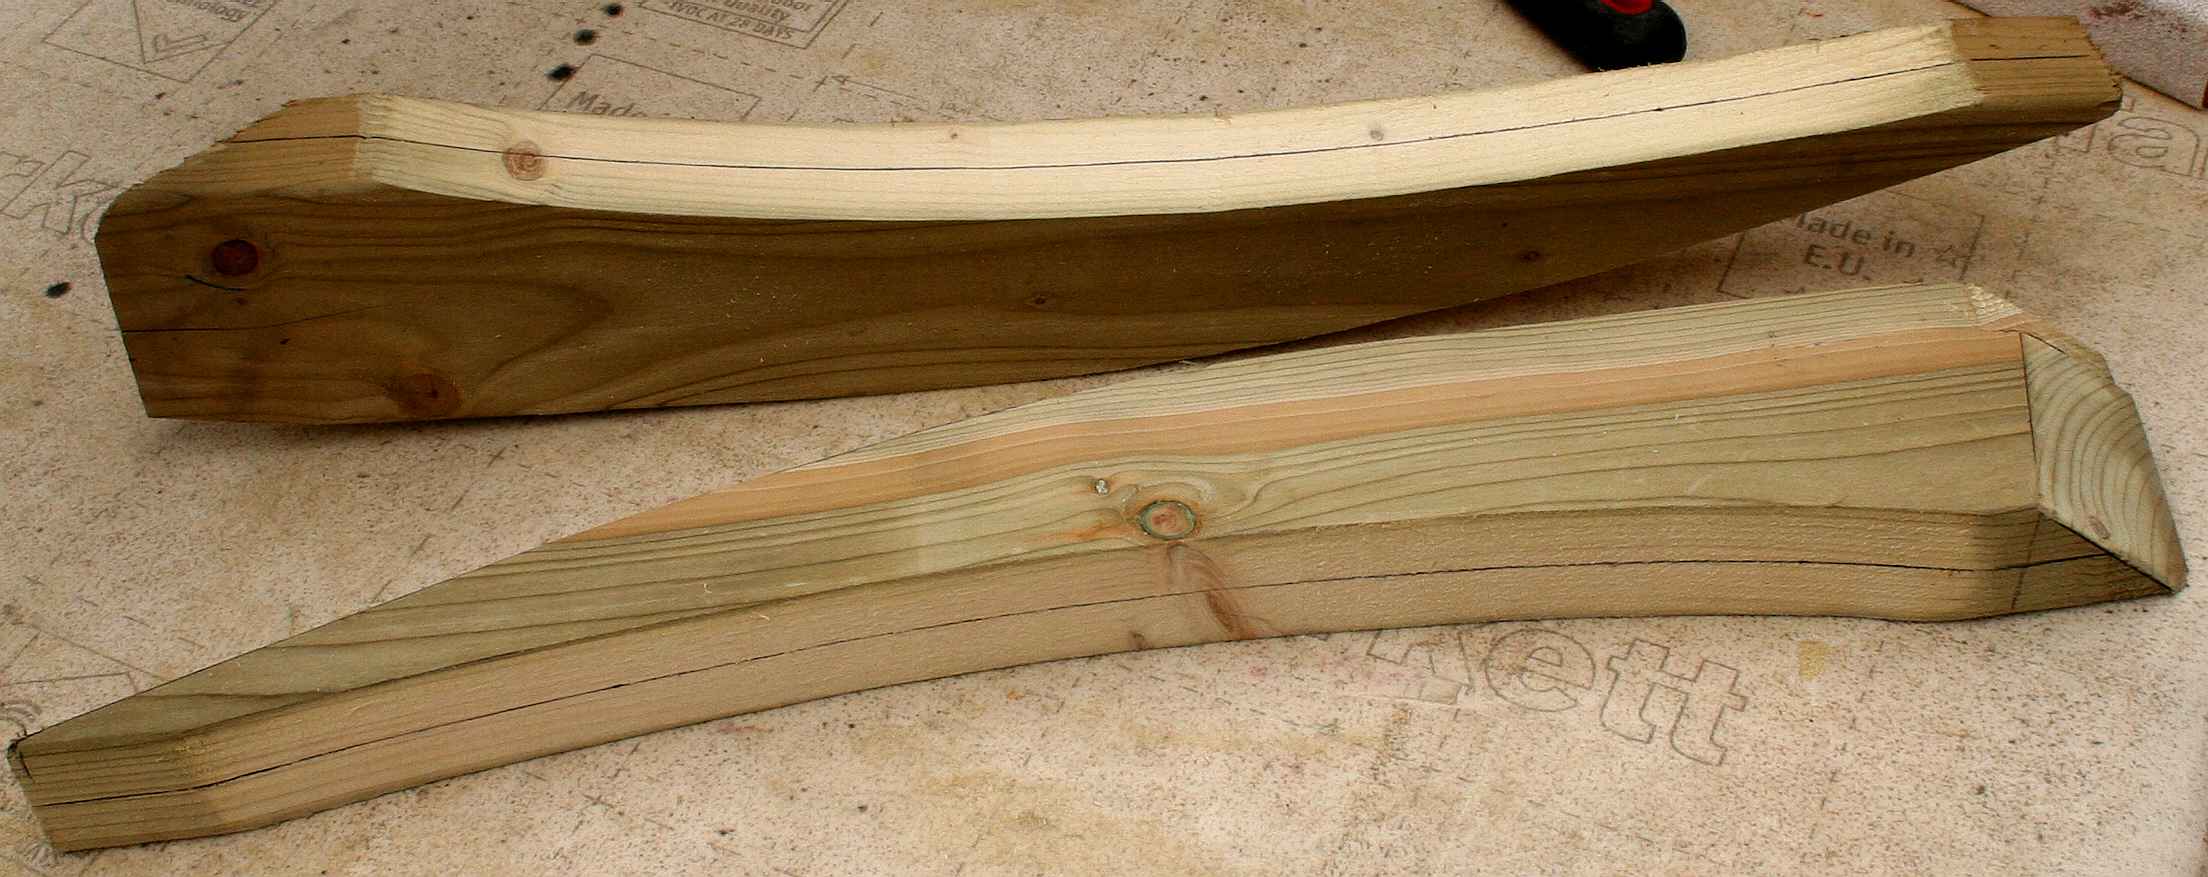
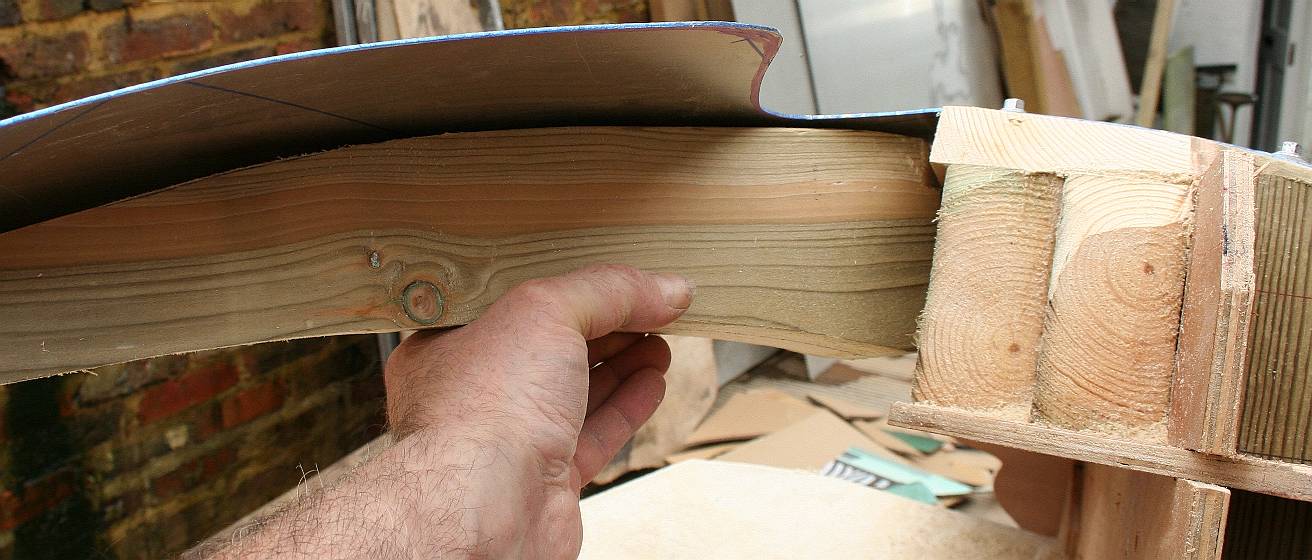
PROFILE - The curve in the wooden supports matches the wing profile as near exactly as possible by human eye and measurement with tapes and rulers. We don't need to be too fussy because minor irregularities will come out at the carving stage.
TIGHT FIT - When making custom artworks it is not always possible to get a 100% fit as in furniture that is machine made - and it is not practical to keep re-making the same item. Hence, when designing the support structure make sure that it will be strong enough with suitable fixings. Triangulations is the key and this joint is a good fit.
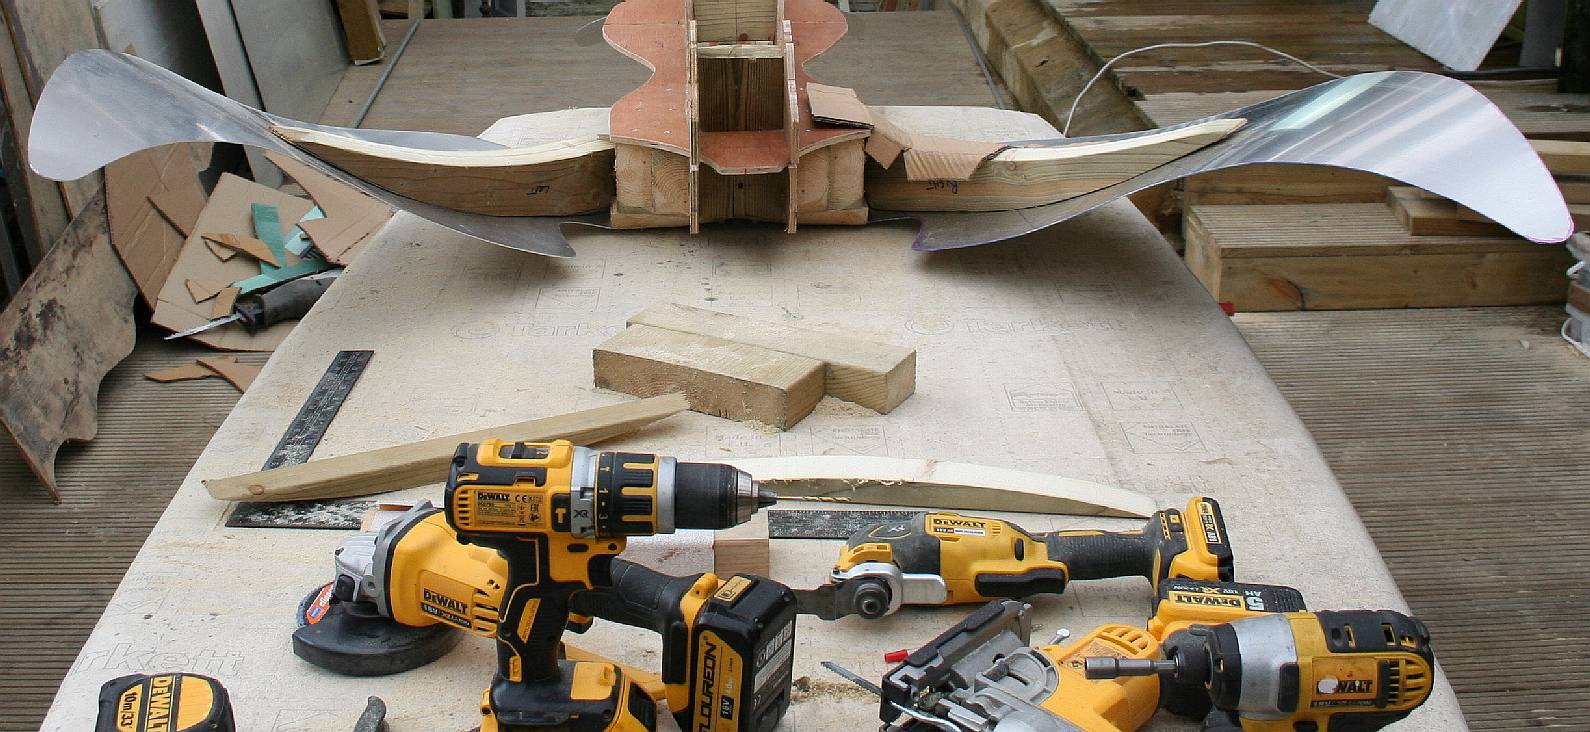
DEWALT HAND POWER TOOLS - The artist seems to use a lot of lithium battery tools to aid in the creative process and likes this brand. In this picture you can see both wing arms fitted. Once the shoulder brackets are fixed it will be time to get out the resin and glass matt. Lloyds approved marine ADX40 resin is used for the reinforcing, where carbon fibre and epoxy resin will be used on the figurehead for the outer skin.
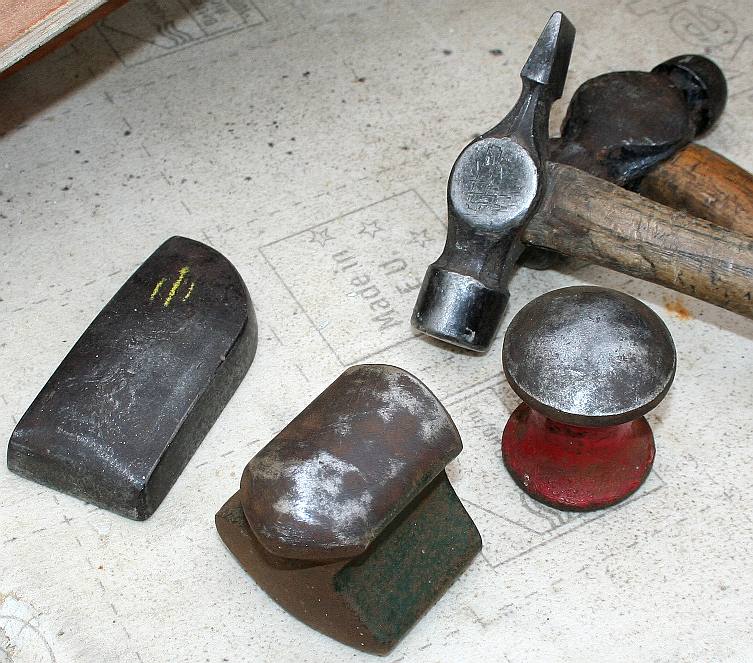
FOLDING - You need a good eye and some skill with basic tools such as flat nosed pliers. You also need a hammer or two with smooth (polished) heads. One hammer in use (a Stanley) is over 50 years old and still going strong.
FIXED - Screwed down and beaten to fit the wooden arm. Most of our fixings are sourced locally. The craftsman used ordinary pop rivets to join alloy to alloy. These need to be hand beaten for a tighter fix. Special countersunk rivets are available for a flush fit.
REPEATED - The left and right brackets should end up virtual mirror images, meaning that the folds are reversed. It is impossible to fit a straight folded section to a curved wing, you need to fan and fold each tab to fit the curve one-by-one. The same techniques used to make the Solar Lady can be applied to make giant animatronics, such as dinosaurs and sharks, except that the joints would be mobile, hence timber would be replaced with steel and adhesive with welding. Our artist is also a skilled welder-fabricator - so could have made the wings work if that had been a requirement. As a water feature that would not be appropriate.
KNEES - The tail does not need to carry any structural loads, but you can imagine that during transit and fitting that the installers will lift by the most convenient handholds - and these will be the wing ends and tail tips. Hence, even the extremities need to be able to take reasonable loads that pass through the knee joint. In a sold bronze casting that is not usually the case, the metal being more than able to cope without complex structural considerations.
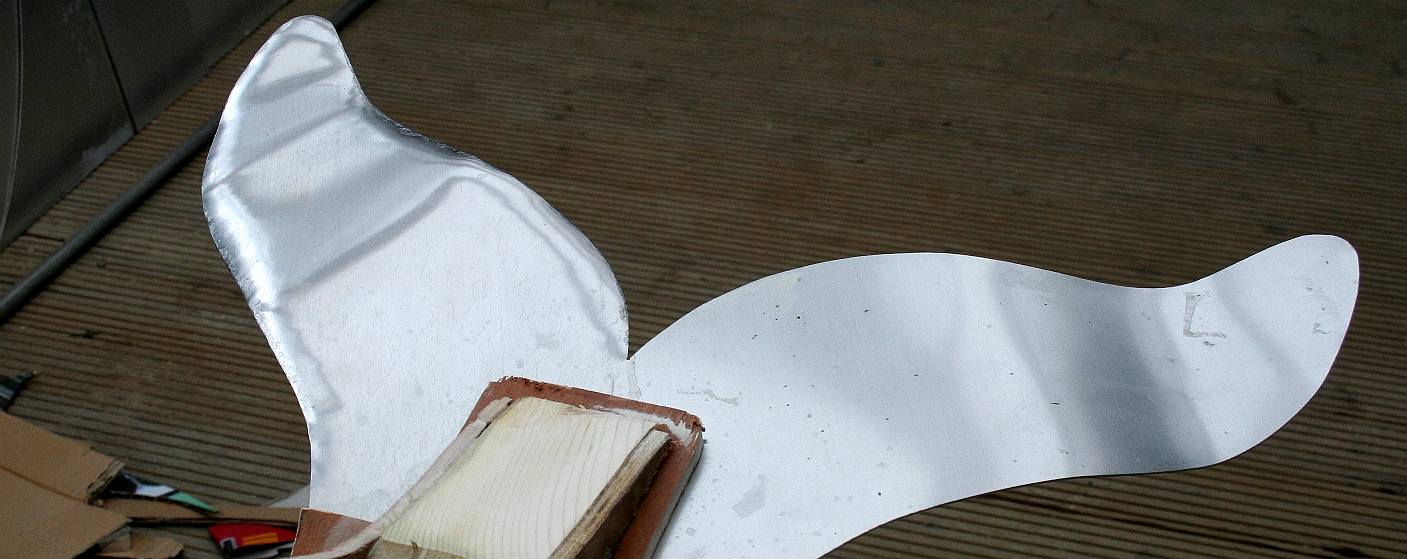
COMPOUND CURVES - Forming metal skillfully can take a flat plate and breathe life into it with curves in all the right places. When beating sheet metal, be careful not to ruck the metal with high stress creases - or at least beat those out. Our artist makes a mental note of potential problems to deal with at each stage, before proceeding to the next stage.
HAND TOOLS - From the most basic of tools you can produce some incredible works of art. For example, a master painter like Leonardo da Vinci only needed a few brushes, some oils and a canvas to produce the Mona Lisa. The end result can be stunning, in Leonardo's case becoming a national treasure.
METAL FORMING - Some of the most exclusive sports cars were made in aluminium where craftsmen rolled metal by hand using the eye to make the panels for exotic bodies. Typically, such craftsmen worked to a pattern of the vehicle they were producing made in wood called a buck.
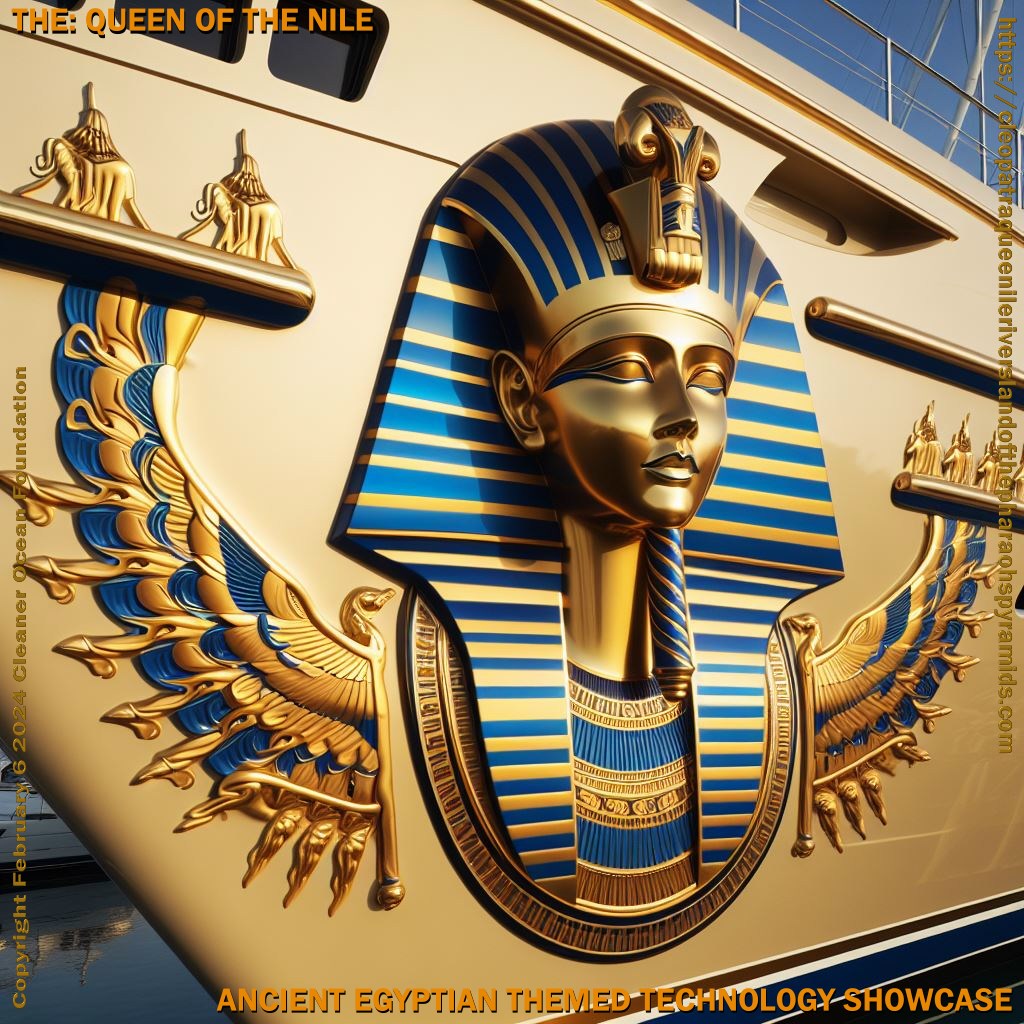
THE QUEEN OF THE NILE - Is a Cleopatra and Ancient Egypt themed floating showcase for zero carbon river cruises.
CURVACEOUS - Metal that is curved is far stronger that flat sheets that would need reinforcing. Working metal also hardens it. So start with a suitably soft (annealed) grade. If you work-harden metal too much it will crack and you'll have to start all over again, or anneal and repair. Our artist got nowhere near causing fatigue during this creative exercise. The wings of Isis.
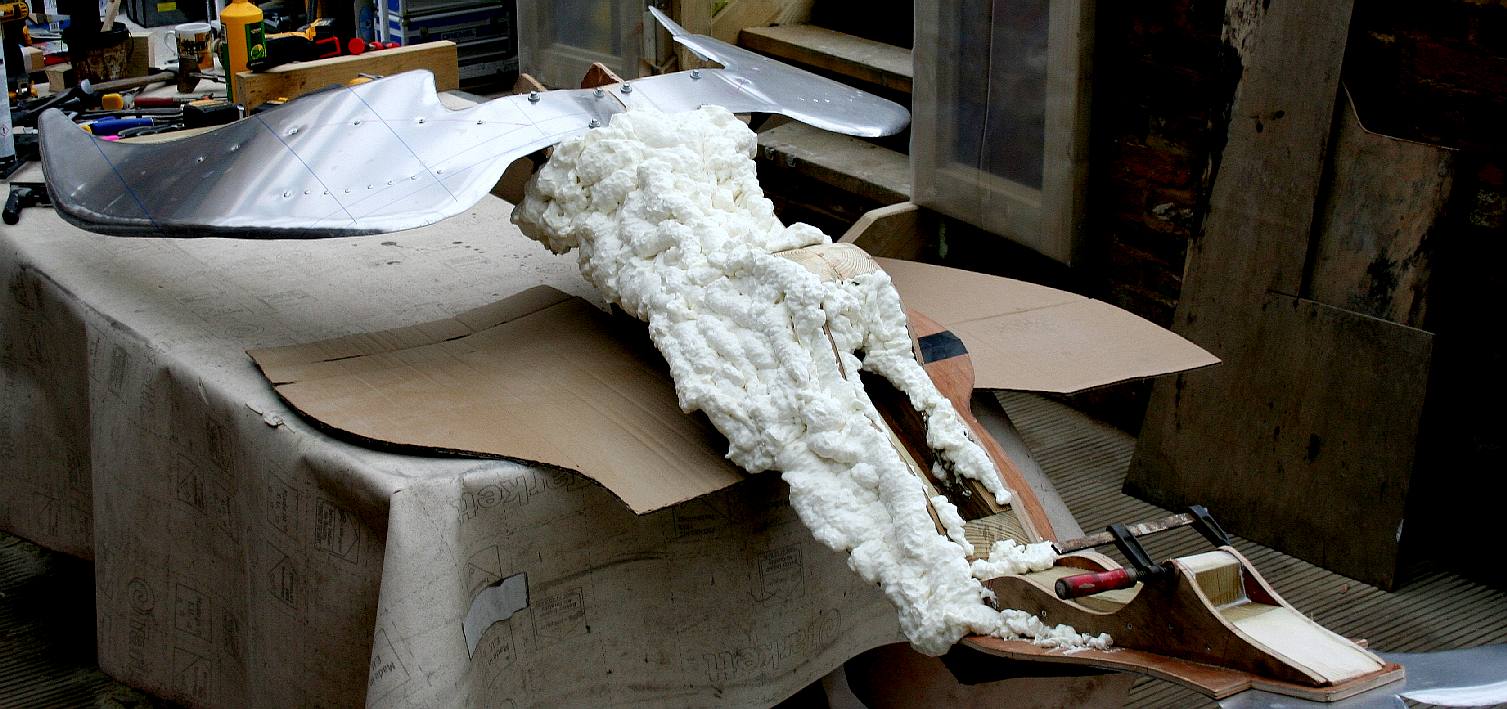
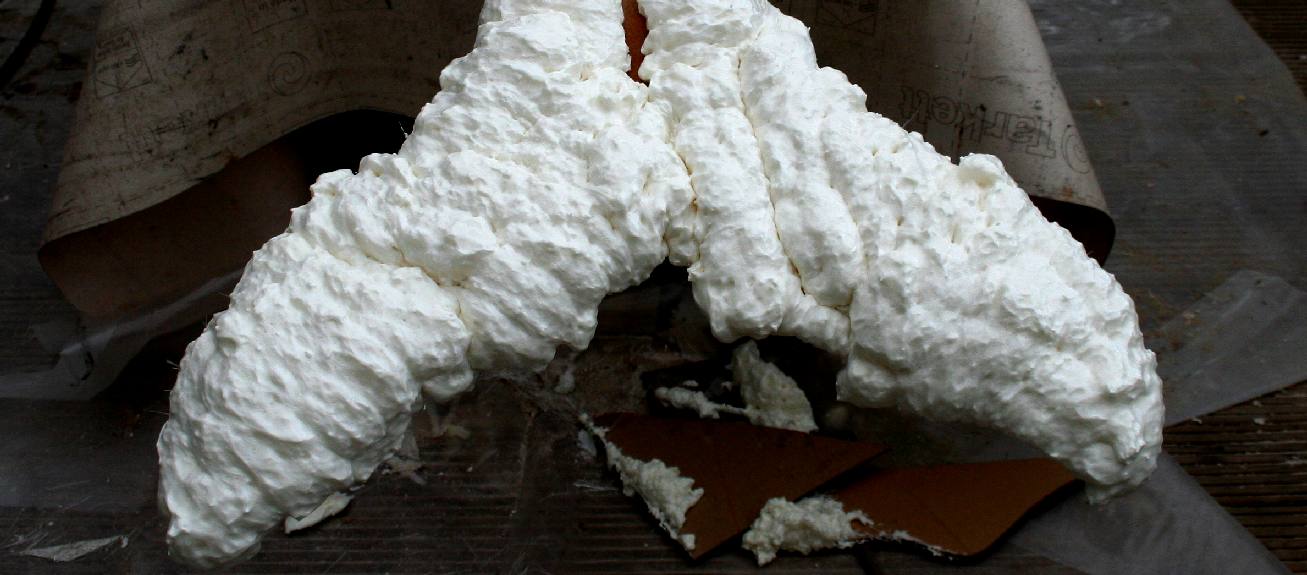
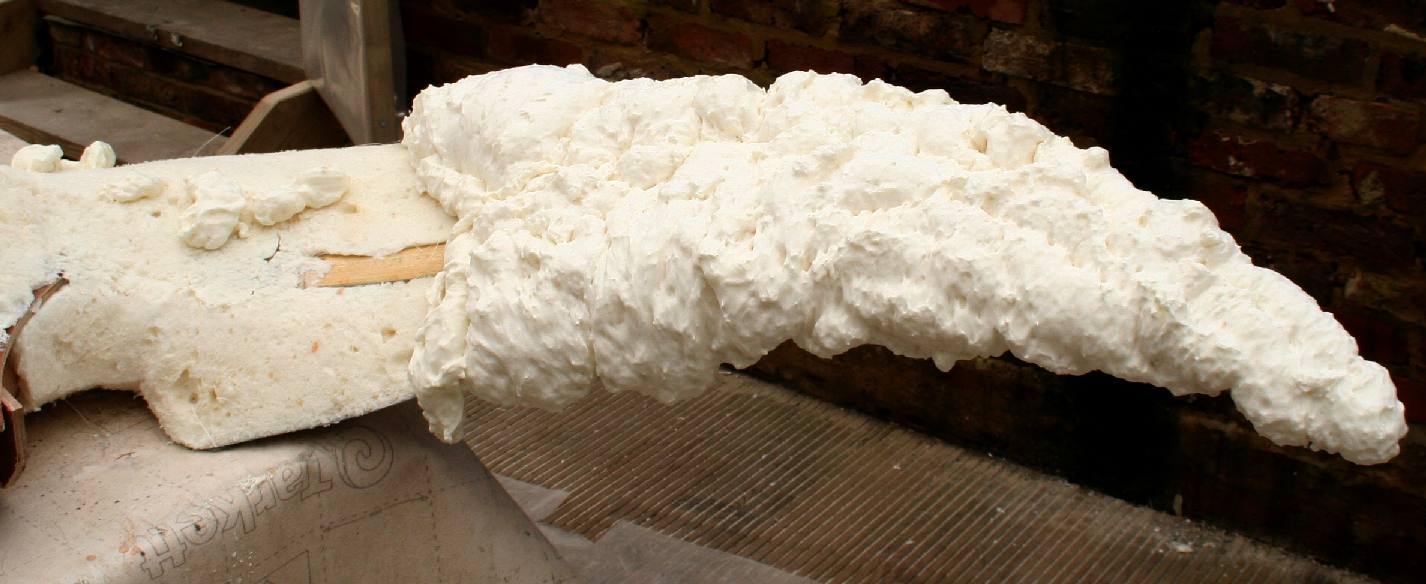
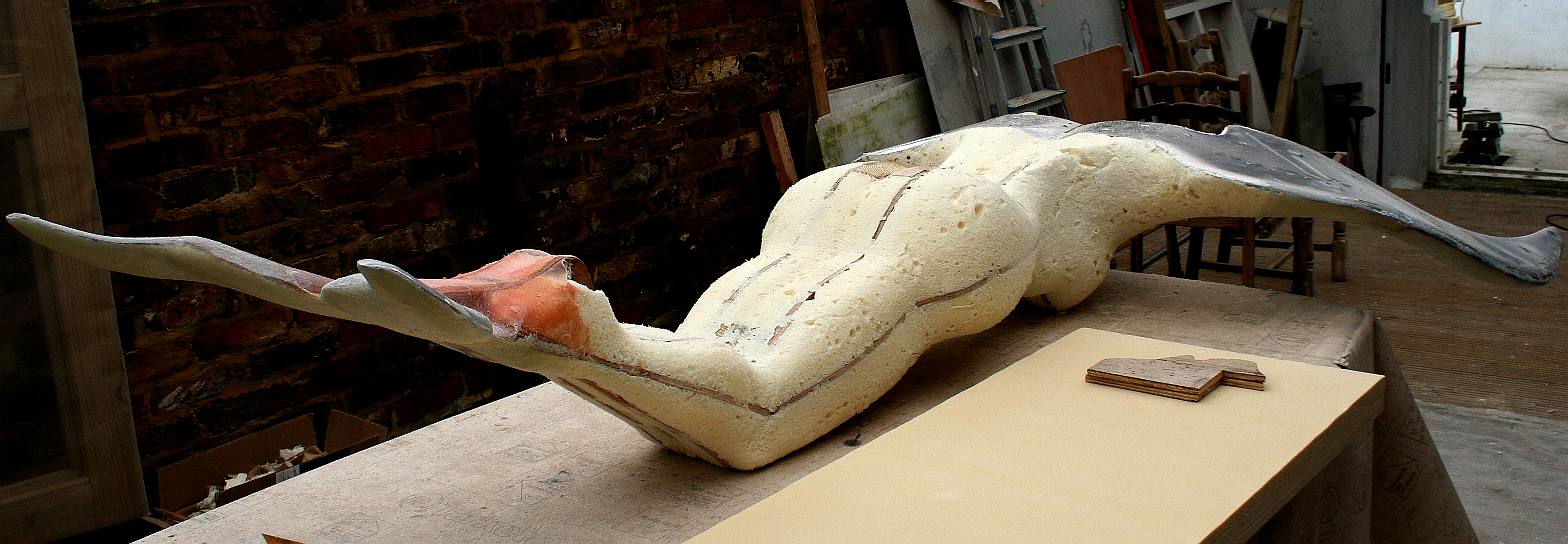
CORE - In the modern world, where we are creating a dynamic artwork like a figurehead, we can take advantage of materials like polyurethane foam. They not only speeds up the carving process, but will leave us with a piece that can withstand substantial loads on a vehicle at sea in harsh weather conditions. That is why ship mascots were hewn from solid blocks of wood. Wood being lighter and stronger than stone or bronze and still strong.
The carving process is just as intricate using foam as a core material, with the problem that with speed and ease of working, you have to be more controlled and the slightest slip will undermine the artwork a whole lot more than carving marble or wood with a chisel. It is easier to make a mistake, but unlike stone masons, if you make a mistake it can be rectified with a fresh application of polyurethane. The core material will be sheathed is a composite that is far more durable. It is important to get the shaping right at this stage so that the laminating process does not need to involve form adjustment. The foam is applied from canisters and must bond to clean dust free surfaces. Each section has to harden before the next application, so be patient.
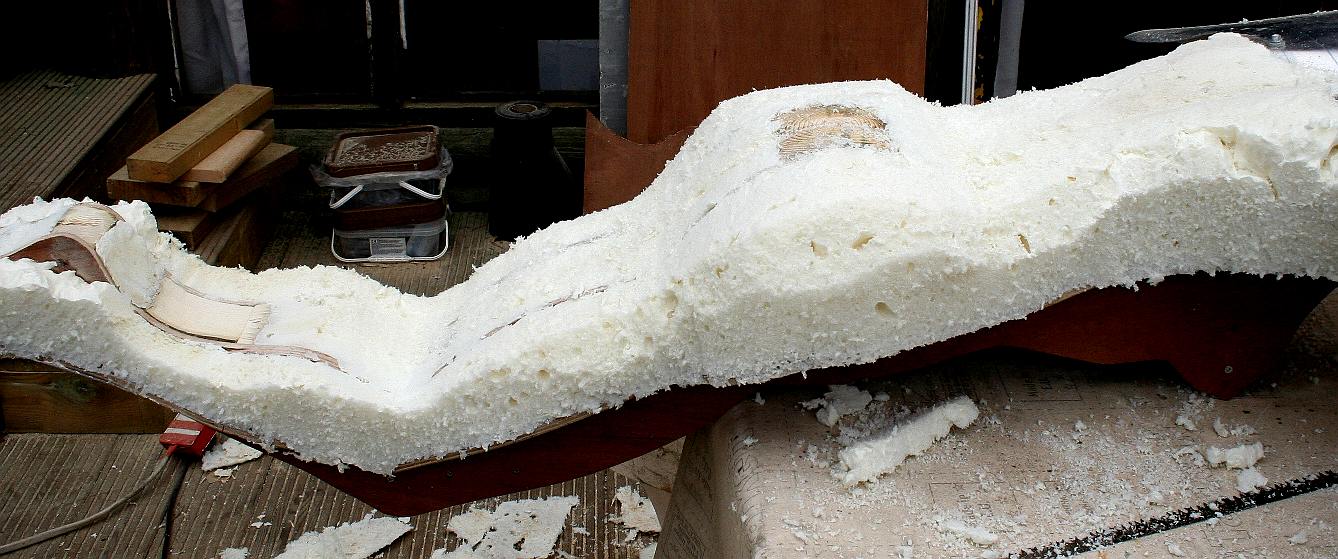
ROUGH SHAPING - The polyurethane foam can be rough cut with ordinary saws, being careful not to tear the material. The process must be repeated several times as each facet is built up. Finally, each completed section should be laminated with a high grade epoxy and suitable woven rovings. The static version will still use epoxy resin for final lamination, but polyester and vinylester resins for local structural reinforcing.
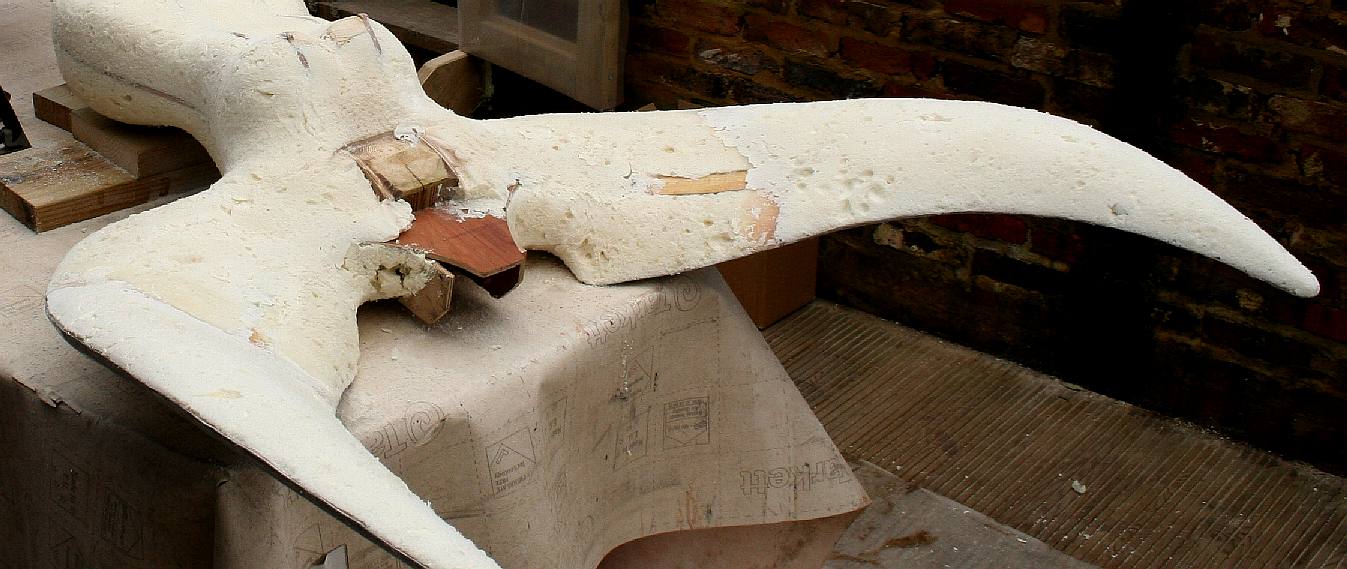
INTERIM SHAPING - The second stage is to shape the foam to a point where a laminate can fix and preserve the form for final detailing. This has to be as near to the finished art as possible, allowing only another millimeters or two of material to complete.
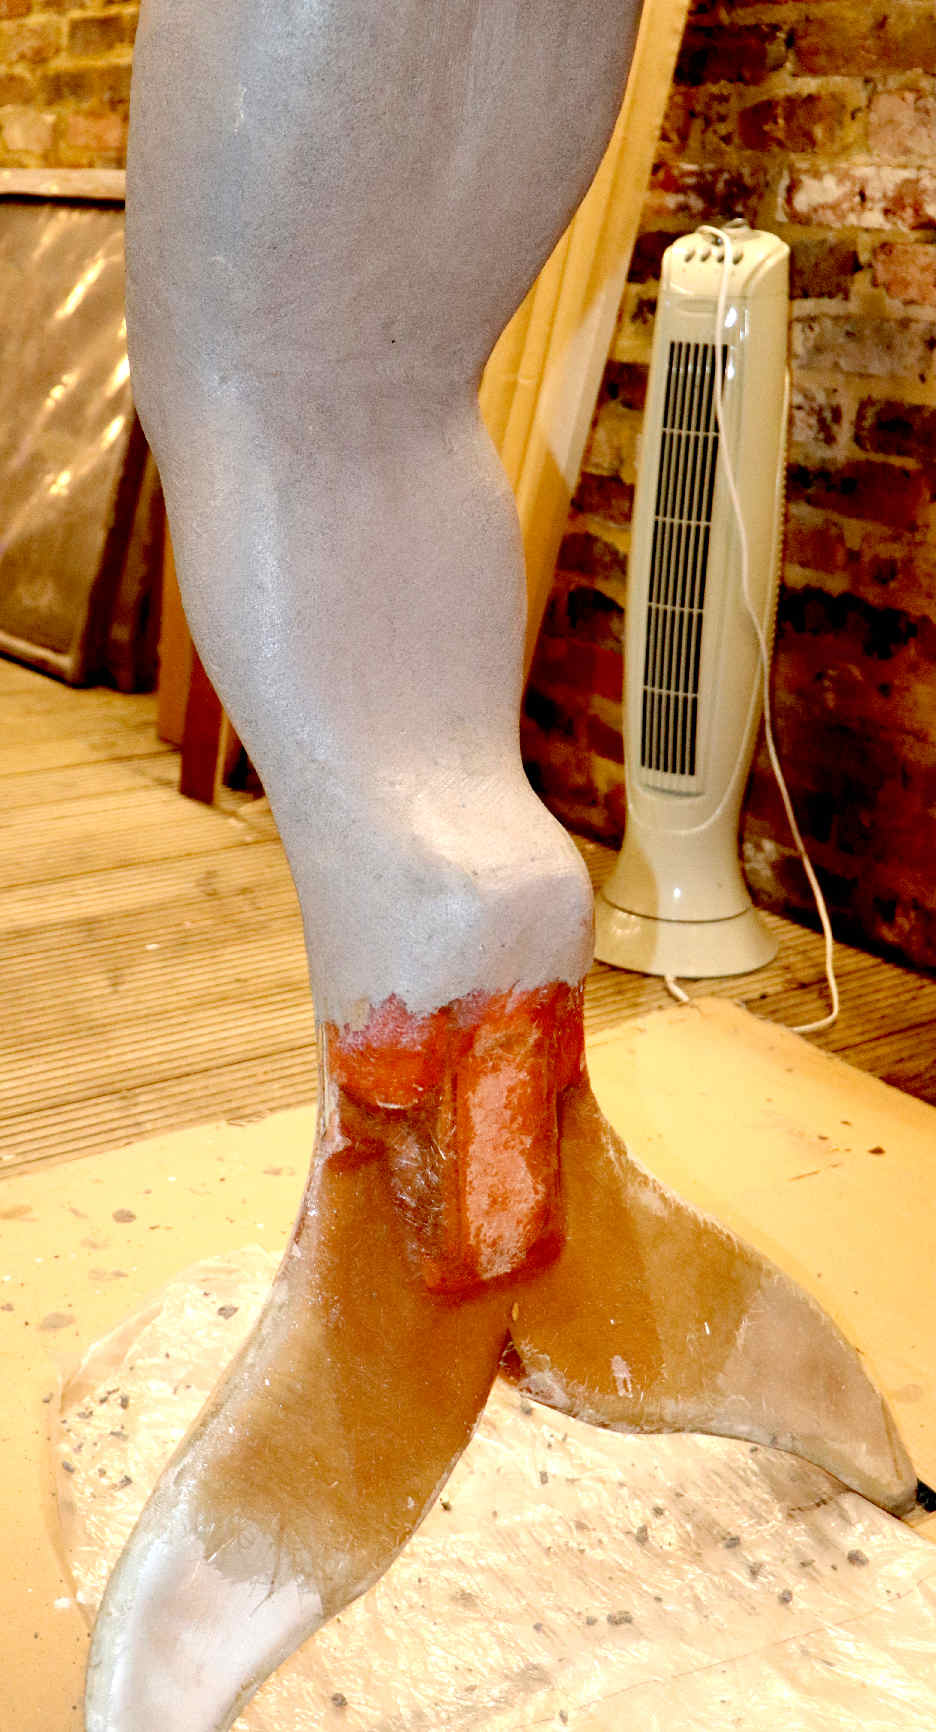
MERMAID TAIL - Where the aluminium fins meet the wooden structure, the artist has included several layers of chopped strand matt at the join, that will be built on with foam and layered over with epoxy and a woven glass cloth for the final form. Any metal that is being laminated must be properly keyed for a good bond.
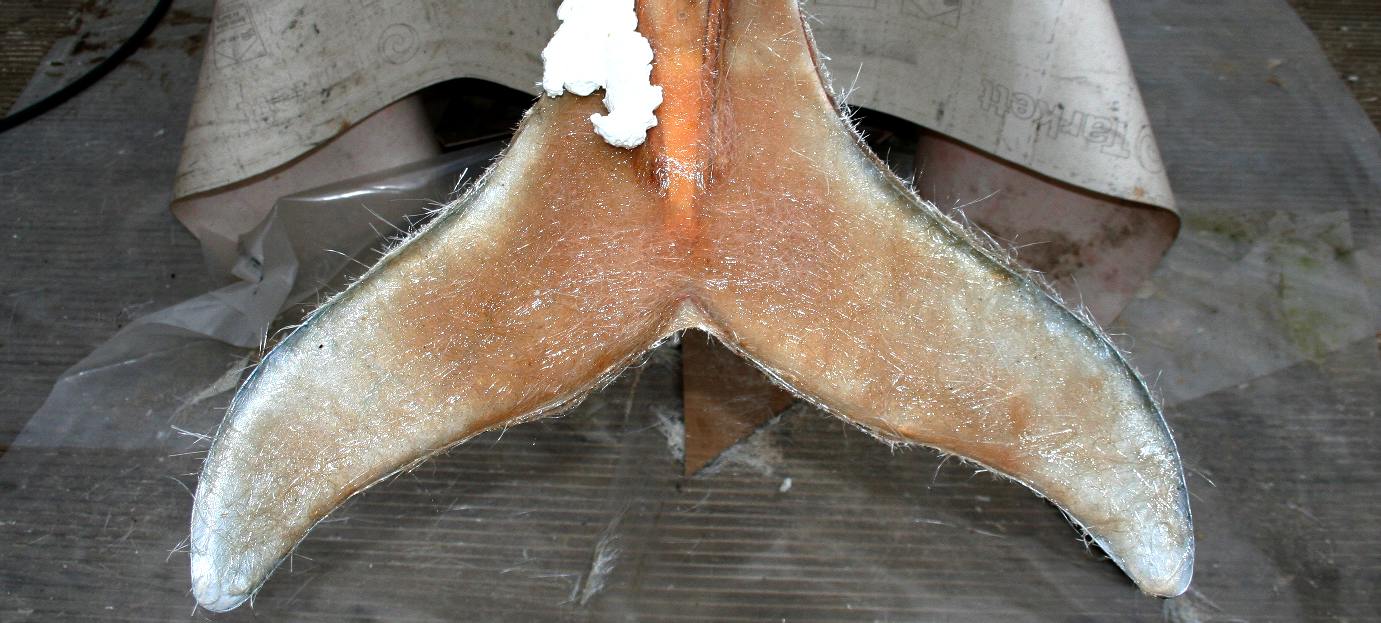
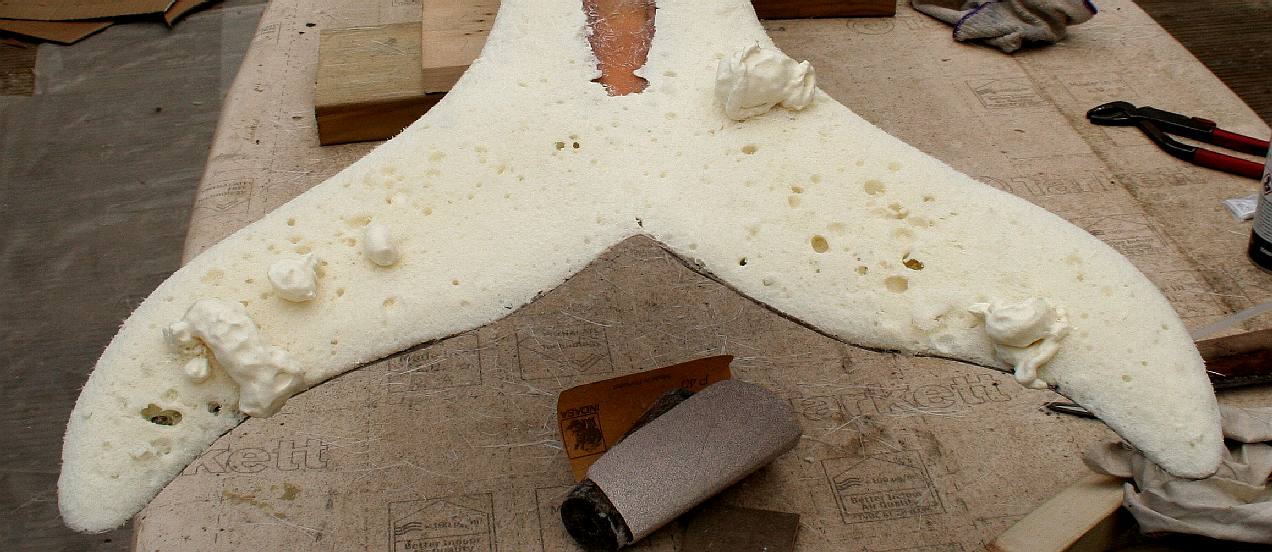
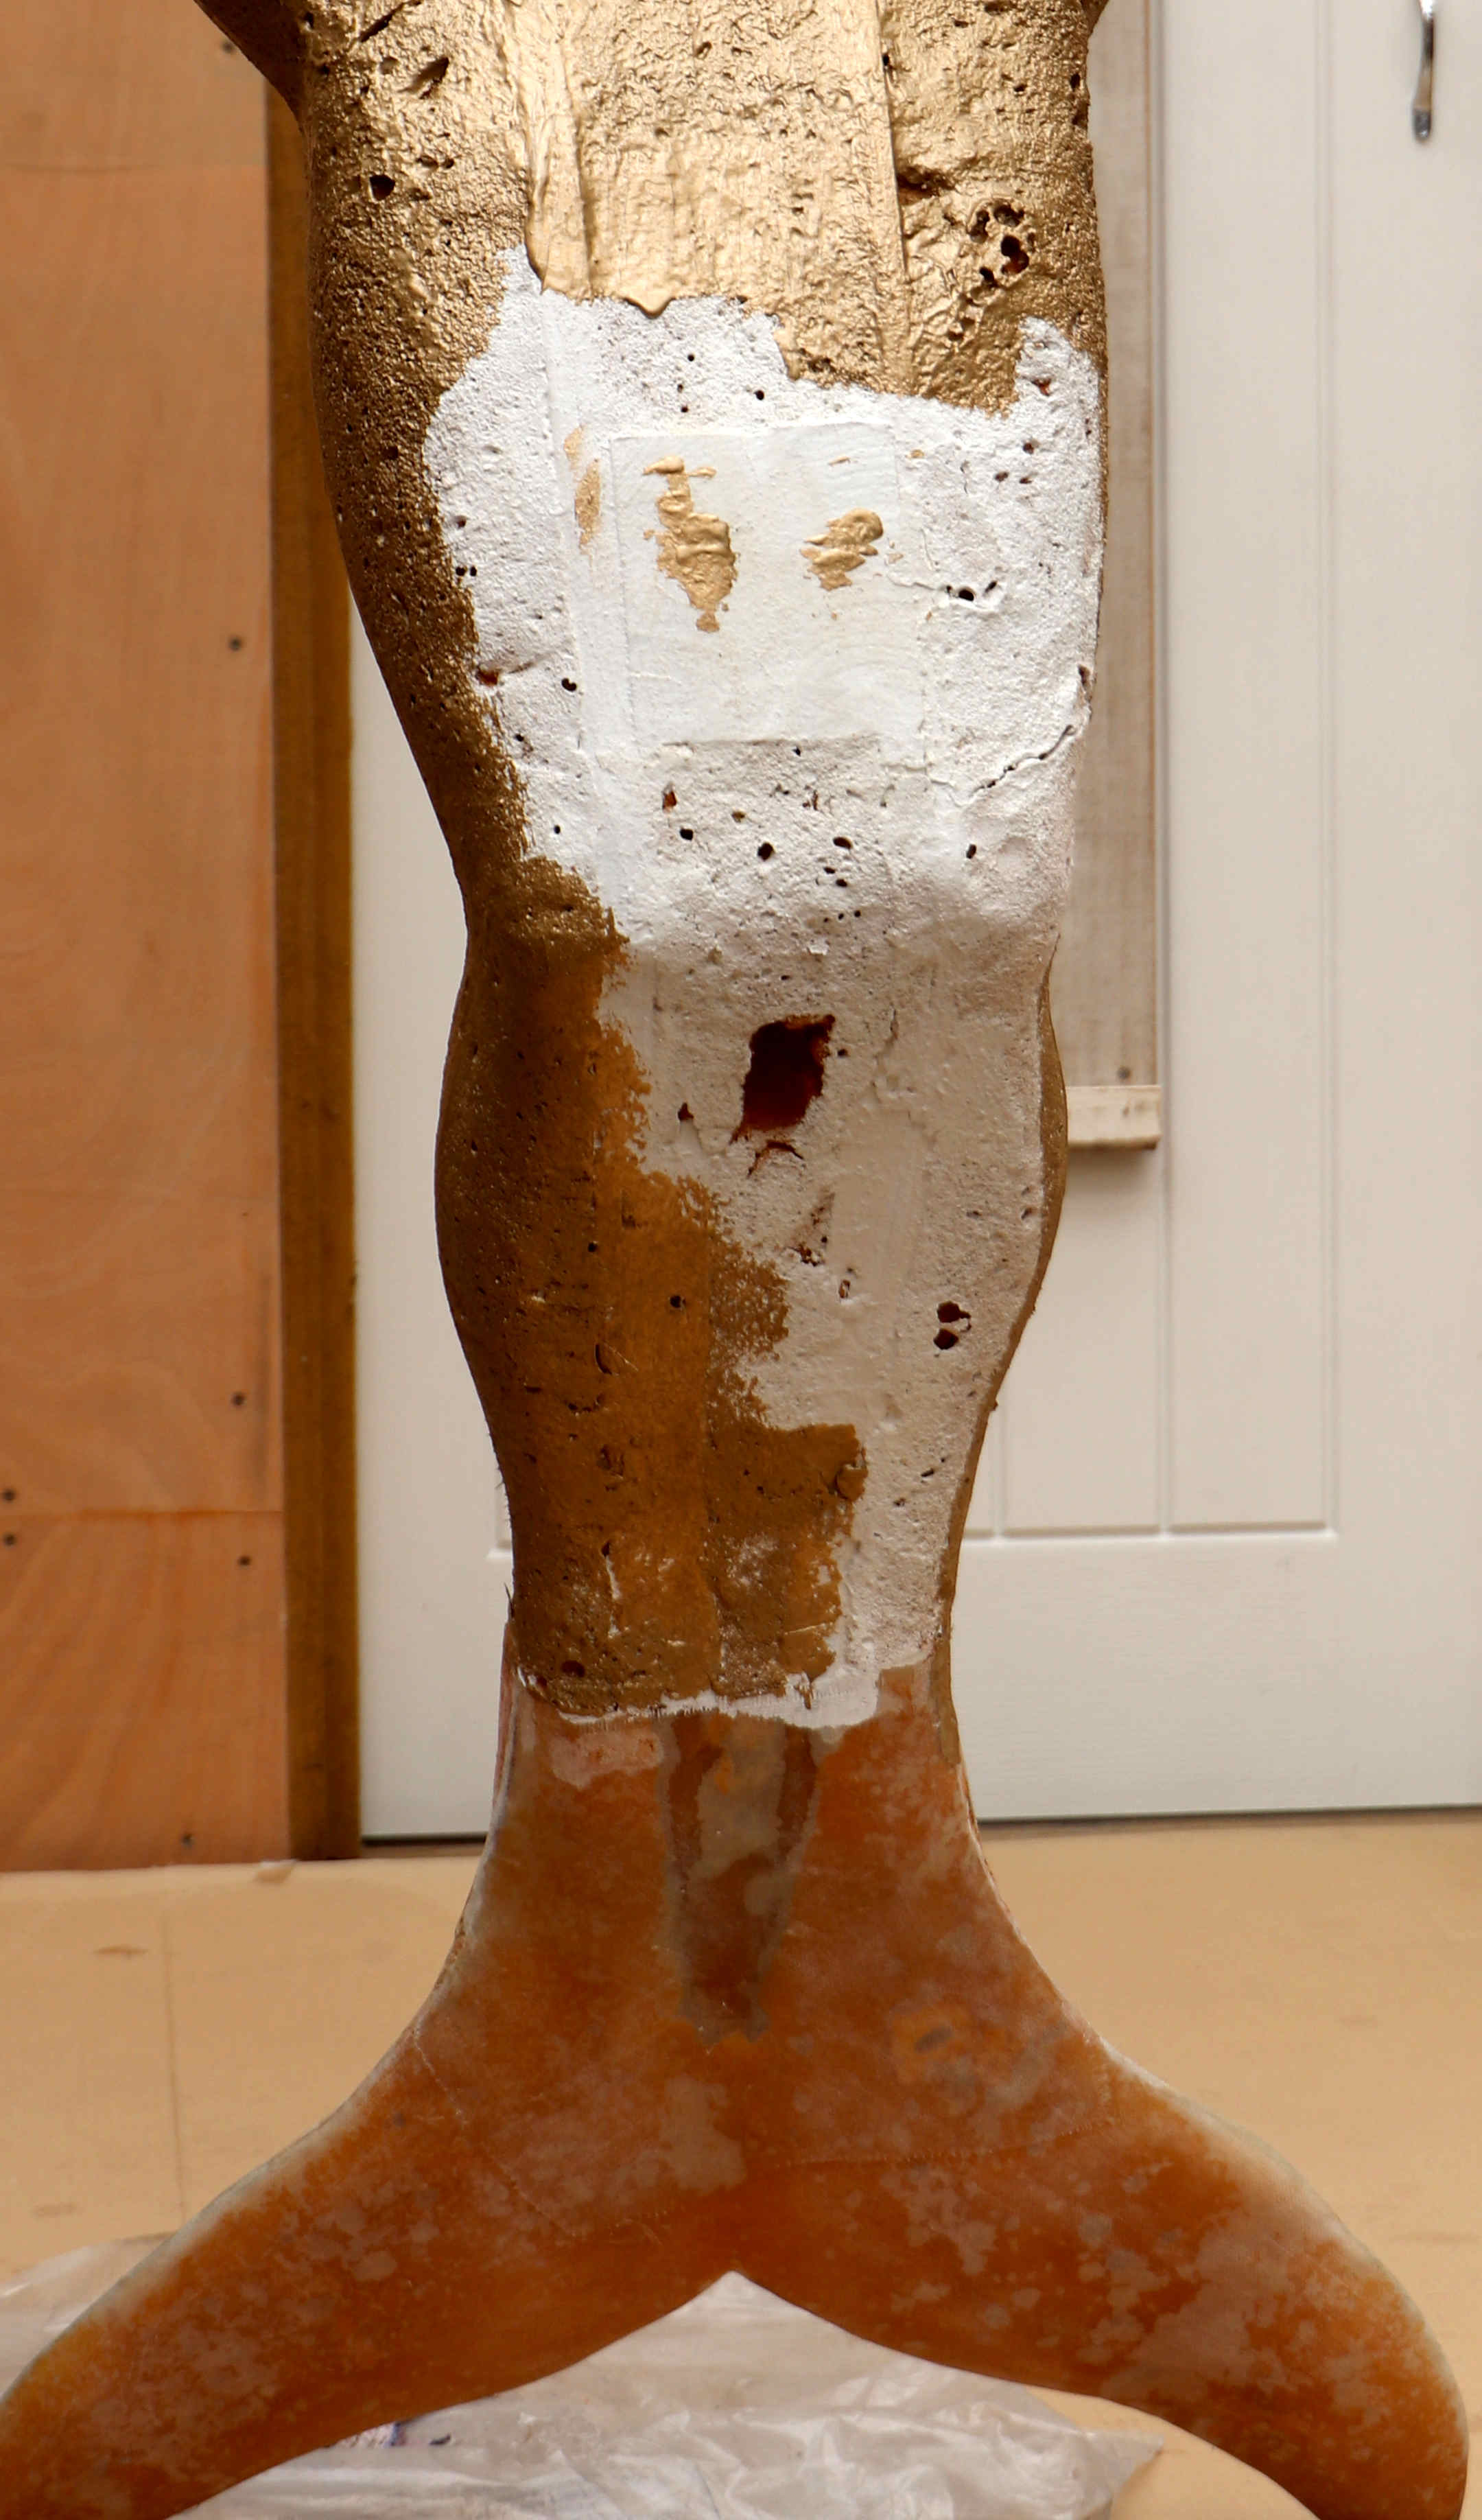
TAIL REVERSED - The underside of the mermaid tail is reinforced with GRP to create a composite sandwich that is very strong. This will be filled with polyurethane foam and shaped to form a core, when the whole tail is encapsulated in a skin of epoxy resin and woven glass cloth for the statue, or carbon fibre for the figurehead - before being gilded.
CORE FILLING - The underside of the tail is seen here filled or covered with foam. In about 12 hours the foam will be cured sufficiently to carve to shape. See what that looks like below.
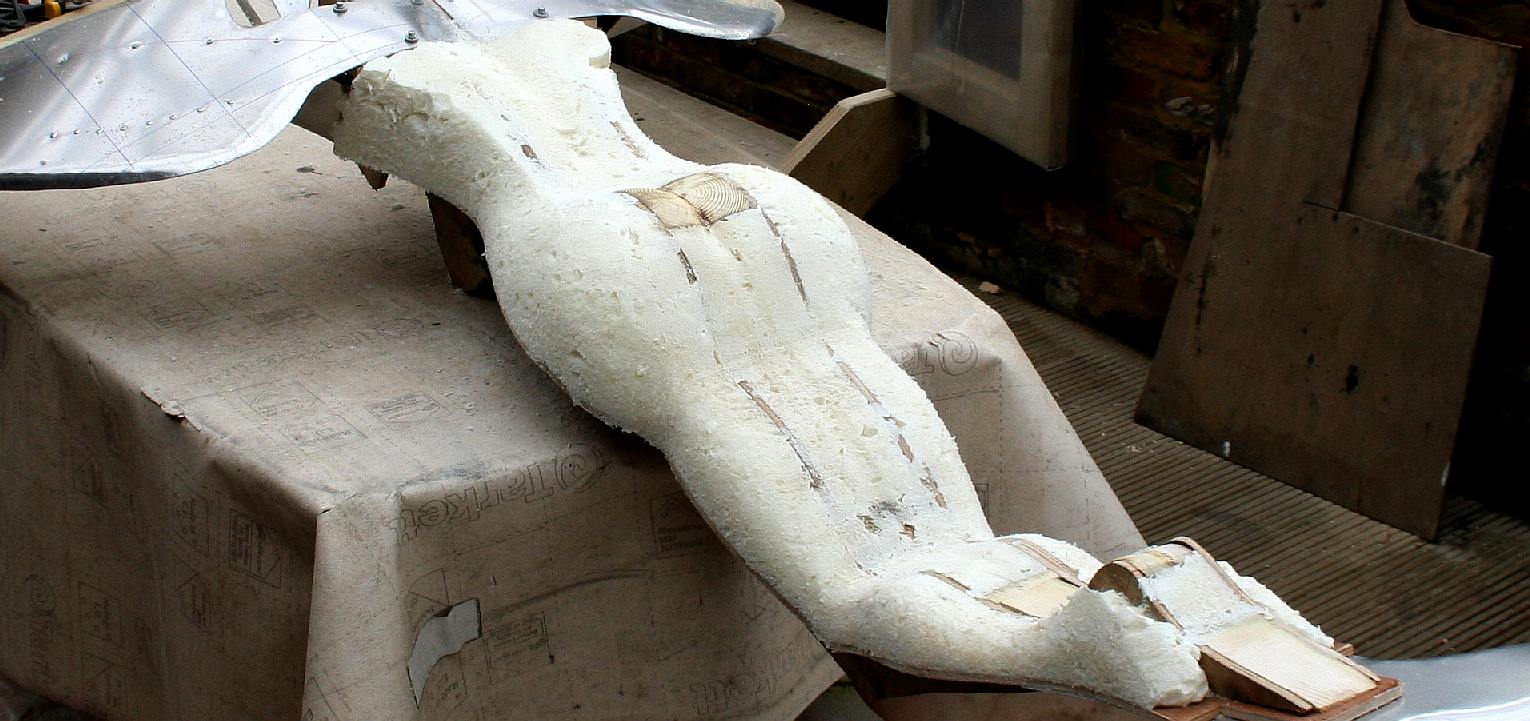
ROUGH & SMOOTH - The underside is carved in principle while the topside receives a first coating of polyurethane foam that also has to be shaped. It is only possible to do one side at a time unless a temporary stand is made, but even then the top half would have been hard to reach. Some features need two coats of foam to build up sufficiently to then carve. The head will need several coats of foam, even with formers.
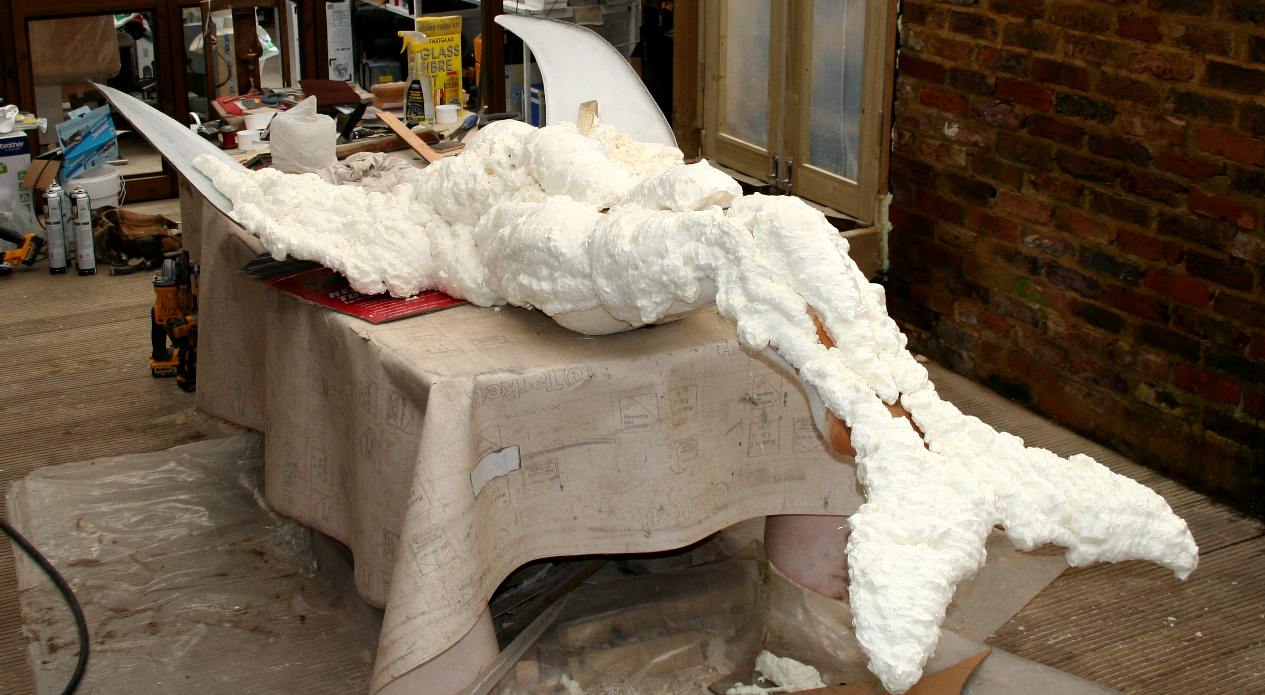
MUMMY - The core foam is applied to the wings and shoulders, making the art piece look like something out of a Mummy film. Apart from the art and sculpting elements, the skills used to create this statue are much the same as for boat building.
ANGELIC - Seen from a distance, the mermid form is still apparent even when liberally covered in polyurethane foam. The foam can either be mixed in a container or applied from a can using a trigger valve. The wing tips still need reinforcing with polyester resin and glass matt (fiberglass), or maybe the artists will go for epoxy resin at this stage. We are expecting a large consignment of resins and cloths this week.
ISIS WINGS - From the cured foam our artist rough shaped the Cleopatra fgurehead. Copyright © photograph.
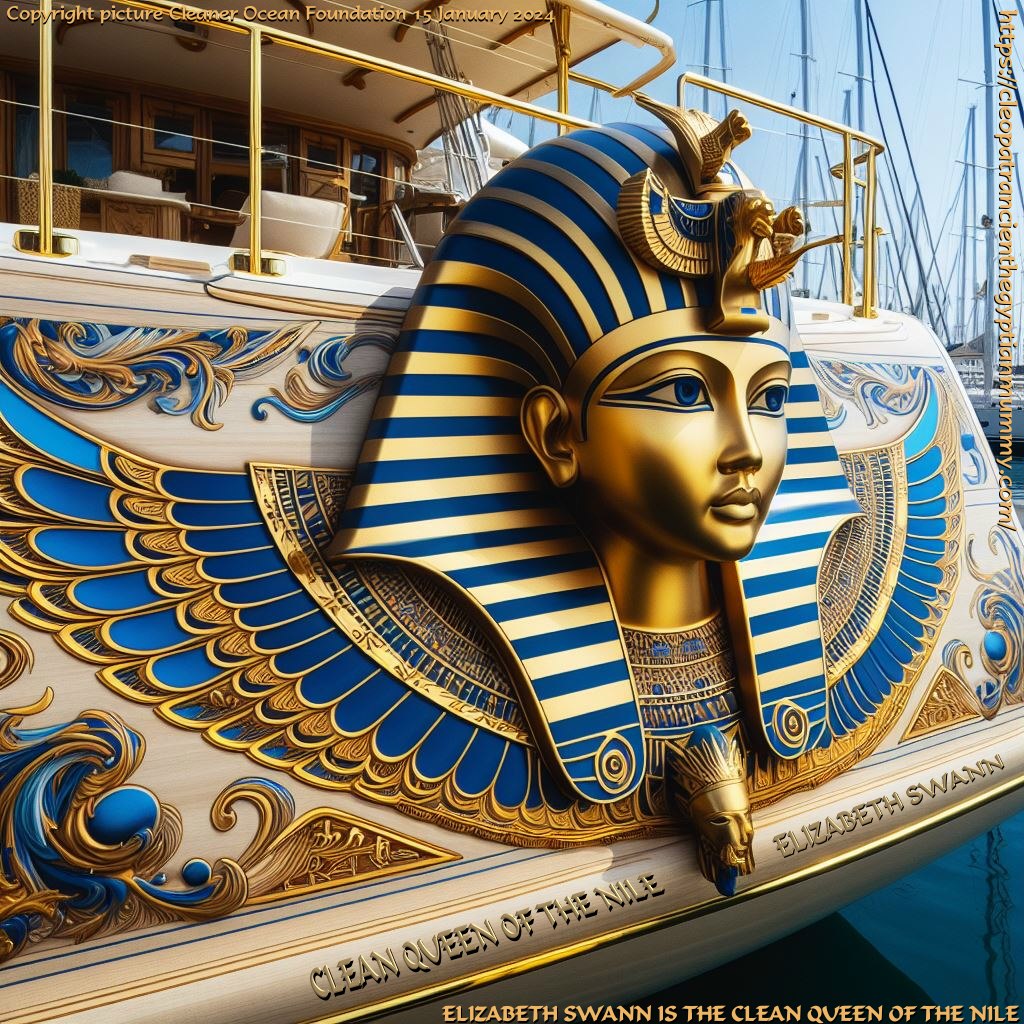
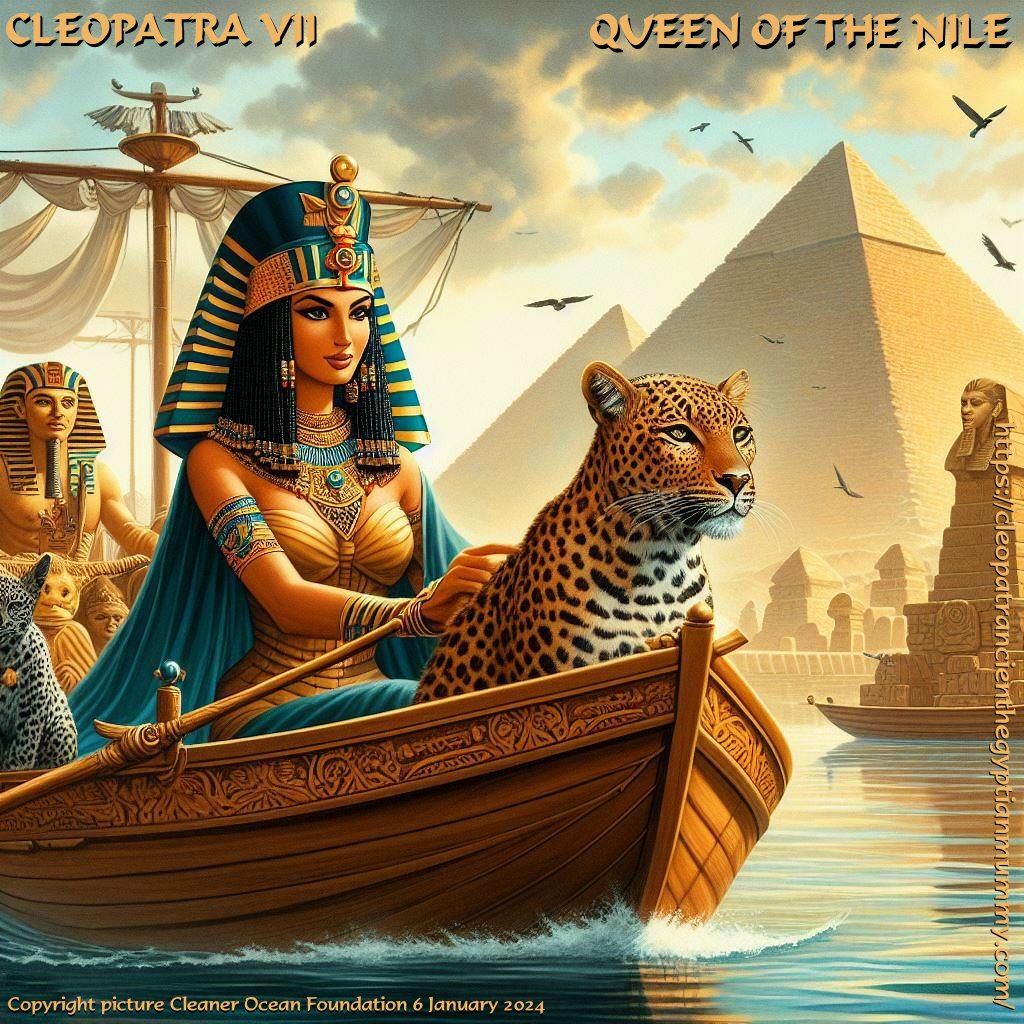
STERN - Where the prow on the Elizabeth Swann would carry the Cleopatra figurehead, the stern could be adorned with relief's and a mask in gold and Egyptian blue enamel, the artwork for which could be something like, or based on that above.
TAIL FLUKES - Here you can see the mermaid tail fins shaped in foam, with some infill of large hollows created as bubbles during the curing process.
PREPARATION - Before any laminating session, no matter how big or small the job, it is wise to set things out ready to place on the artwork. This is because the working time (pot life) of most resins is about 20 - 60 minutes. Using fast cure resin as in this case for small wing sections, the resin starts to glob after 10-15 minutes. You have to get a move on - and switch off your mobiles. You can see here that the resin in measured out and the chopped strand glass matting is torn into sections to be placed around the wing edges. It is better to tear rather than cut for this exercise.
TIPS - This is one of the wing tips after lamination. The centre of the wing has fewer layers of glass matt. Trim the edges while still soft, or grind off the excess when cured. Wash all mixing pots, brushes and hands in acetone. Cellulose thinners is also useful for cleaning, but takes the oil out of your skin, so wash as infrequently as you need, or allow time for the hands to regenerate between laminating bouts. Copyright © photograph.
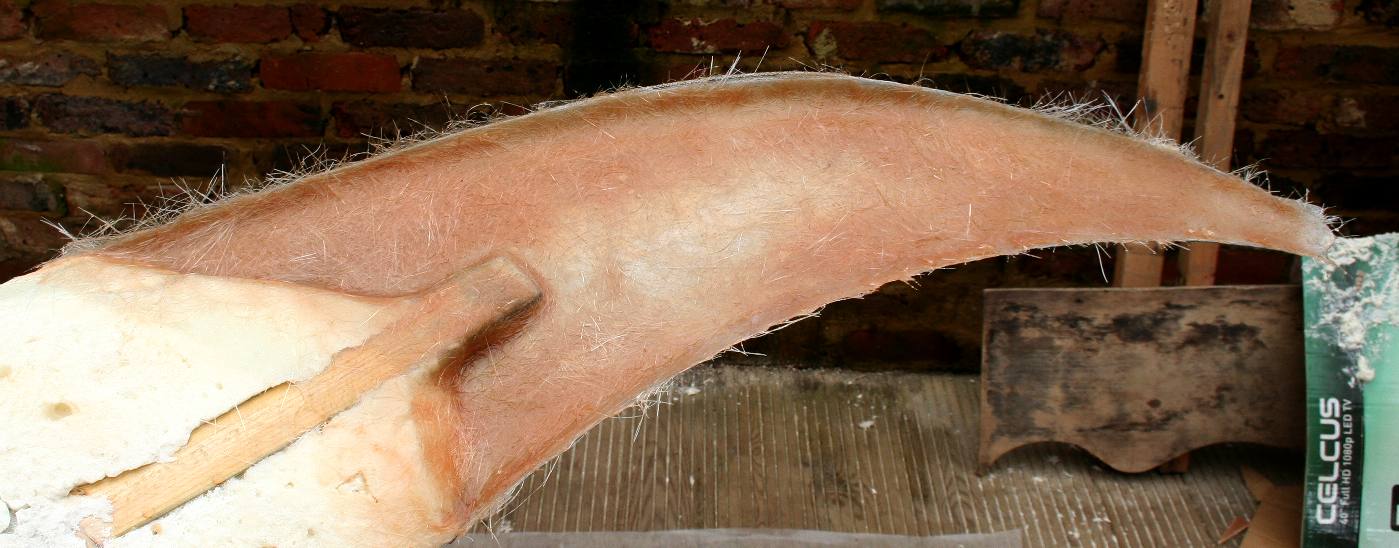
FOAMING - The polyurethane foam is applied to cover the fibreglass. Make sure of a good bond by dampening the surface. This helps the foam adhere to any surface and cure. Once shaped the wing can be sealed and further strengthened with a skin of epoxy resin laminate. If you are on a tight budget and weight is not so critical, you could use chopped strand glass matt and polyester resin. This is glass and glass is dangerous if it pierces your skin. So wear gloves if you can and a mask while sanding and the like.
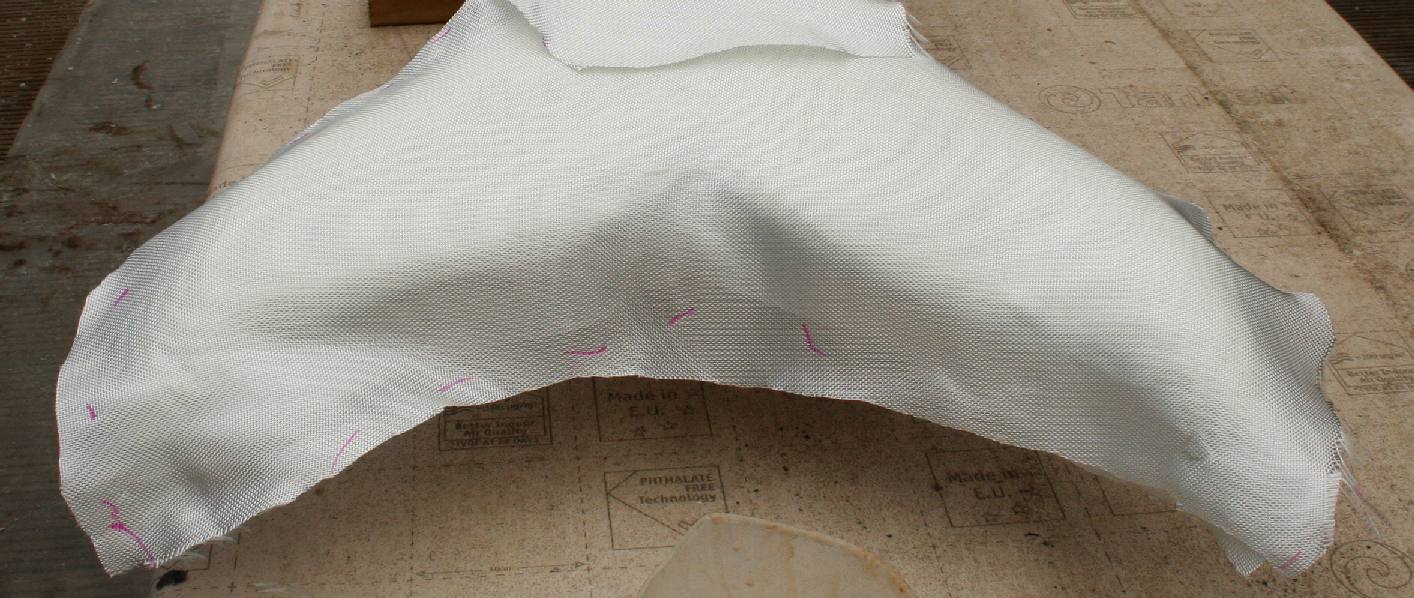
WINGED - The foam is shaped and prepped ready to be coated in epoxy resin then laminated with two layers of glass fibre cloth. This is how they make surfboards and the laminating system is more or less the same.
TAILFINS - Two layers of woven glass fibre cloth are cut to size for the mermaid tail fins, or flukes.
WINGS - The upper (outer) wing surface is next for a coat of epoxy and woven glass cloth. The rivets and wood screws are ground down and the aluminium must be keyed for a good bond. The artist is at this stage working on the head drawings and considering the best angle where the statue is mounted at a different angle to a figurehead. Copyright © photograph Cleaner Ocean Foundation Ltd. All rights reserved.
TAILFINS - The feet and tail need a bit more shaping before the back can be laminated with epoxy resin and glass cloth. After that the body needs final shaping before that too is preserved with a layer of resin and glass.
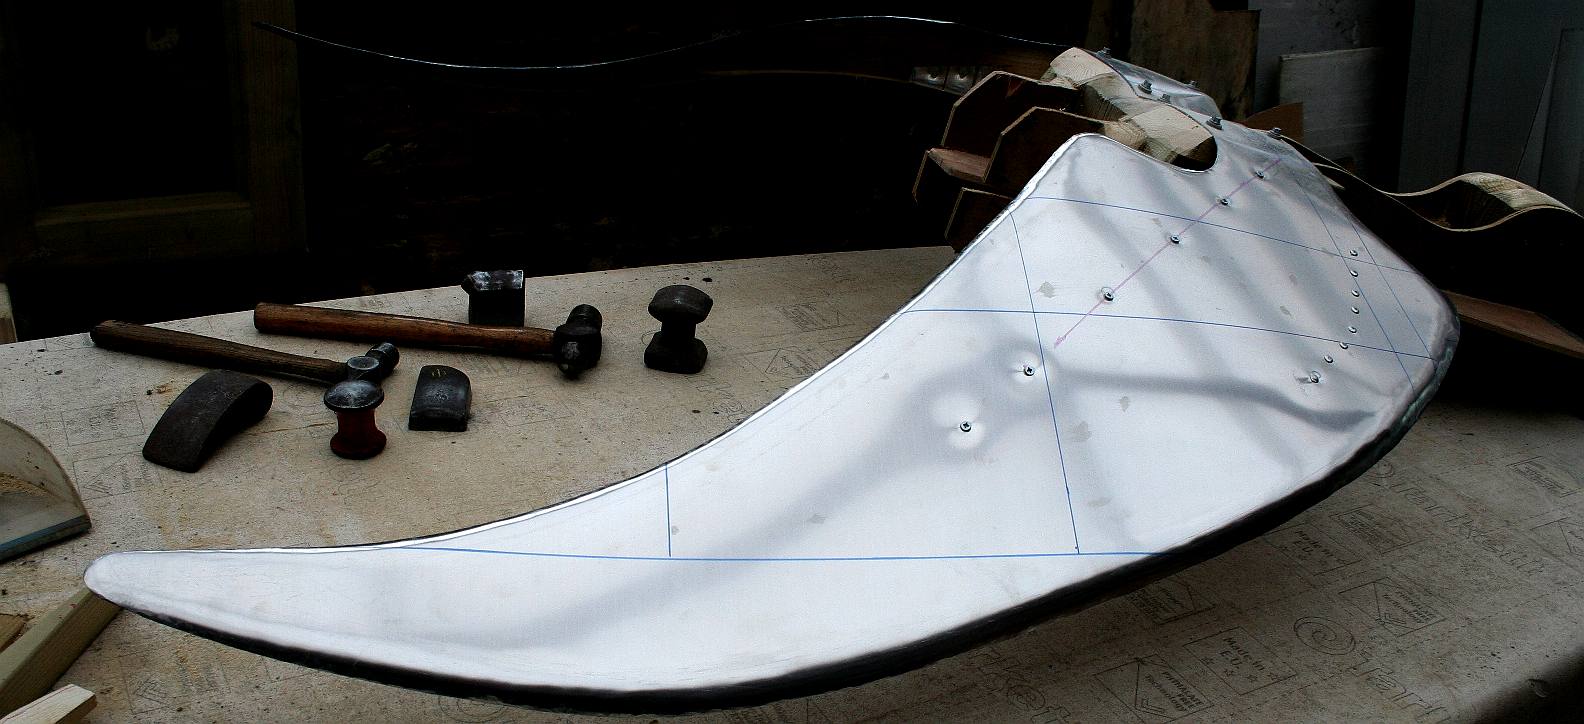
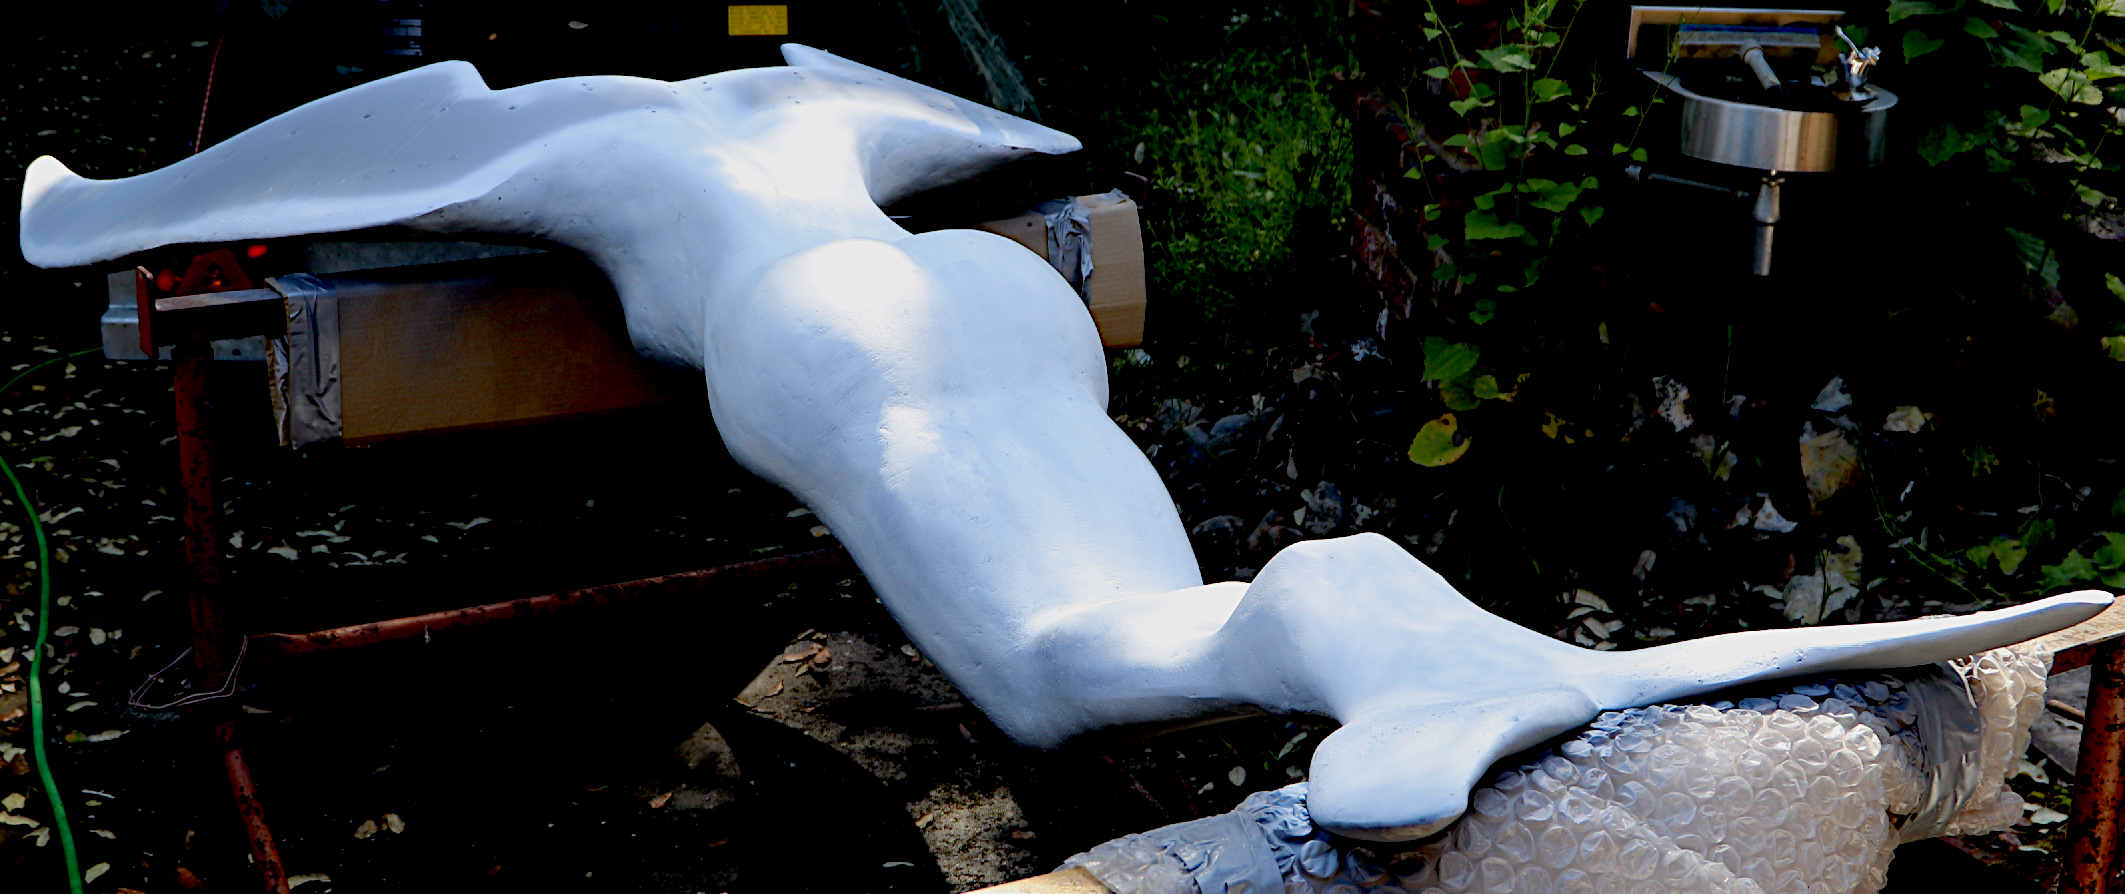
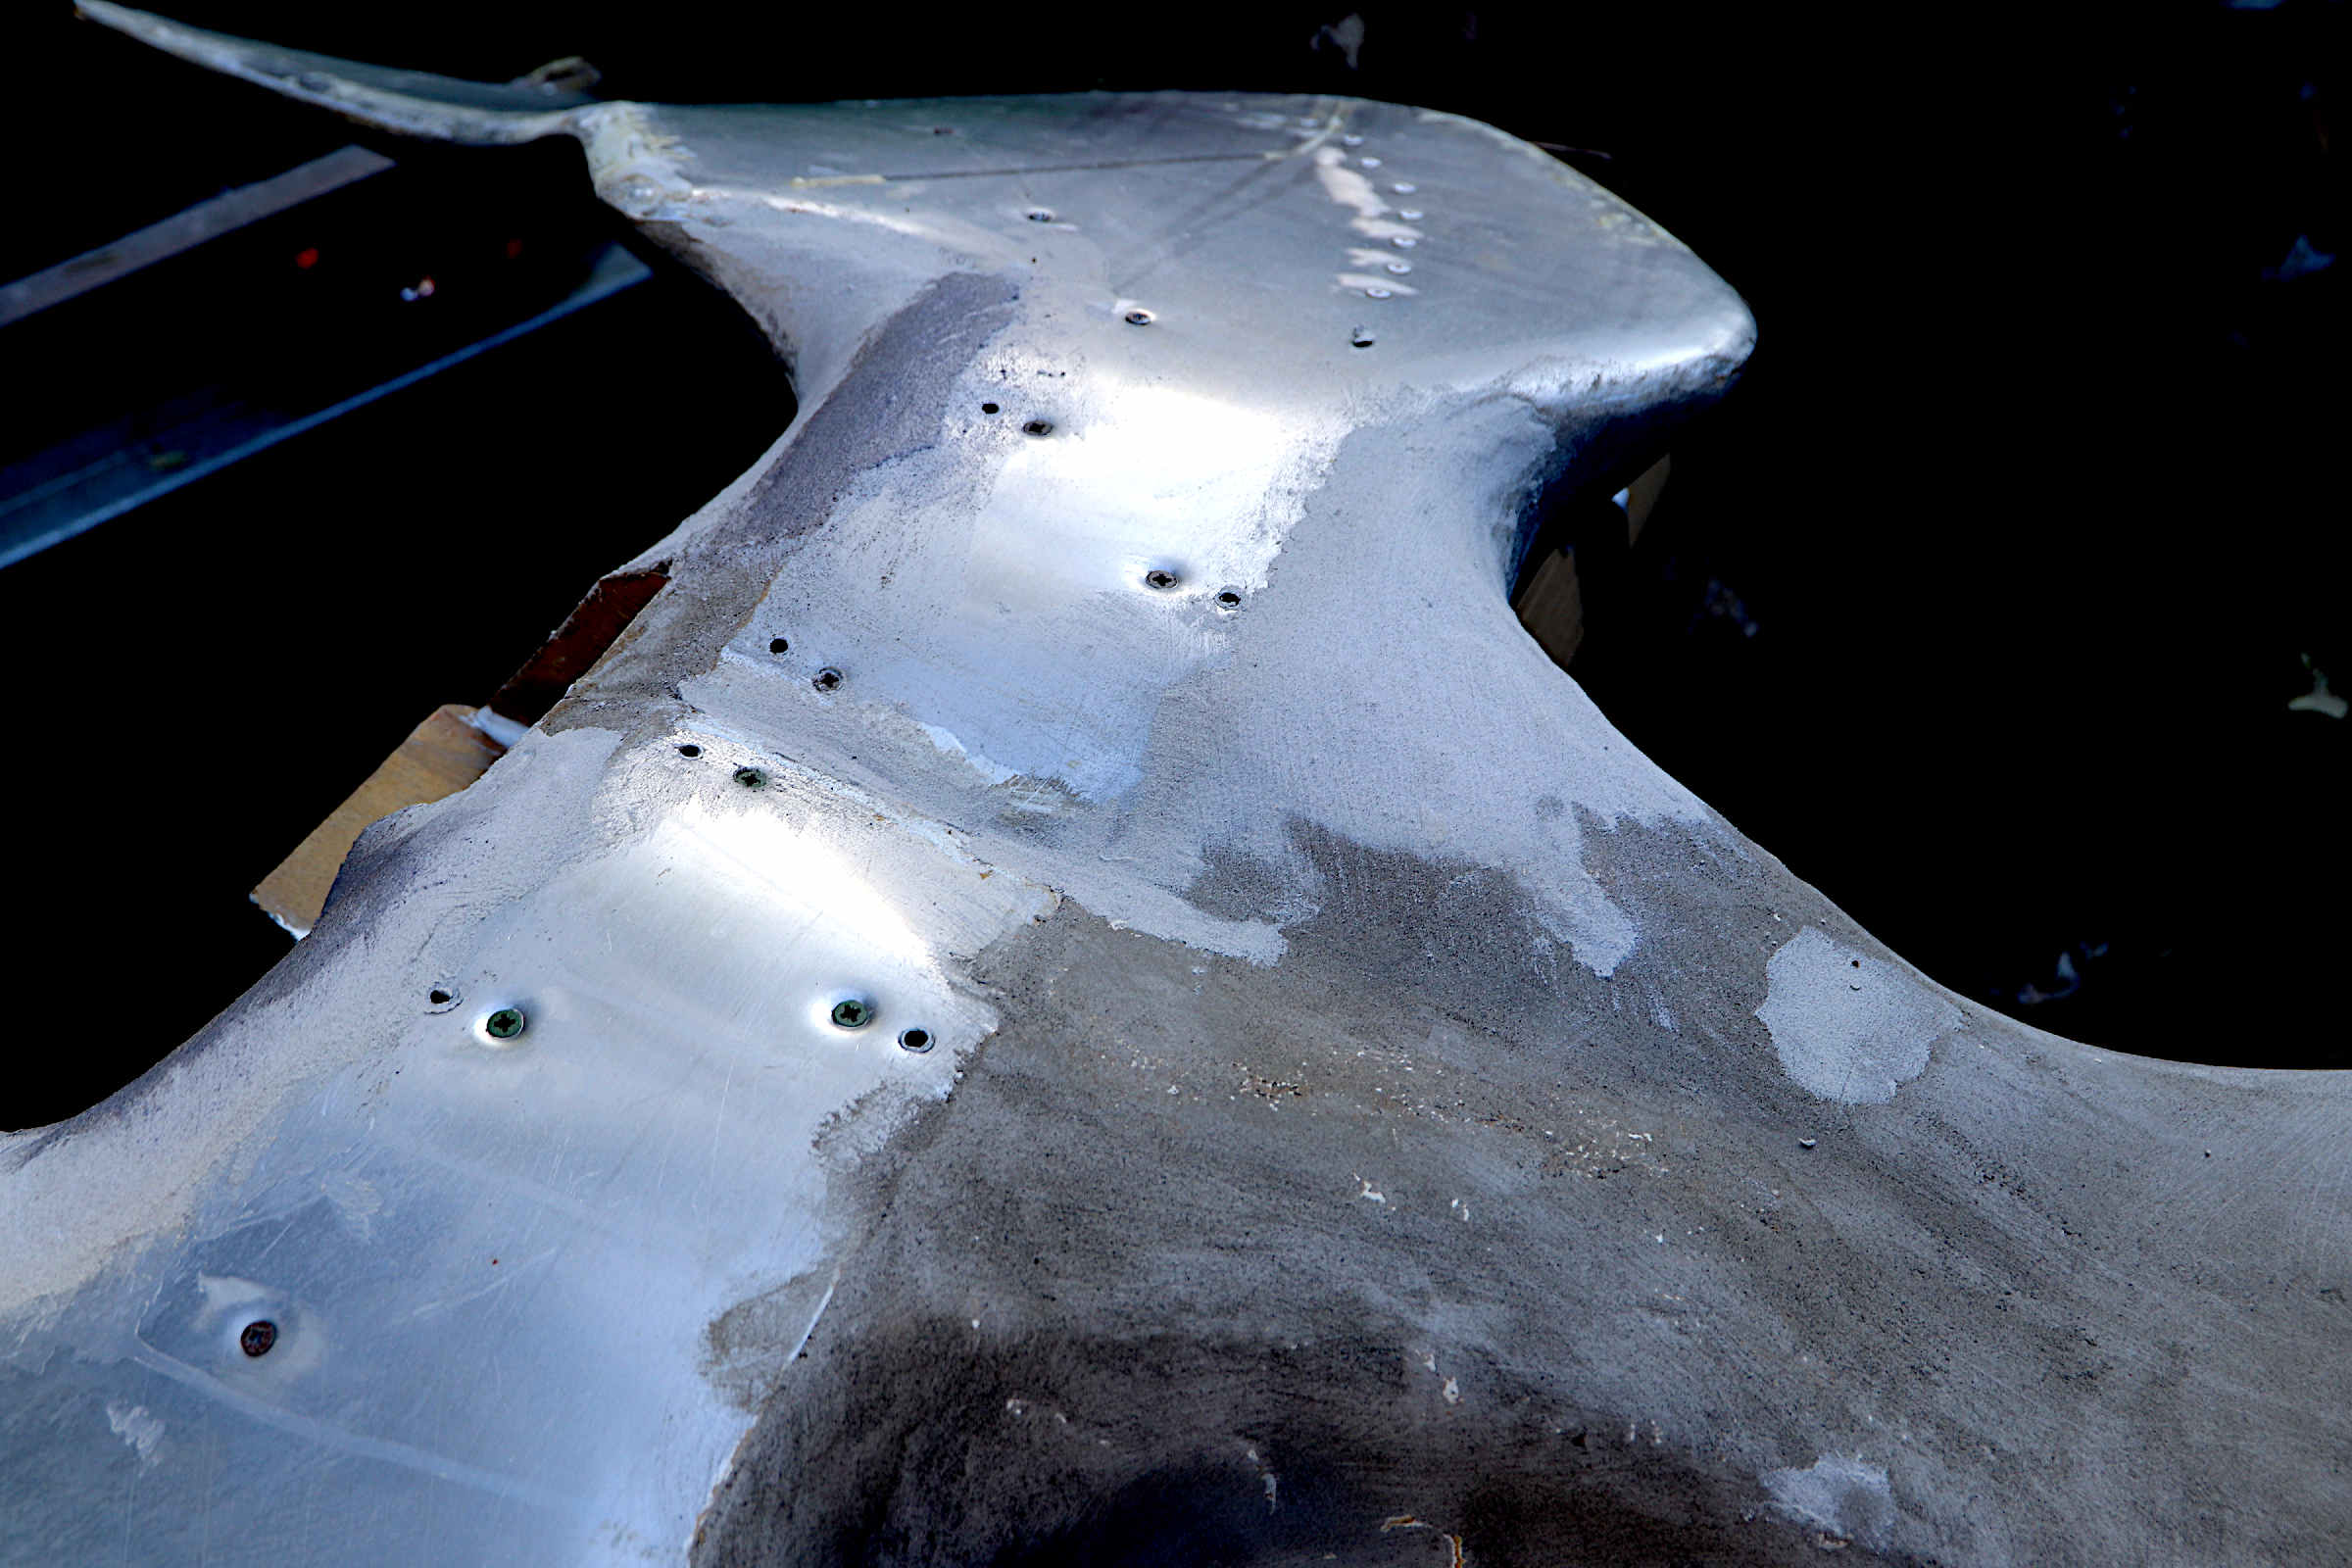
TAILFINS 2024 - The body and mermaid tail sheathed in a tough stone like resin. Soon to be reinforced with carbon fibre and coated with a flexible polyester coating that can be sanded smooth and polished, in case we decide to chrome or gold plate.
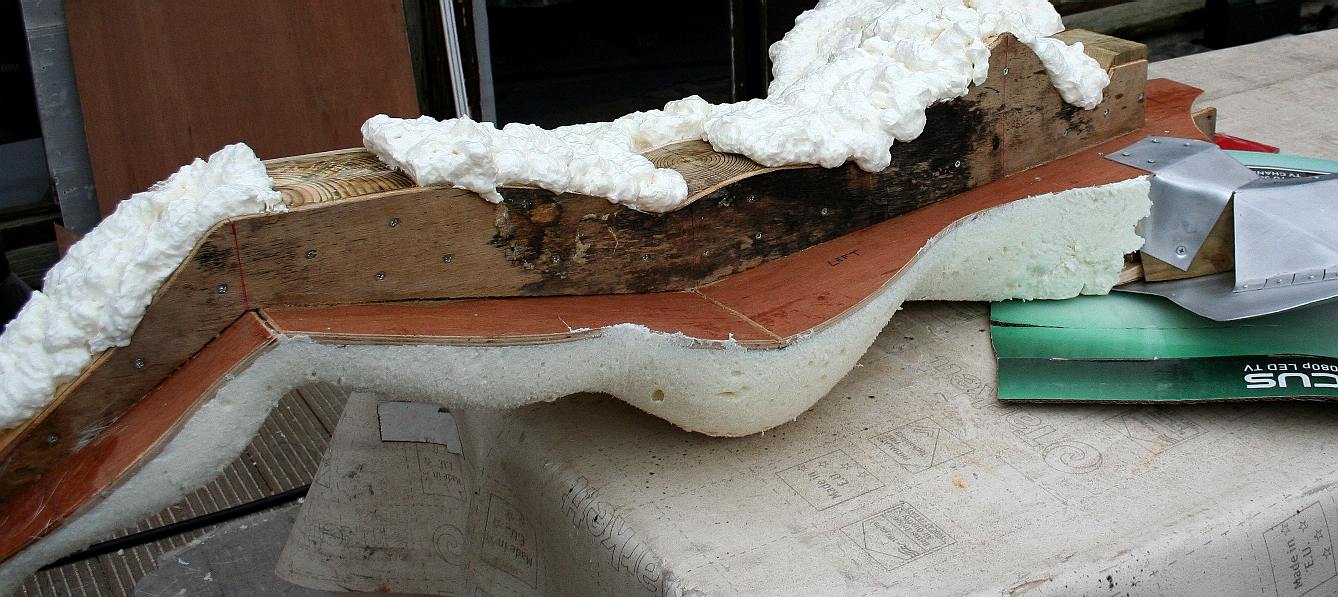
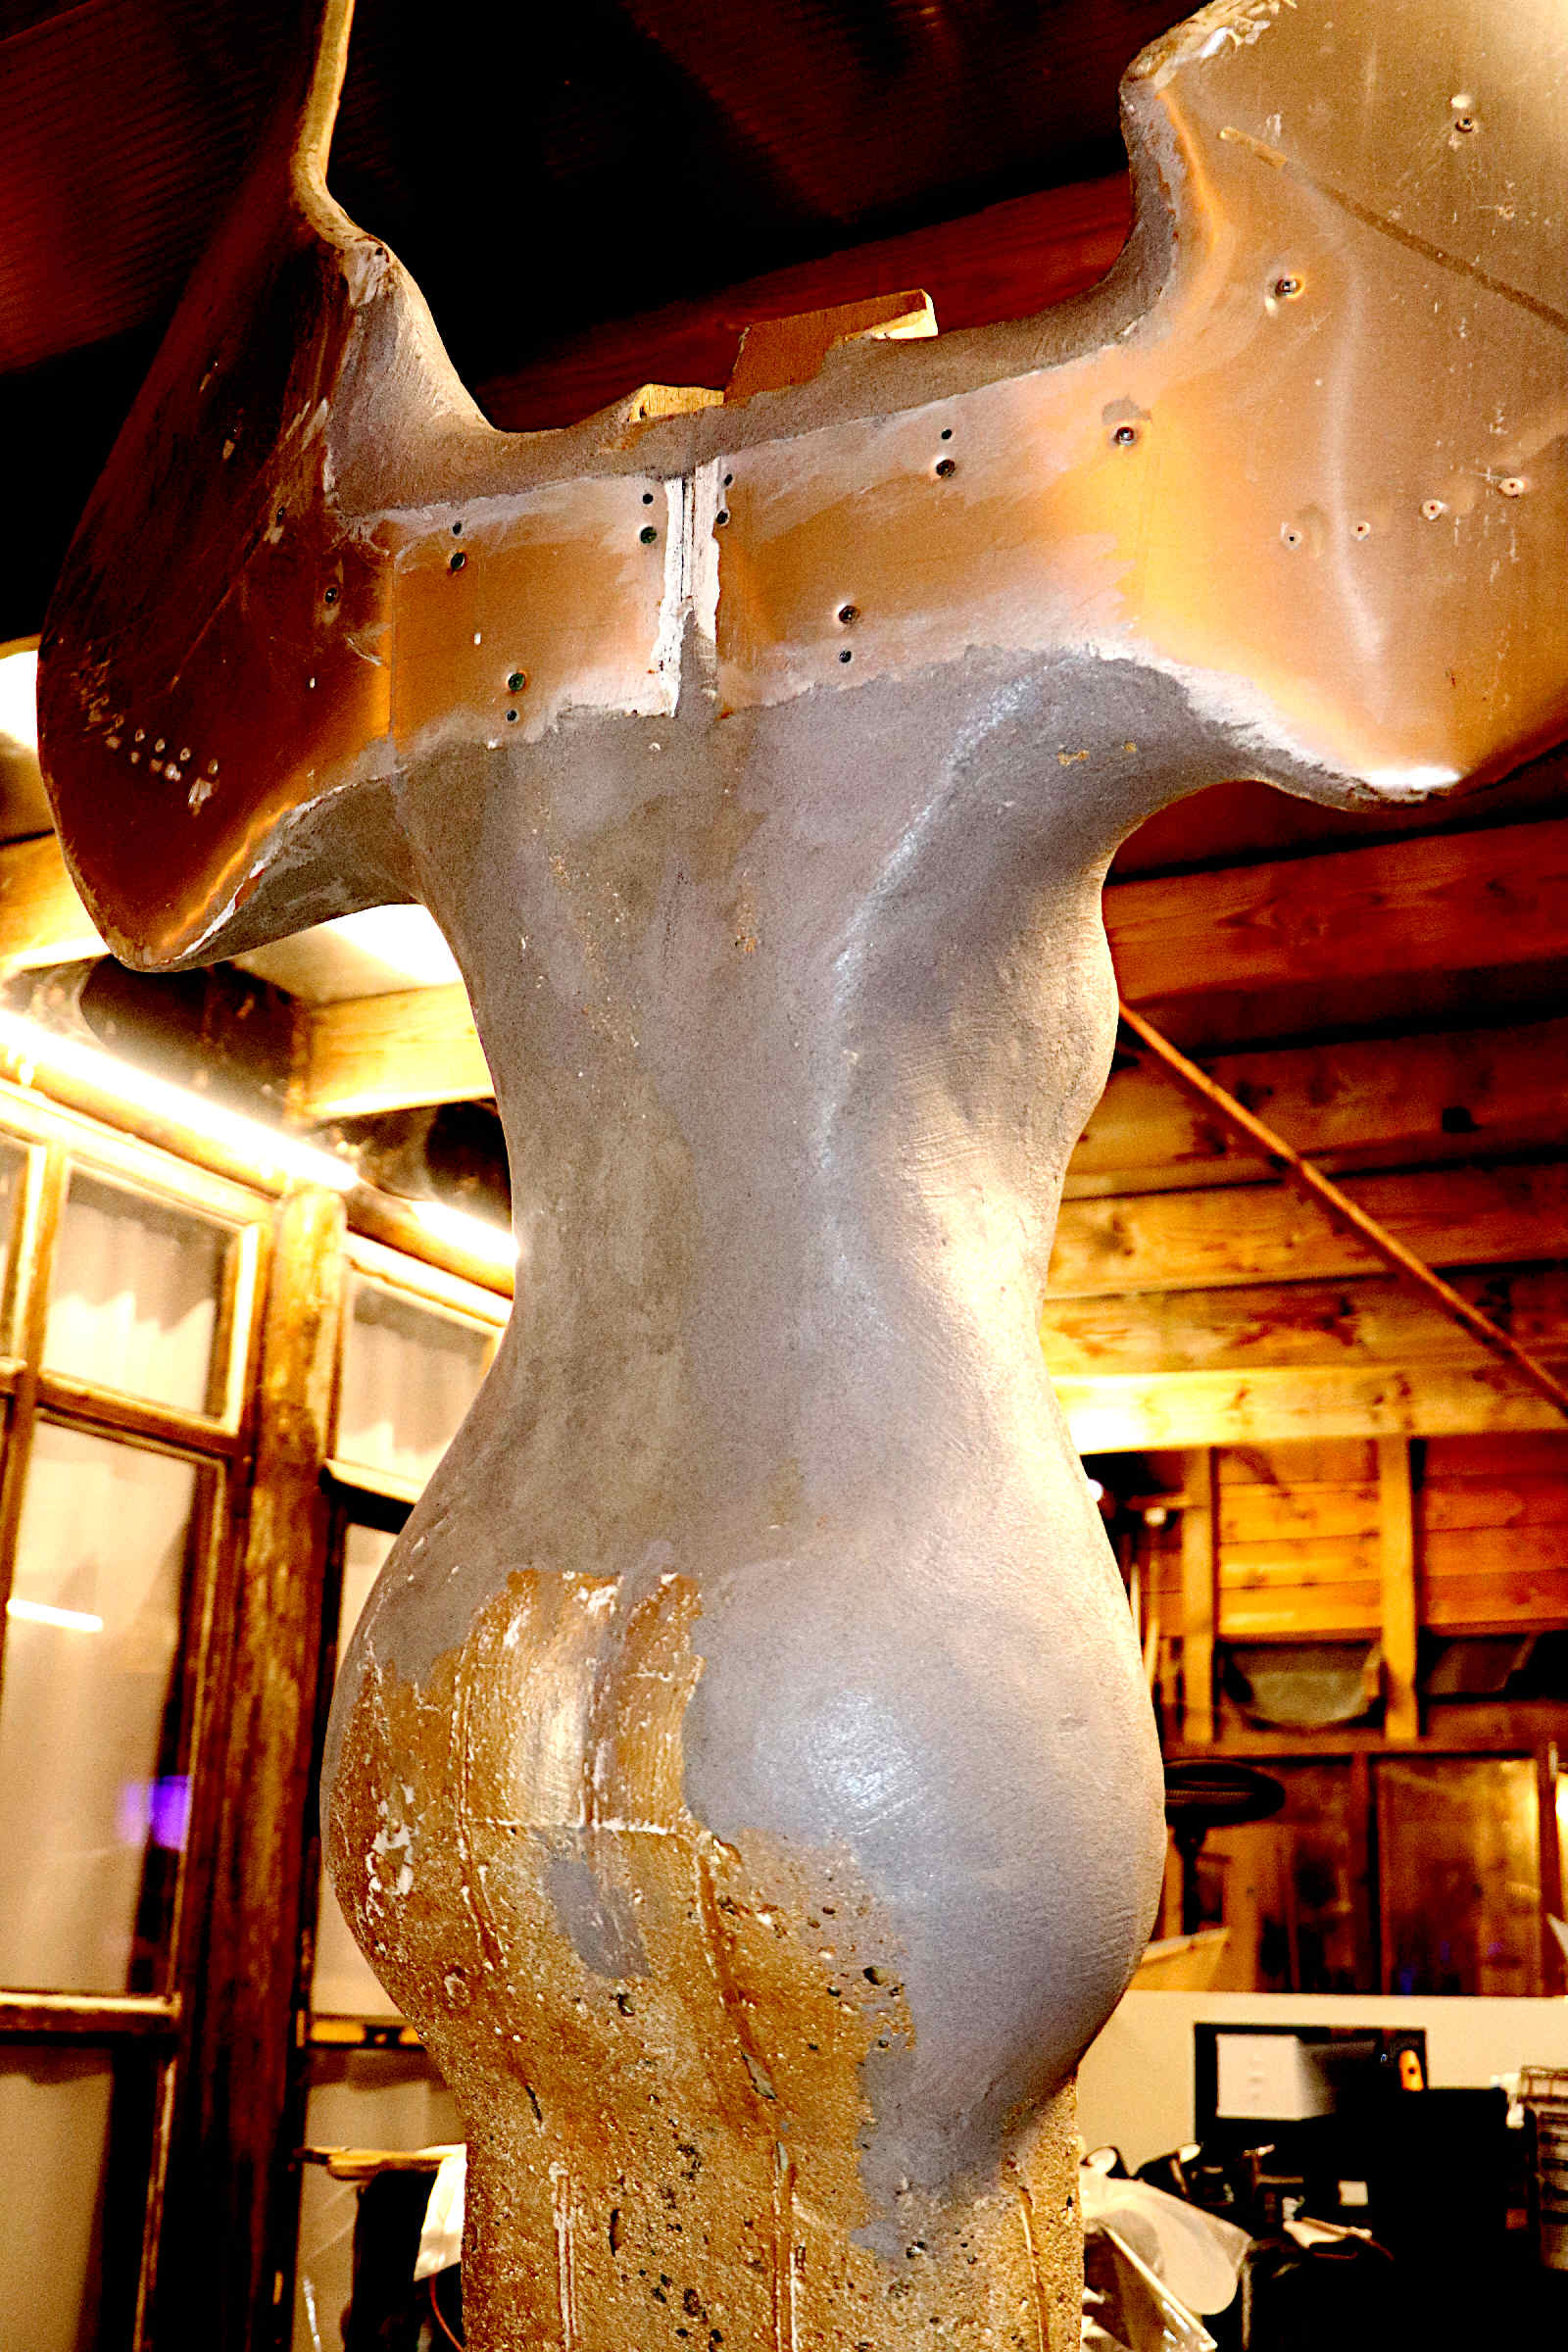
[LEFT] The wooden formers are visible in this picture, as is the foam core that formed the basic shape. [RIGHT] In this picture the foam core is no longer visible. It has been coated with a strong resin plaster that resembles stone.
TRANSFORMATION - Another view of the back of the statue, as the resin plaster overcoats the stabilized foam core, and wooden formers. It is very satisfying to see the Isis, Queen of the Nile, taking shape.
The shoulders and wings grow out of the strong back of the sculpture. The resin plaster blends nicely, and is fine enough when sanded to be primed and painted, to show up any defects that may need to be corrected before carbon fibre reinforcing is applied, and the flexible polyester paste, that can then be virtually polished, prior to the application of gold leaf, or chrome plating.
The 'Queen of the Nile' was a film made in 1961 by Columbia Pictures. Today, in 2024, Cleopatra is more commonly quoted by the media as 'The Queen of the Nile.'
We are fortunate that a good photographic record was maintained, during the making of the structure. As funds allow, the sheathing needs to be completed, and then the sculpting of Cleopatra's head. Fingers crossed the artist has a camera to hand when creating her visage.
Copyright photographs © Cleaner Oceans Foundation Ltd 2024. Solar Studios, BN271RF, UK
|